


How to add or remove a plugin in WordPress
Plugins are like apps that can add all kinds of functionality to your WordPress site. To see the wide range of plugins available, see the WordPress repository which offers over 55 000 plugins.
Plugins are very easy to add to your website and need no coding or intensive WordPress knowledge – just follow our step-by-step instructions below.
It is possible to add and remove plugins to try them out or compare them.
Add a plugin
- Firstly, you’ll need access to your website’s WordPress administrative area, wp-admin
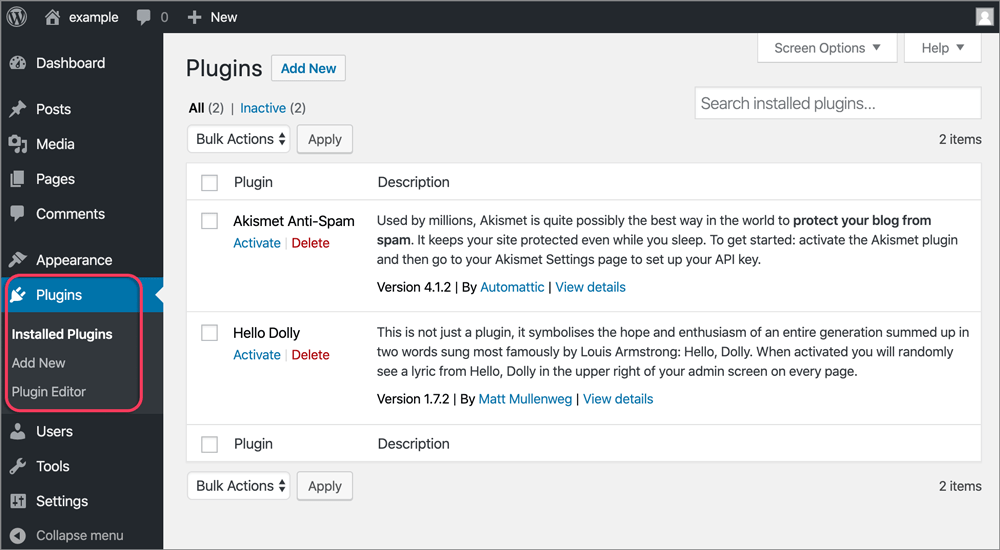
- On the left menu of your dashboard, click Plugins
- Click Add New, either from the menu, or via the Add New button at the top of the Plugins page
- In the search field, add the name or type of plugin you’re looking for. Press Enter on your keyboard. In this example, we’re searching for a calendar
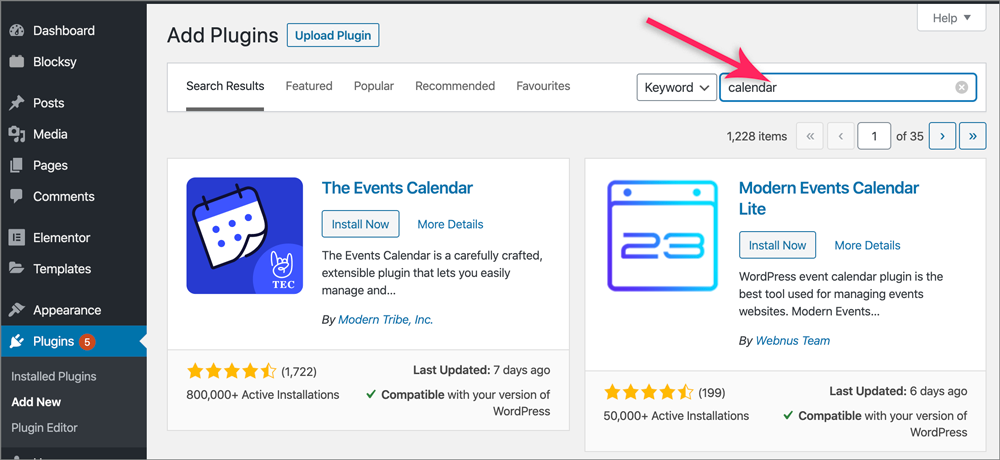
- Select a plugin. Pay particular attention to the star rating, that it has recently been updated (don’t use plugins that are no longer updated as these could pose a security risk) and that it is compatible with your version of WordPress
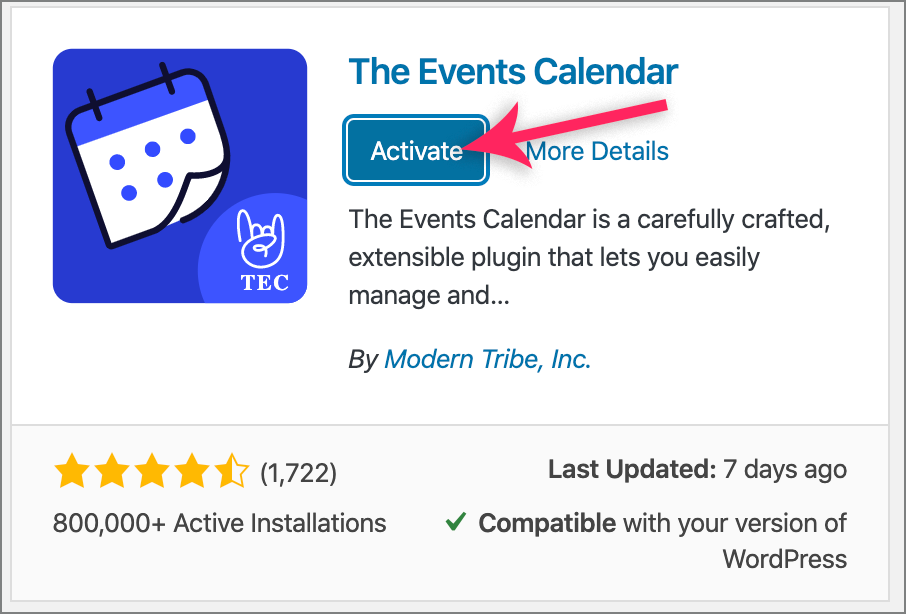
- Click Install Now

- Once it has completed installing, click Activate
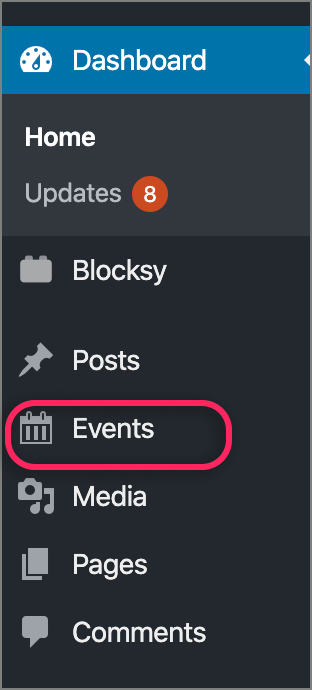
- Looking at your left menu, you’ll now see a new menu item with the name of the plugin that you have selected – in our example, it is Event. Alternatively, the menu item may have been added under Tools.
- Use that plugin’s menu to personalise the item according to your needs. Each plugin will come with its own instructions, which you will find as a blue View details link on the Installed Plugin page. The best plugins will also offer support if you have problems.
Remove a plugin
If you decide not to use a plugin, then it is important to deactivate and delete it.
- On your WP-admin menu, click on Plugins, then Installed Plugins
- Find the plugin that you want to remove, then select Deactivate
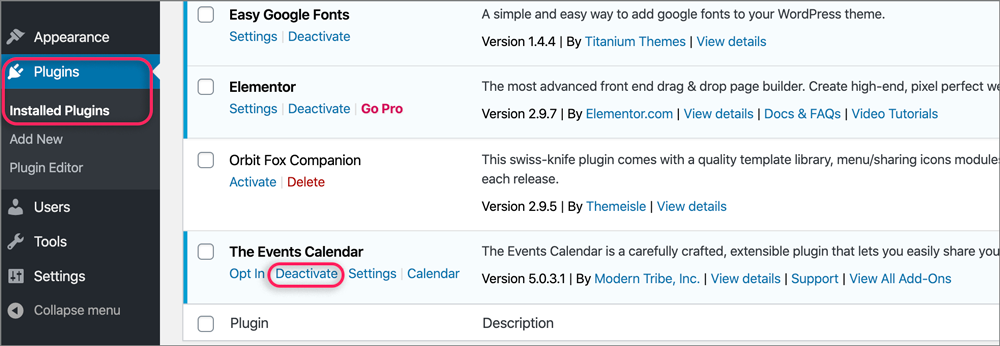
- Once it is deactivated, click Delete to remove it completely

