


Configure the wp-config.php file via the xneelo Control Panel
The information in this article is related to the new xneelo Control Panel.
If you are still using konsoleH, refer to this article.
If you are still using konsoleH, refer to this article.
The wp-config.php file is an important file that tells WordPress how to connect to your website’s database. It’s stored in the main folder of your WordPress files.
In most cases, WordPress will set up this file for you during installation. If something goes wrong and the file isn’t created, you can set it up yourself in two different ways:
- File Manager in the xneelo Control Panel (described below), or
- FTP to download the file, edit it in a text editor such as TextEdit or Notepad (do not use Google docs or Word) and then upload the updated version.
Steps
-
1
-
2Select a Product (i.e. Web Hosting) from the side menu.
-
3Select or search for the domain name.
-
4Under Domain tools, select File Manager.
-
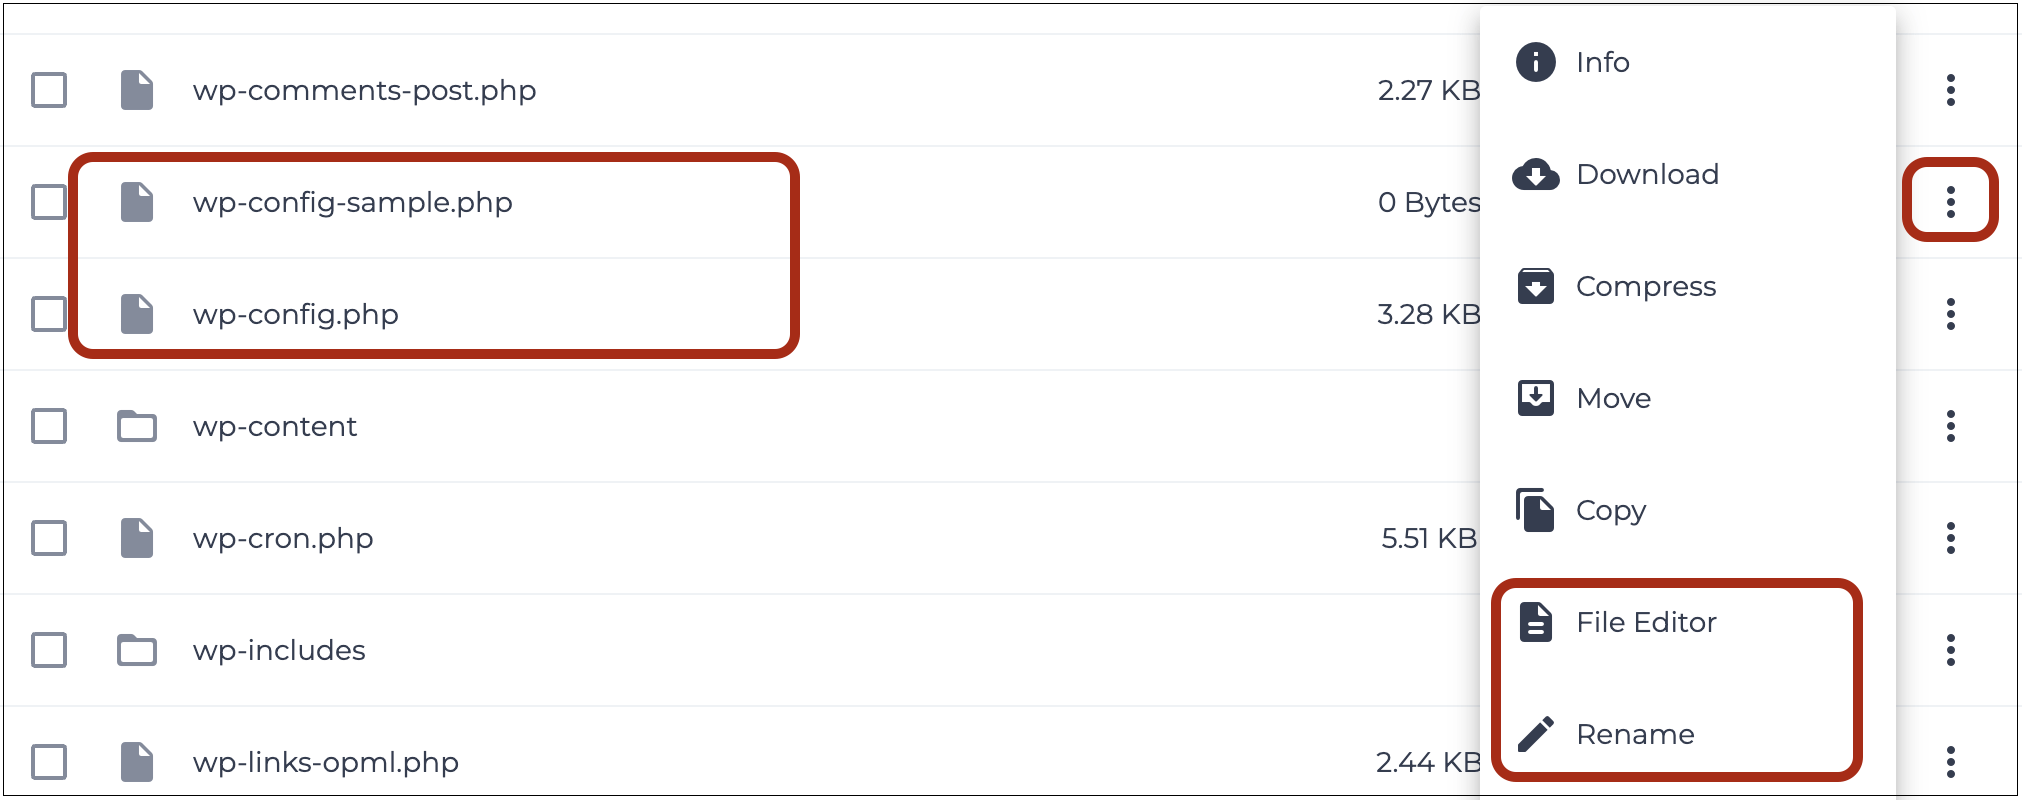
5In the public_html folder, search for wp-config.php (if the domain is a sub- or Multiple domain, this file will be in a subfolder within the public_html directory of the main account).
-
6If only the sample file wp-config-sample.php exists, then select the file and choose Rename from the 3 dots menu to rename to wp-config.php.

-
7Select the new wp-config.php file and choose File Editor from the 3 dots menu.
-
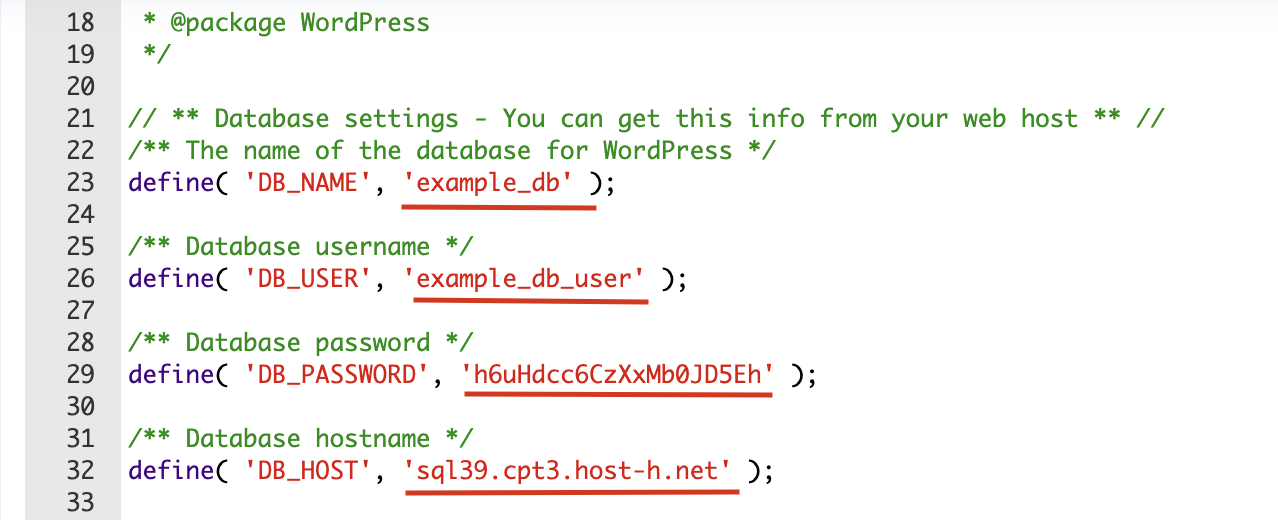
8Edit the following settings using the details you saved when creating your WordPress database. Click in the text and replace each value as follows:
- DB_NAME → your database name (e.g. example_db)
- DB_USER → your database login (e.g. example_db_user)
- DB_PASSWORD → your database password
- DB_HOST → your database server name. Replace localhost with the correct database server (e.g. sql32.jnb2.host-h.net). Note: this is not the same as the web server name (e.g. sql39.cpt3.host-h.net).

What happens next
The wp-config.php file is now configured to recognise the database associated with your WordPress website.


