


Configure the wp-config.php file
The information in this article is related to konsoleH.
If you are using our new Control Panel, refer to this article.
Make the switch and discover a simpler, more secure way to manage your hosting.
If you are using our new Control Panel, refer to this article.
Make the switch and discover a simpler, more secure way to manage your hosting.
The wp-config.php file is located in the root of your WordPress file directory and contains your website’s base configuration details, such as database connection information.
After first installation, WordPress will automatically try to create this file. If there is an error when browsing to your domain and running the install script, the file can be configured manually instead.
This can be done in 2 ways, using:
- File Manager in konsoleH (described below), or
- FTP to download the file, edit it in a text editor such as TextEdit or Notepad (do not use Google docs or Word) and then upload the updated version.
Configure using konsoleH File Manager:
- Browse to konsoleH and log in
- In the left menu choose Manage Services > Files and Folders > File Manager
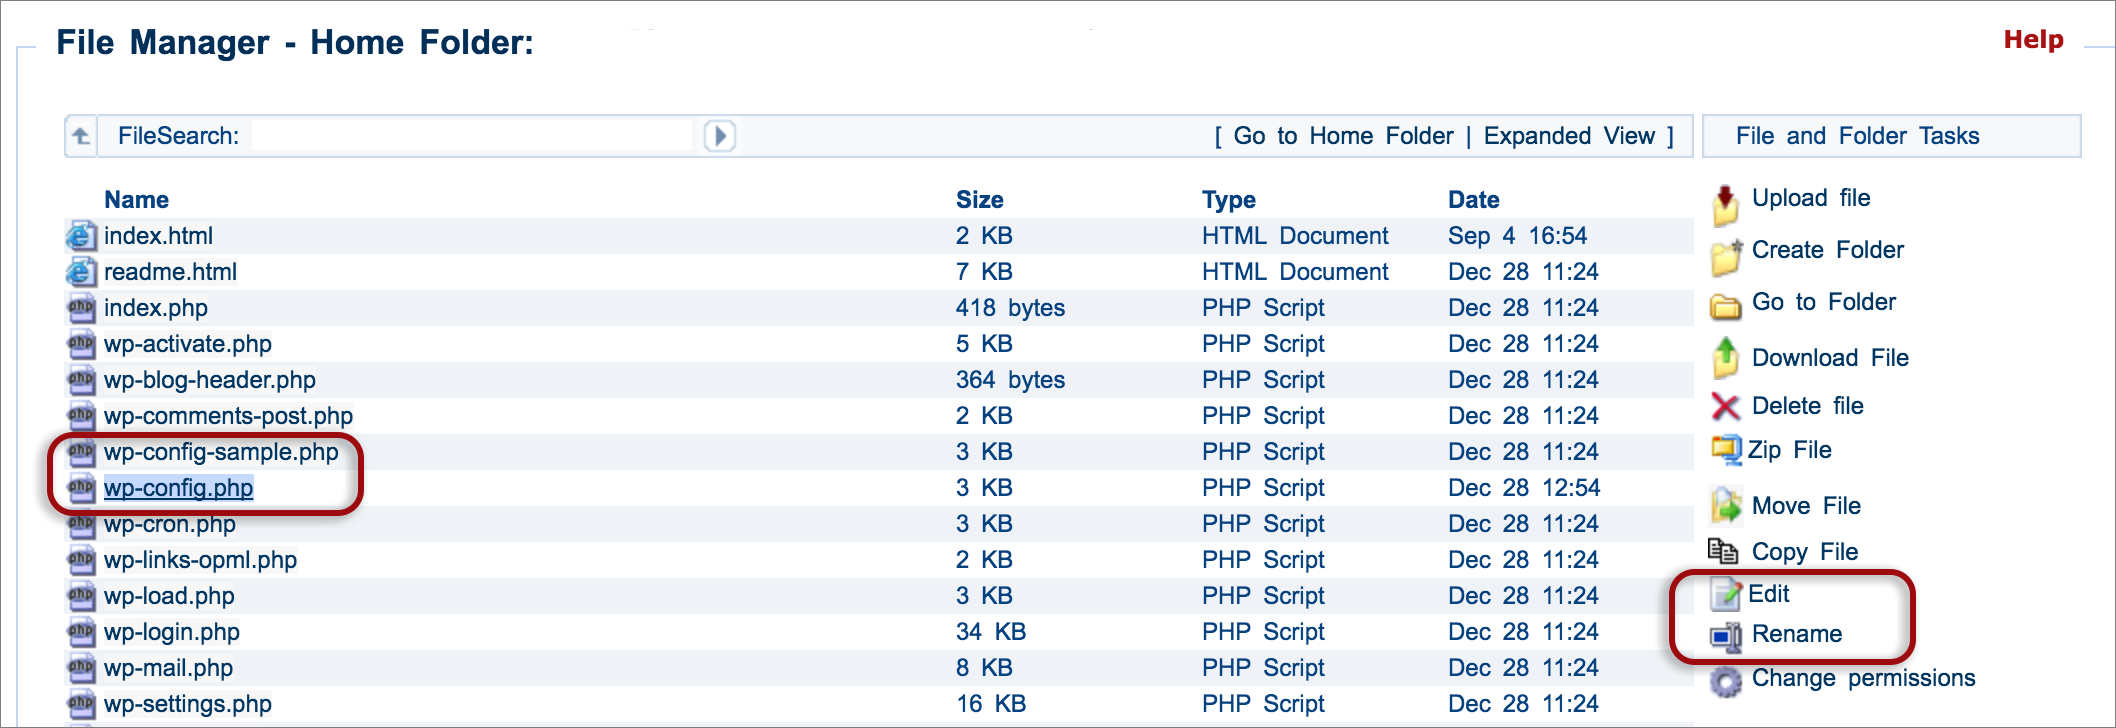
- Using the top and right hand menu (or double clicking) find the home > public_html > wp-config.php (If the domain is a sub- or multiple domain, this file will be in a subfolder within the public_html directory of the main account)
- If only the sample file wp-config-sample.php exists , then select the file and choose Rename from the right hand menu to rename to wp-config.php
- Select the new wp-config.php file and choose Edit from the right menu
- Edit the following settings using the details that you saved when creating a database for your WordPress site
- Replace ‘database_name_here‘ with the database name e.g example_db2
- Replace ‘username_here‘) with the username e.g. examplemhgy_2
- Replace ‘password_here‘ with the full password
- Replace ‘localhost‘ with the database server name e.g. sql32.jnb2.host-h.net (note: this is not the web server name e.g.www527.jhb1.host-h.net)
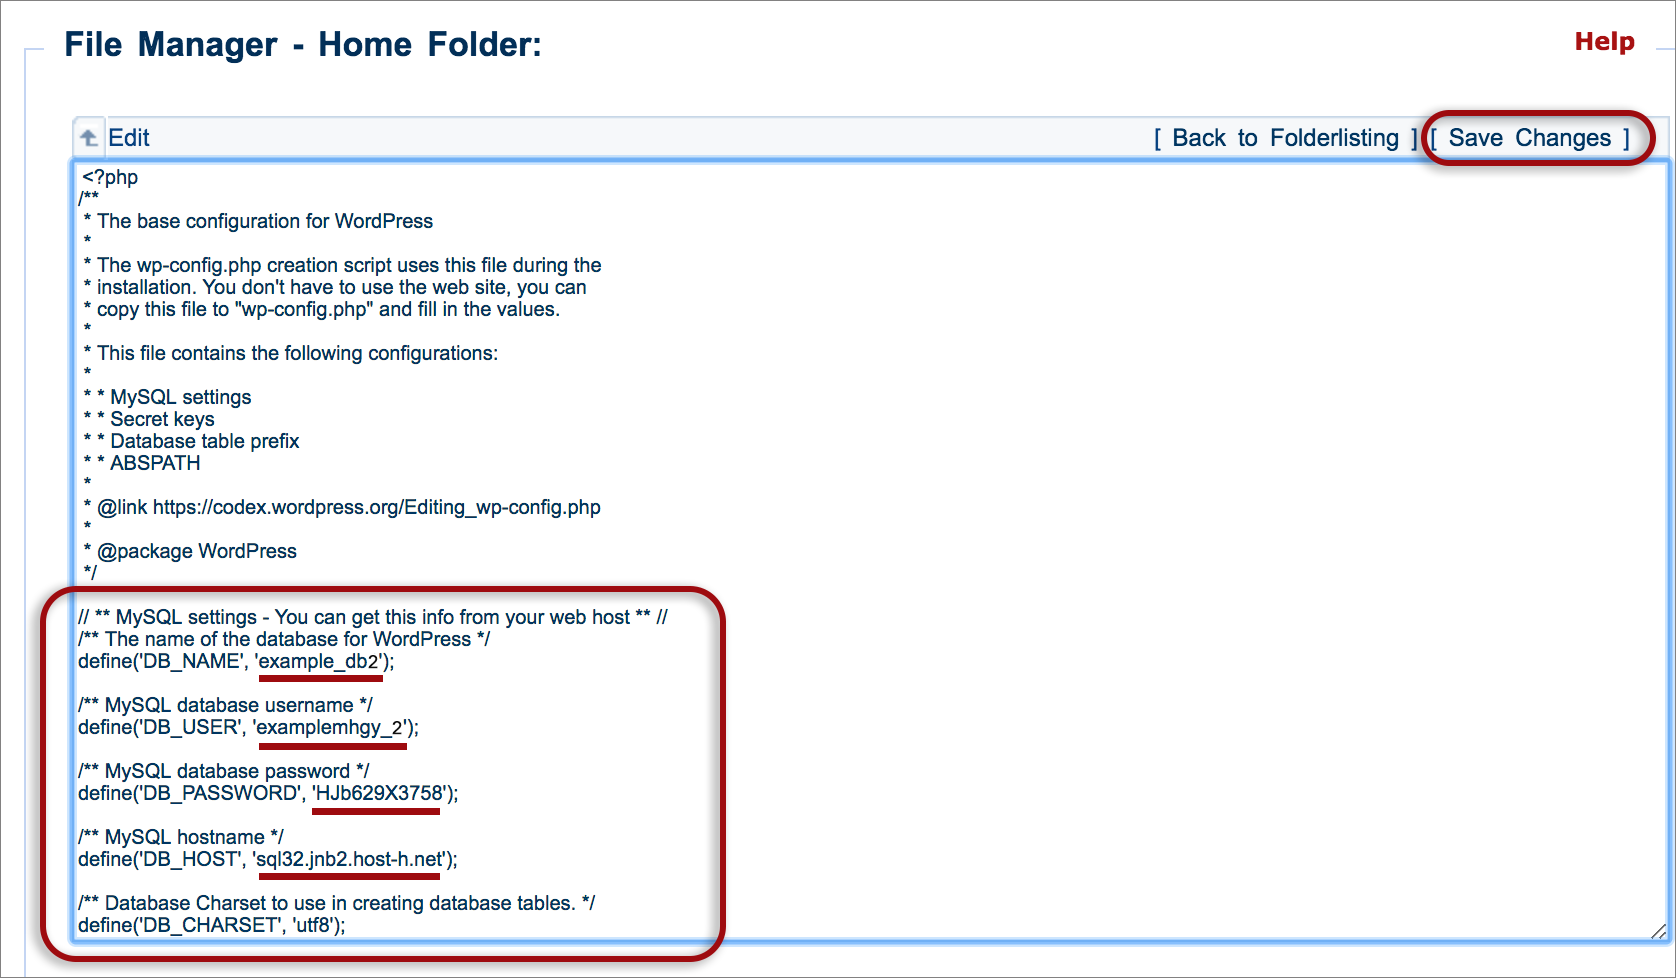
- The wp-config.php file is now configured to recognise the database associated with your WordPress website.

The new xneelo Control Panel is here
Experience a simpler, more secure way to manage your hosting. Most features are now live and ready for you. Switch now

