


How to activate the Windows Remote Desktop Service (RDS) Role and configure the session host
When is the RDS role needed?
The default server setting is RDP Admin mode, which allows single sessions with the appropriate privileges. If there is only one user, then additional RDS (Remote Desktop Service) licenses are not required.
If multiple users need to connect to the server simultaneously, each user needs a Remote Desktop Server Client Access License (RDS CAL) added to the license manager, with the session host configured to use that license manager.
Note: If this is not done, the RDS will go into Evaluation Mode, which will expire after 120 days, effectively locking users out. An error message ‘Remote Desktop licensing mode is not configured‘ will be displayed.
How to add Remote Desktop Service (RDS) licenses to a Windows server:
-
2. Install Remote Desktop Services Role
-
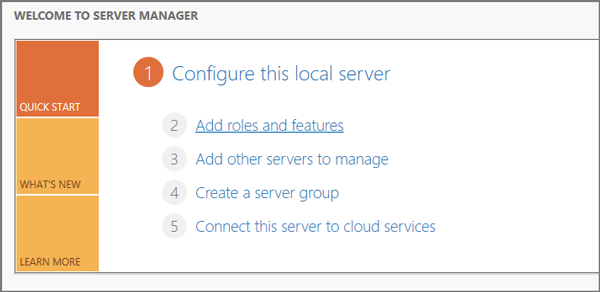
1On your license server go to Server Manager → Add roles and features.
-
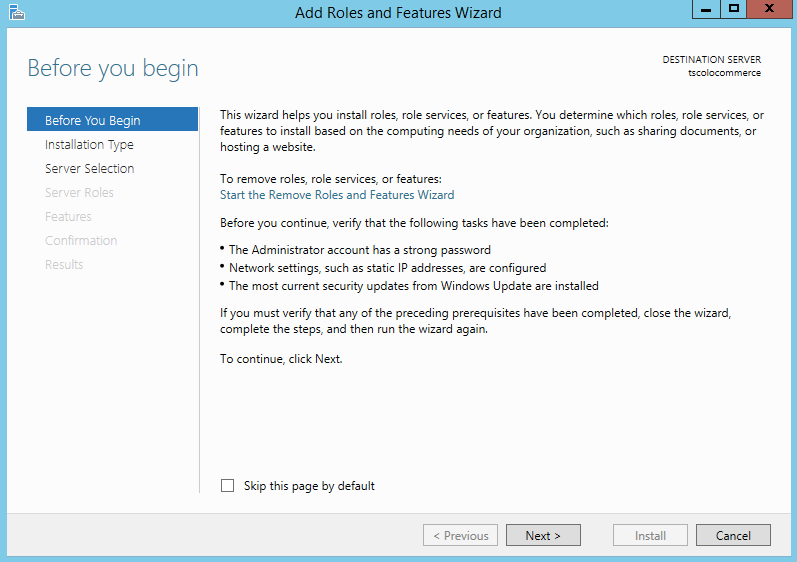
2Before You Begin: Click Next
-
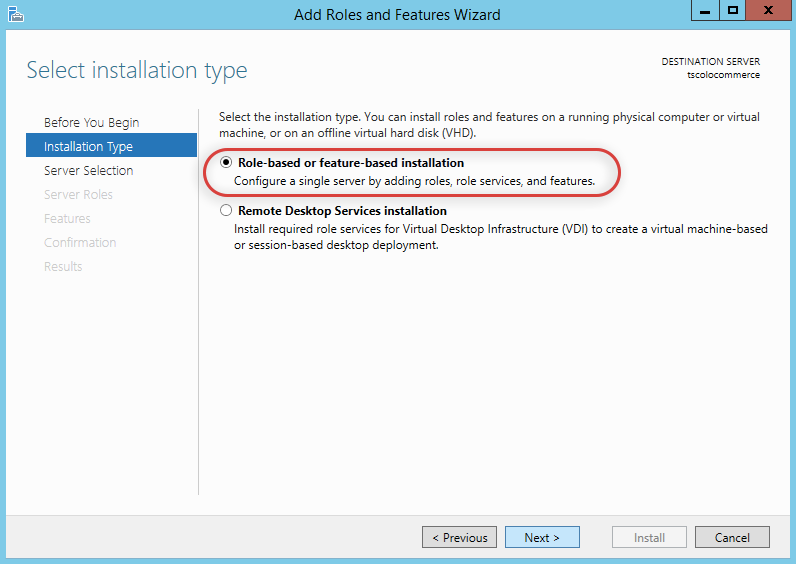
3Installation Type: Click Next
-
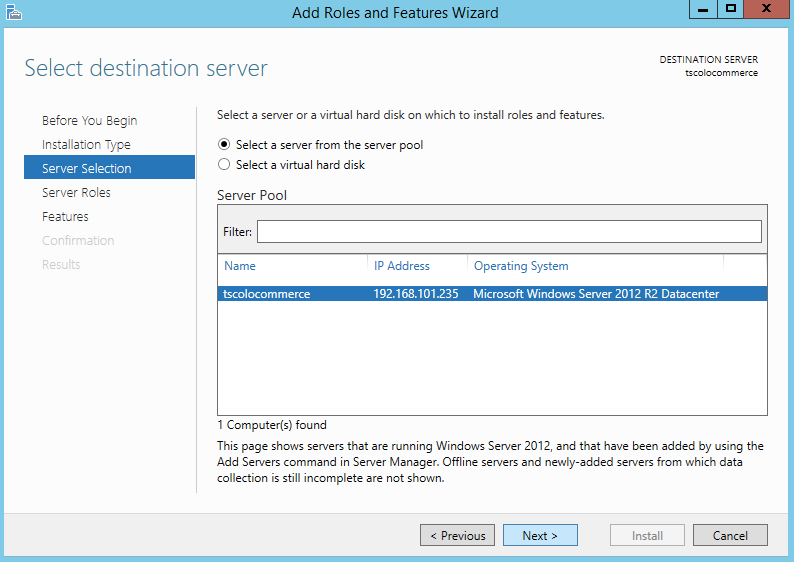
4Select your server from the server pool and click Next.
-
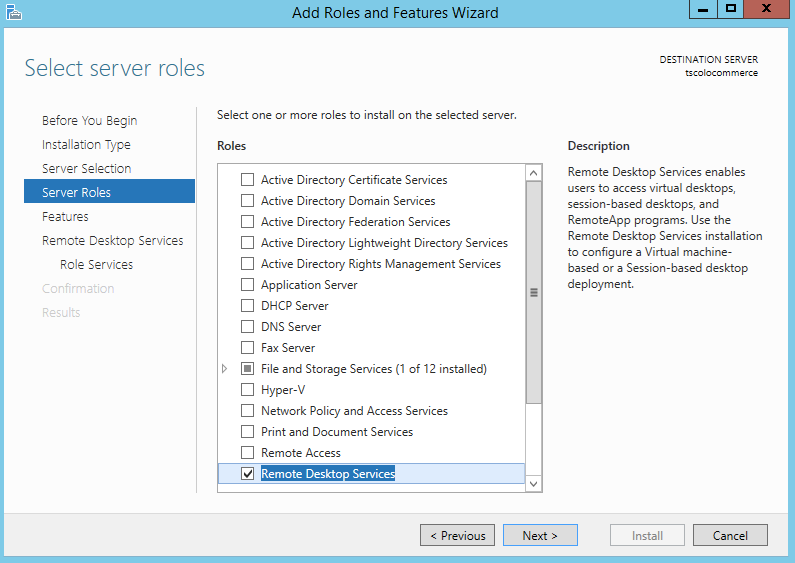
5Server Roles: Select Remote Desktop Services, click Next.
-
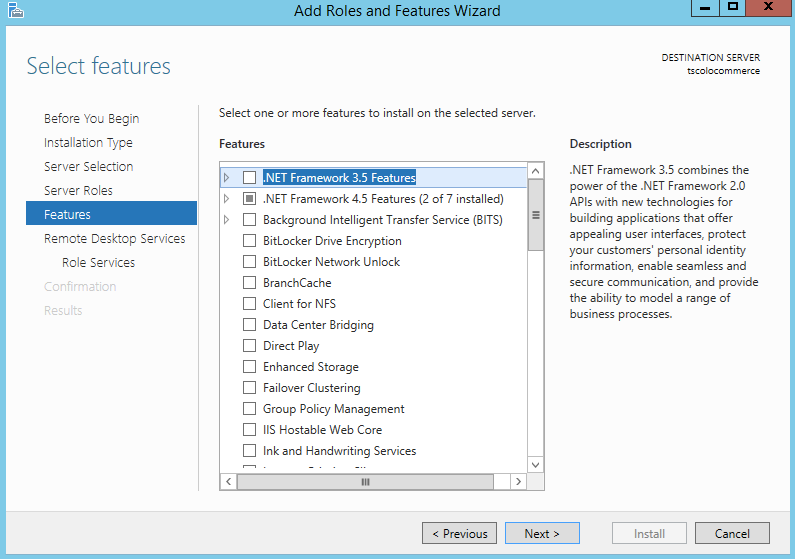
6Features: Click Next.
-
7Select role services:
- Select Remote Desktop Licensing
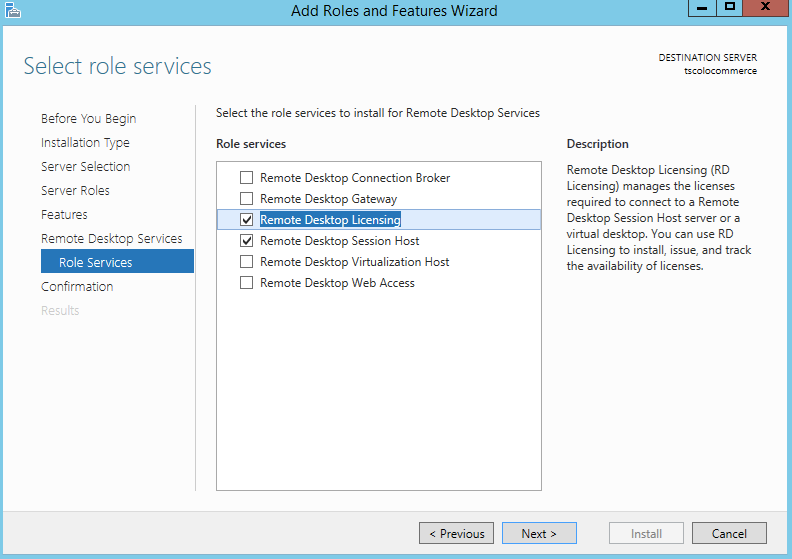
- Click Add Feature on the pop-up message
- Select Remote Desktop Session Host
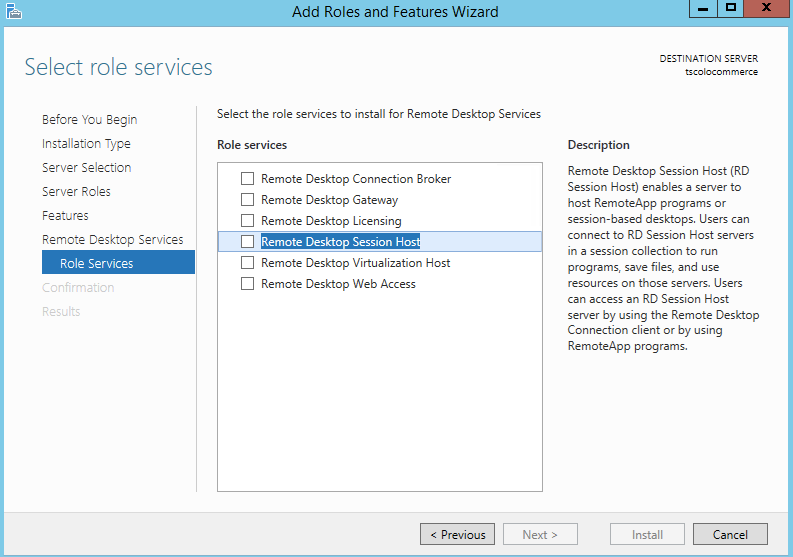
- Click Add Feature on the pop-up message
-
8Tick Restart the destination server automatically if required.
- Click Install
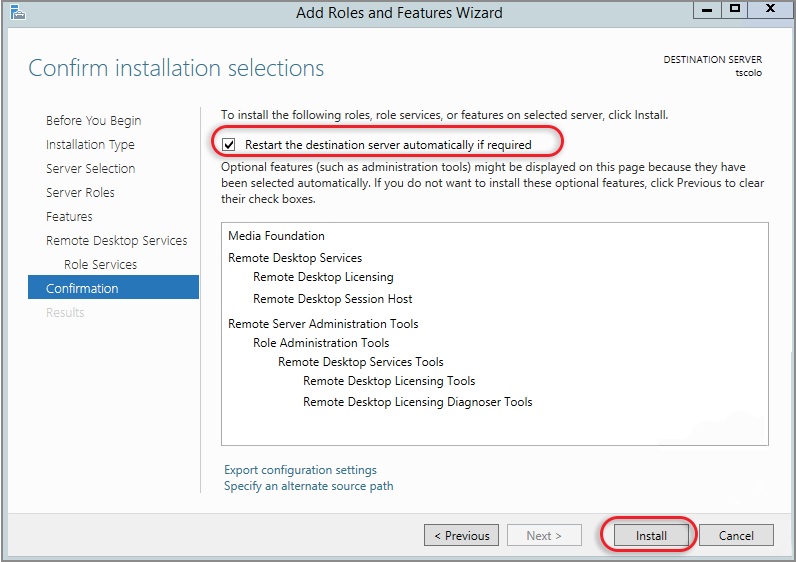
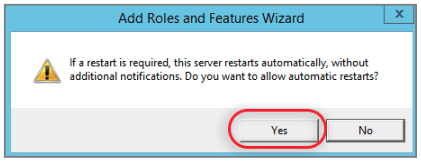
- Click Yes on the warning message
-
9Wait for the installation to complete and for your server to reboot.

-
-
3. Configure the Session Host
-
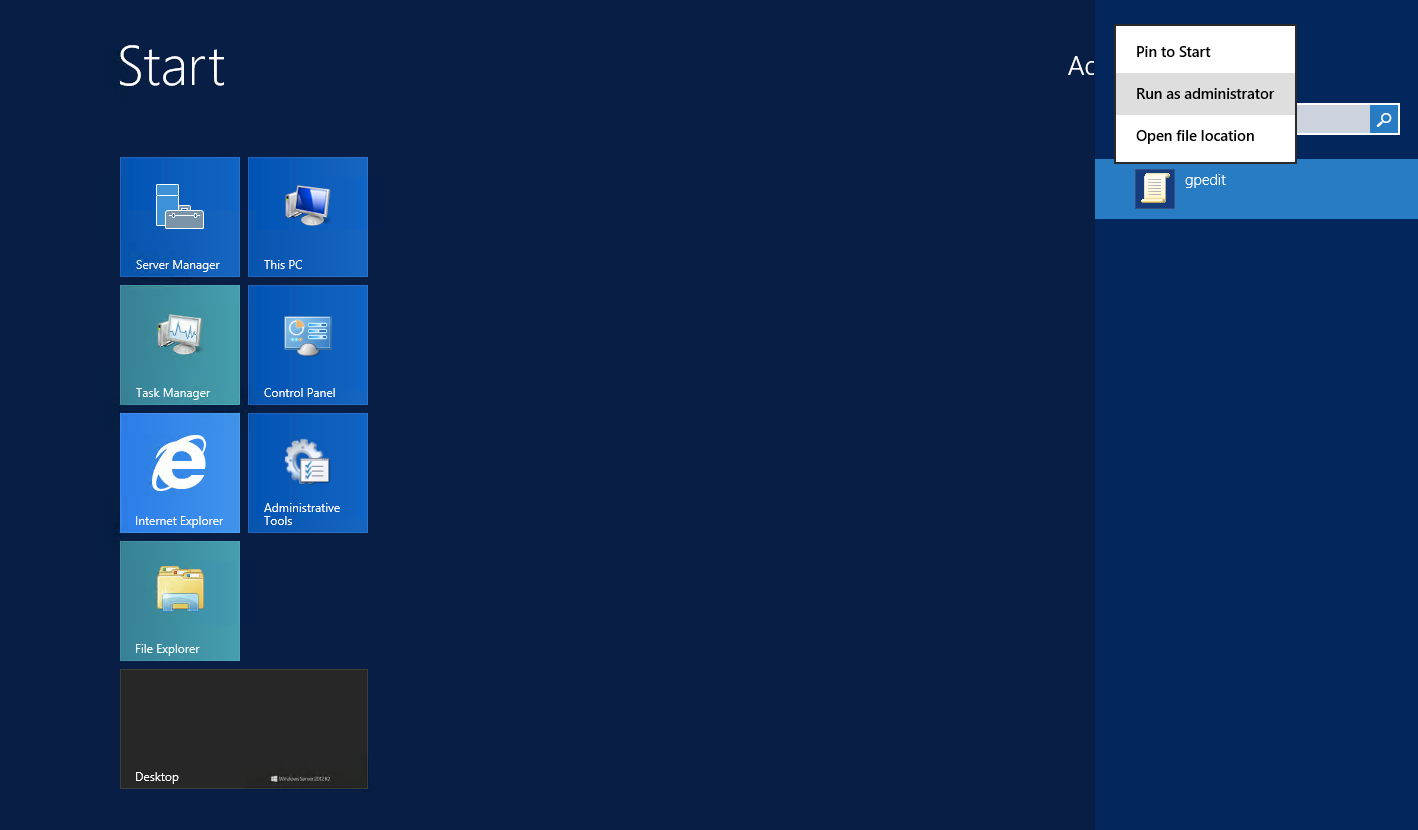
1Click on the Windows home icon.
- Run a search for gpedit.msc, right-click on the icon and select Run as administrator.
-
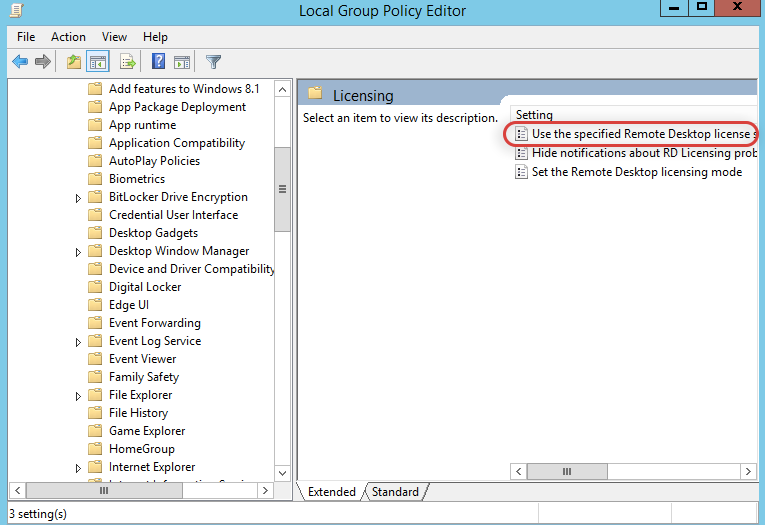
2In the Local Group Policy Editor select:
- Administrative Templates
- Windows Components
- Remote Desktop Services
- Remote Desktop Session Host
- Licensing
- Remote Desktop Session Host
- Remote Desktop Services
- Windows Components
-
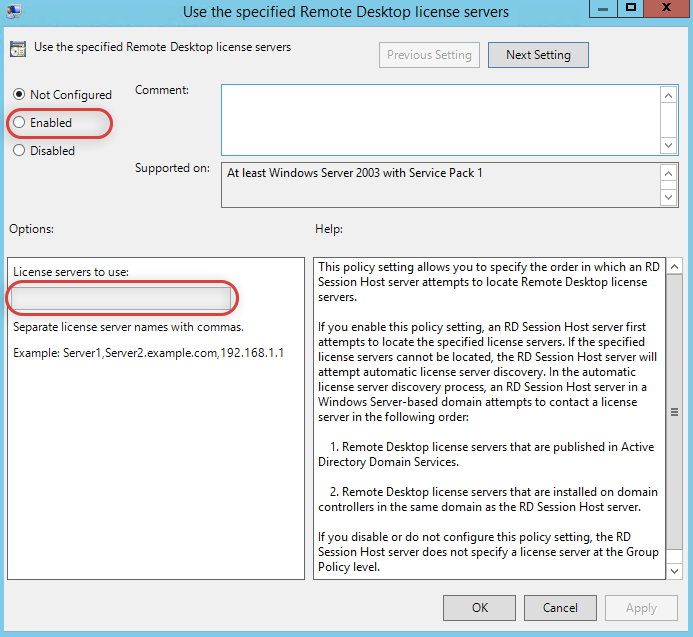
3Double click on Use the specified Remote Desktop license servers.
-
4Use the specified Remote Desktop license servers:
- Select Enabled
- Insert the server IP address in License servers to use. (NB. This step assumes that you will be setting up a license manager on this server)
- Press Apply and then OK
-
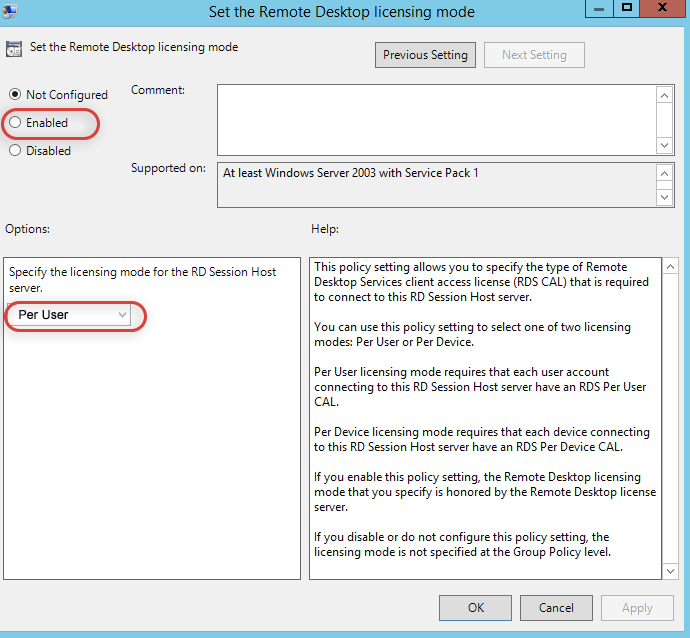
5Double click on Set the Remote Desktop licensing mode.
- For Windows 2019 / 2022 / 2025:
- Set to Enabled
- Select Per User (domain setup) / Select Per device (if a workgroup server)
- Press Apply and OK
-
6Close all open windows, click on the Windows icon, select Windows PowerShell.

-
7Type in gpupdate /force and enter. The message should read “Computer Policy update has completed successfully. “

-

