


Force HTTPS using a .htaccess file
If you are using our new Control Panel, refer to this article.
Make the switch and discover a simpler, more secure way to manage your hosting.
You have SSL/TLS enabled for your domain, but how do you get the website to load using HTTPS rather than the non-SSL/TLS version, HTTP? This guide will show you how to add code to the .htaccess file to ensure that your website always loads using HTTPS.
- Here’s how to update WordPress websites to load using HTTPS.
- New hosting packages, as well as Sitebuilder sites may not have a .htaccess file, but this can easily be created using any text editor programme e.g. Notepad in Windows or TextEdit on Mac.
What code should be added?
All web traffic can be forced to use HTTPS by inserting code into the .htaccess file within the public_html folder. These lines should be added above any other rules with a similar starting prefix:
RewriteEngine On
RewriteCond %{HTTPS} off
RewriteRule (.*) https://%{HTTP_HOST}%{REQUEST_URI} [L,R=301]
Sitebuilder requires the .cm4all directory to be excluded. In this case use:
RewriteEngine on
RewriteCond %{REQUEST_URI} !^/.cm4all/
RewriteCond %{HTTPS} off
RewriteRule (.*) https://%{HTTP_HOST}%{REQUEST_URI}
Subdomains that don’t have SSL/TLS can be excluded by inserting the following code (replacing “subdomain” and “example.com” with your domain details):
RewriteCond %{REQUEST_URI} !/subdomain.example.com$
How to insert code in the .htaccess file using the File Manager
- Browse to konsoleH and log in at Domain or Admin level
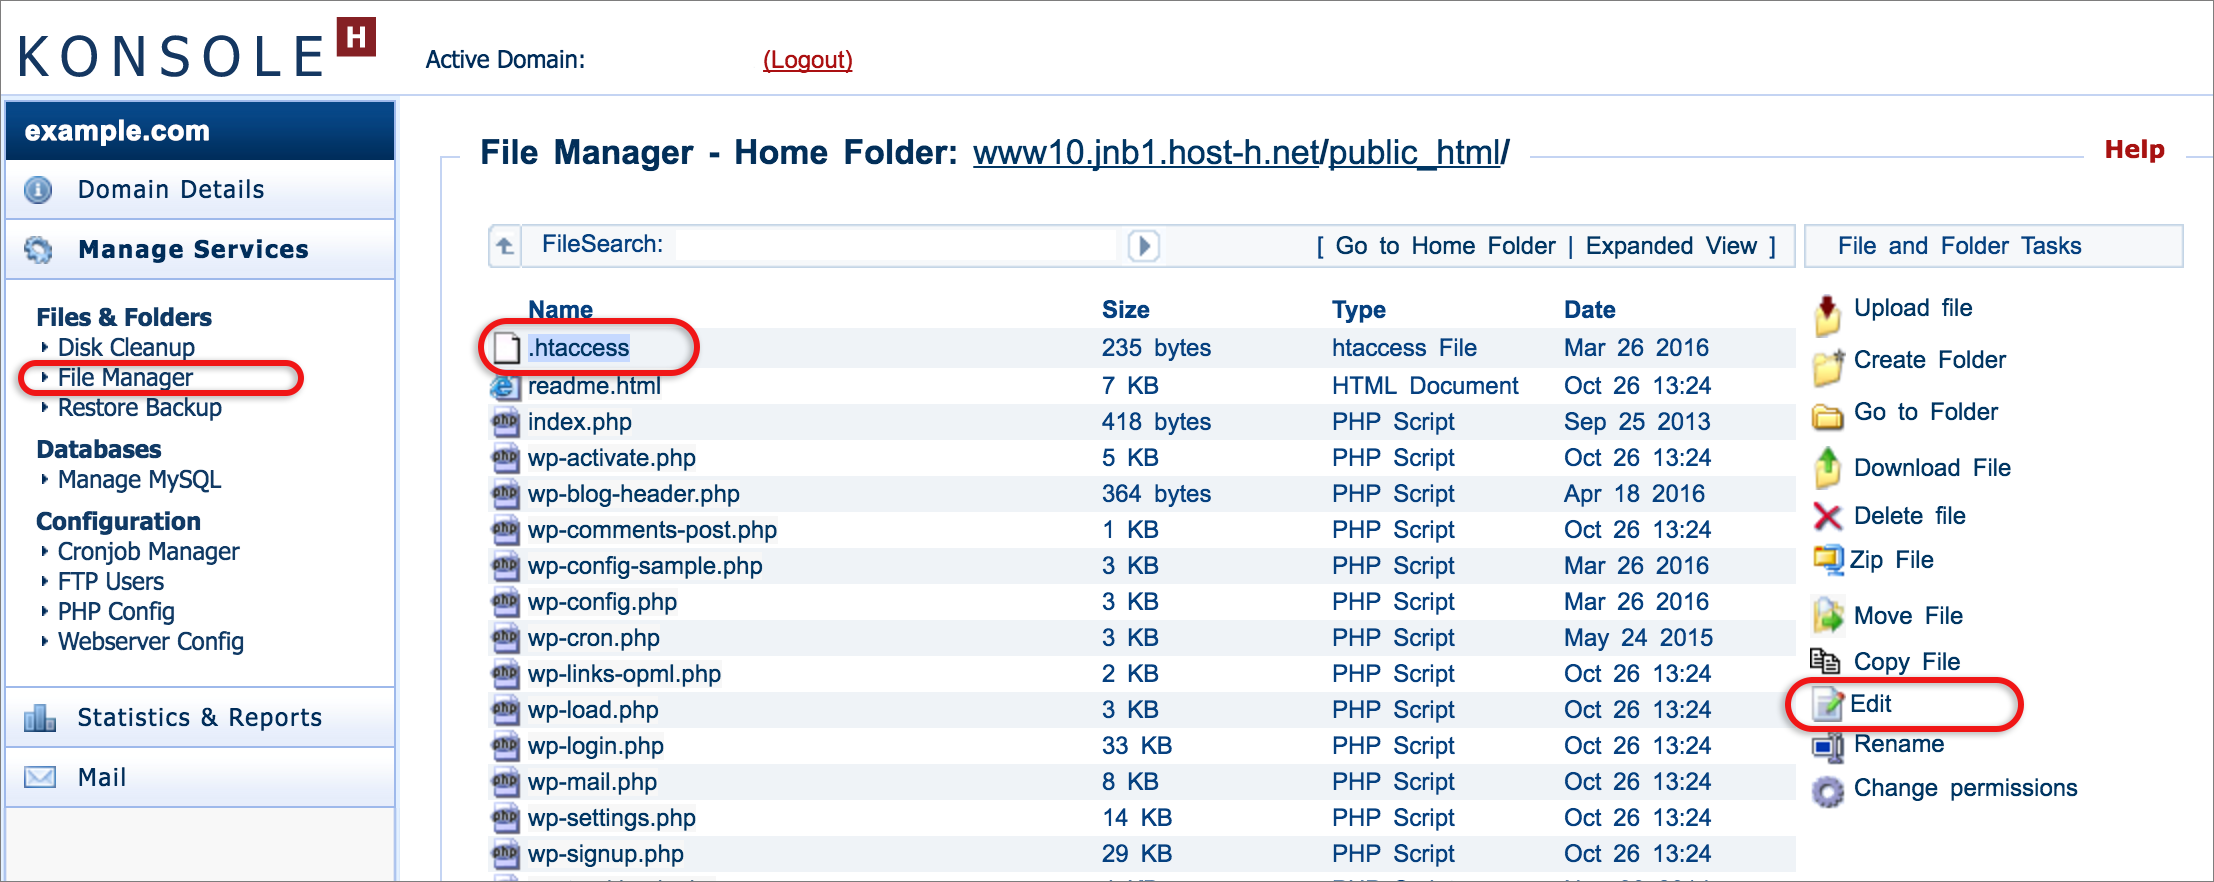
- Choose Manage Services > Files & Folders > File Manager
- Look for a .htaccess file. If there isn’t one, simply name an empty text file on your computer htaccess.txt and upload it using the Upload file menu option in the right hand side of the File Manager. Now Rename it to .htaccess
- Click on the .htaccess file and choose Edit from the right hand menu
- Copy the code detailed higher up in this article, and paste above other code that is already there.
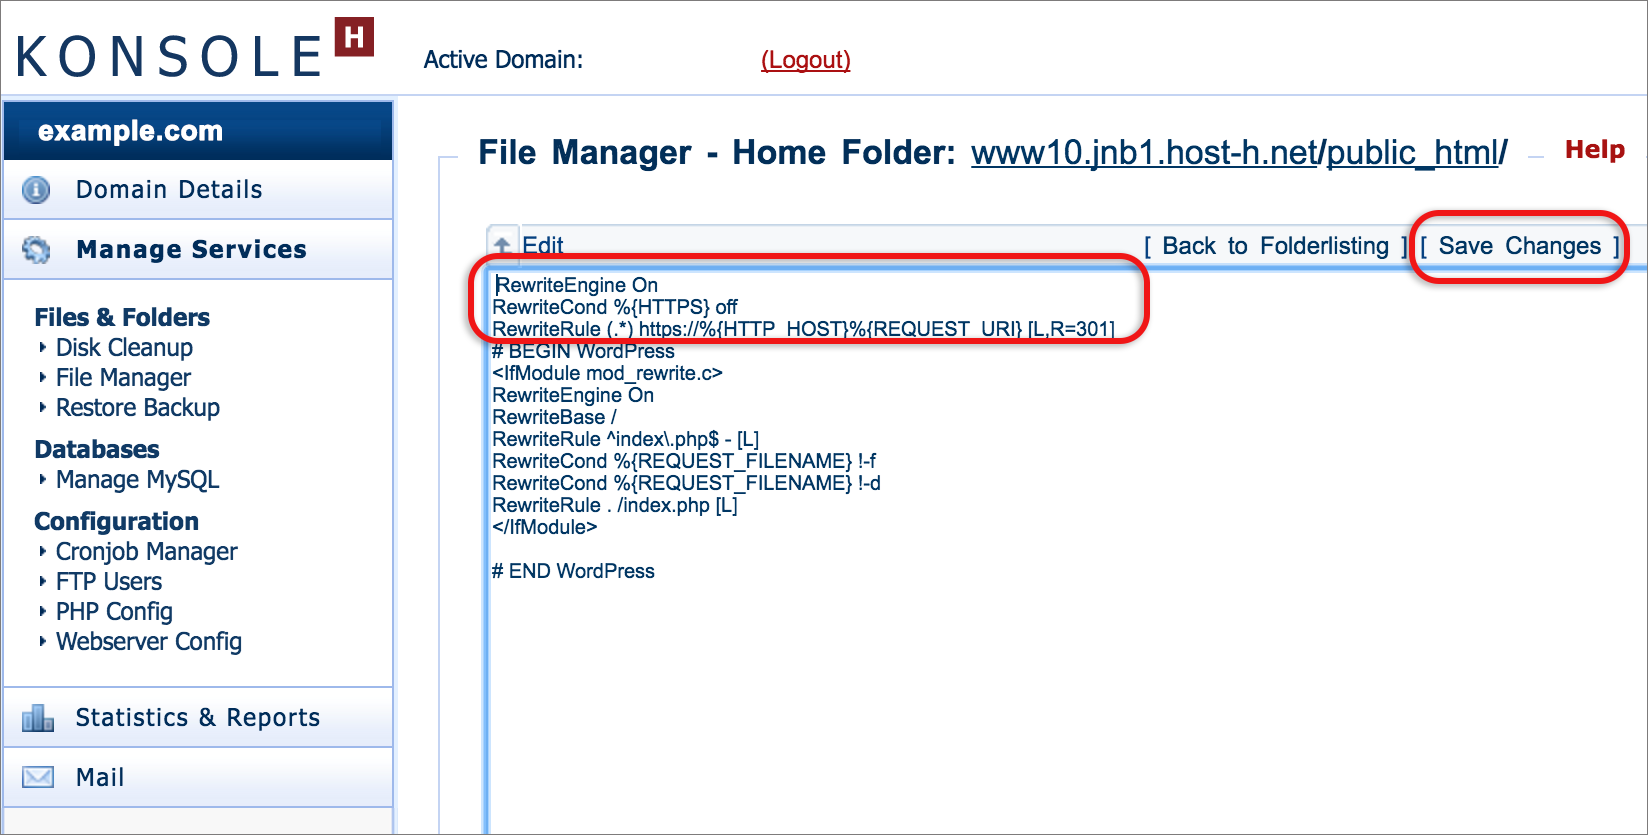
- Save Changes from the menu at top right

The new xneelo Control Panel is here
Experience a simpler, more secure way to manage your hosting. Most features are now live and ready for you. Switch now

