


Change your WordPress site from HTTP to HTTPS
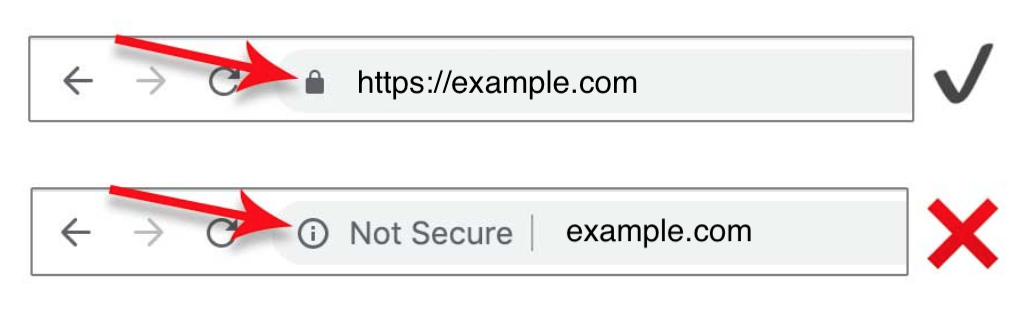
The signs that a website has been secured with SSL are a padlock icon before the domain name in the address bar. Unsecured sites have an ⓘ icon – and possibly “Not Secure” before the domain name:
Let’s Encrypt SSL certificates are automatically included with all hosting packages. Activation of the SSL certificate is dependent on both records both @ and www A DNS records pointing to our server and will be installed once the DNS has fully propagated.
To see whether or not your domain has a certificate, you can browse to the HTTPS version of it, (for example, https://www.example.com).
- If your website is not displaying on HTTPS, or you receive an error, please contact us.
- If your WordPress website has a certificate but does not automatically redirect to HTTPS, here’s how to fix it:
How to activate HTTPS
New WordPress sites
In the Admin area of the newly created WordPress site, select Settings (from the menu on the left-hand side), then General and update the WordPress address (URL) and Site address (URL) to https.
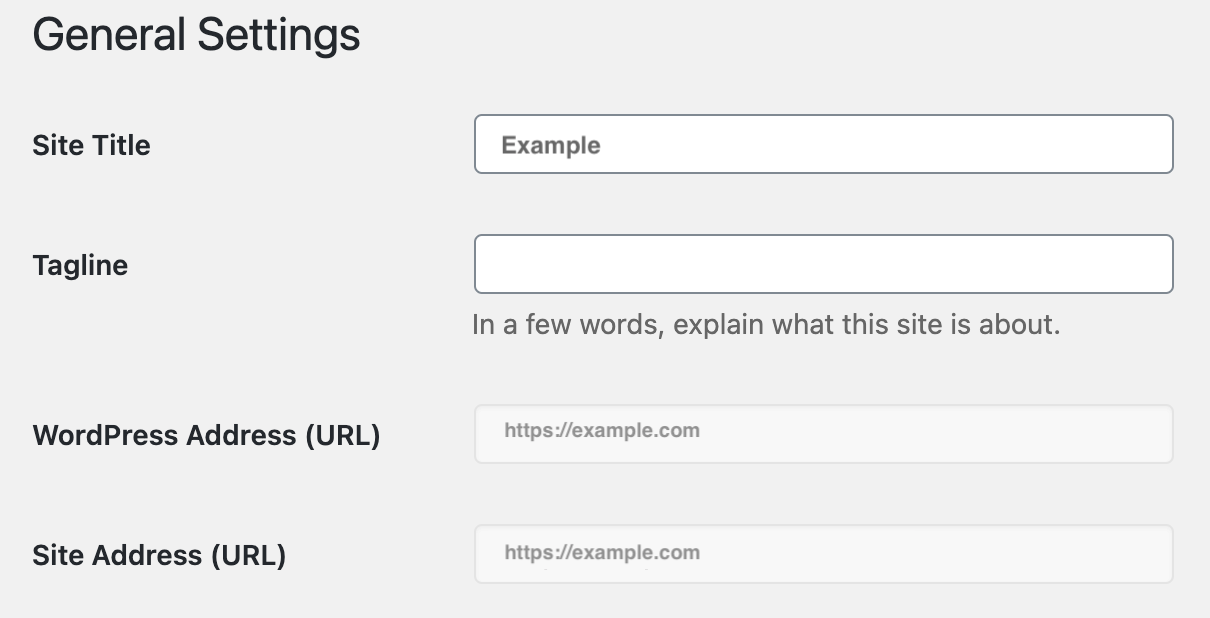
Note: Should these fields be greyed out, this may mean that it is set somewhere else on your website. If this is the case, proceed with the next option below.
Established WordPress sites
Current websites will already have been indexed by Google and the HTTP URL will need to be redirected to HTTPS. Thankfully, there is a plugin that does the work. Really Simple Security plugin automatically detects your settings and configures your website to run over https.
If you use Google Analytics, remember to update the settings to the HTTPS URL.
You can also manually force HTTPS using the .htaccess file.

