How to migrate your WordPress website using Duplicator
Duplicator is a dependable migration plugin that facilitates transferring your WordPress website between domains. This free tool simplifies site duplication.
To manage disk space effectively, make sure there are no backups stored in the public_html directory of the domain you’re transferring from. Including backups in your Duplicator backup will inflate the backup file size, affecting disk space usage on the destination domain.
Steps
-
1To get started, sign into your WordPress Admin dashboard (e.g. http://example.com/wp-login.php) on the site you are copying your content from. Navigate to Plugins > Add New Plugin and search for Duplicator.
-
2The correct plugin is ‘Duplicator - WordPress migration and backup plugin' developed by Duplicator. Click on Install Now > Activate.
-
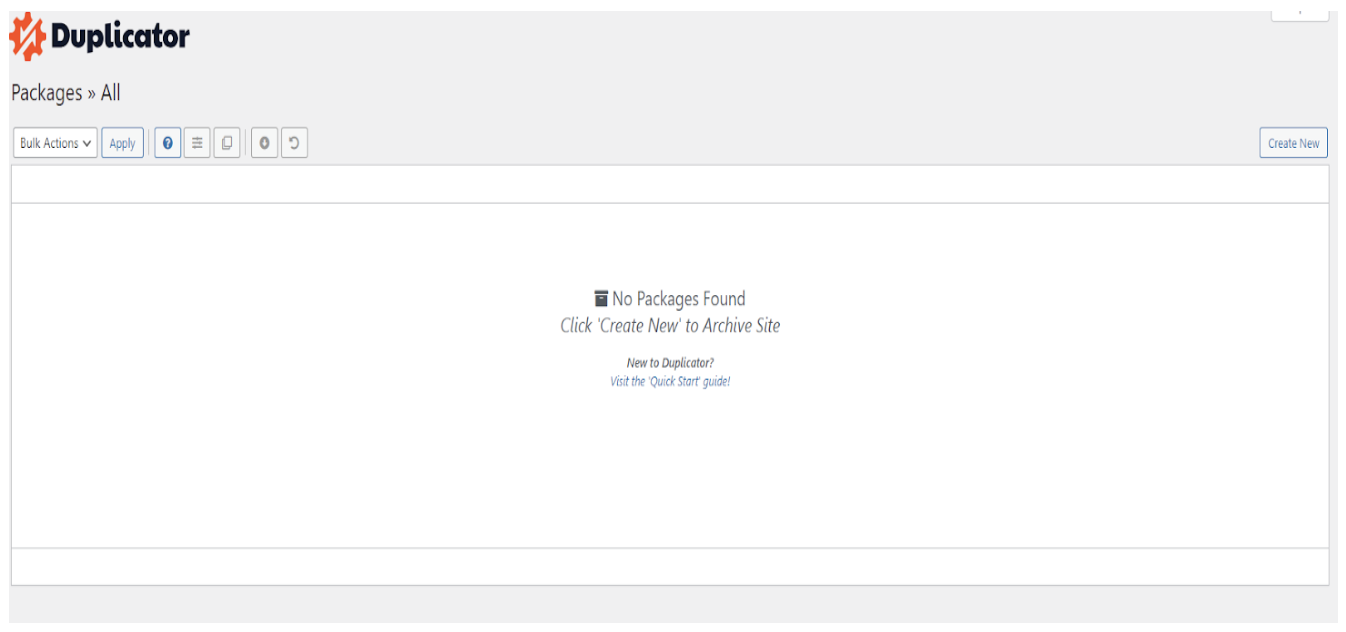
3Navigate back to your admin dashboard to the top left and you should see ‘Duplicator’ in the left-hand panel. Click on Duplicator and Create New on the top right-hand side.
-
4You can create a name for your backup or leave it as default. Once you have chosen your backup name, click on Next on the bottom right-hand side.
-
5A scan of your site will be performed. Once completed, you can continue with the build process by clicking on Build at the bottom.
-
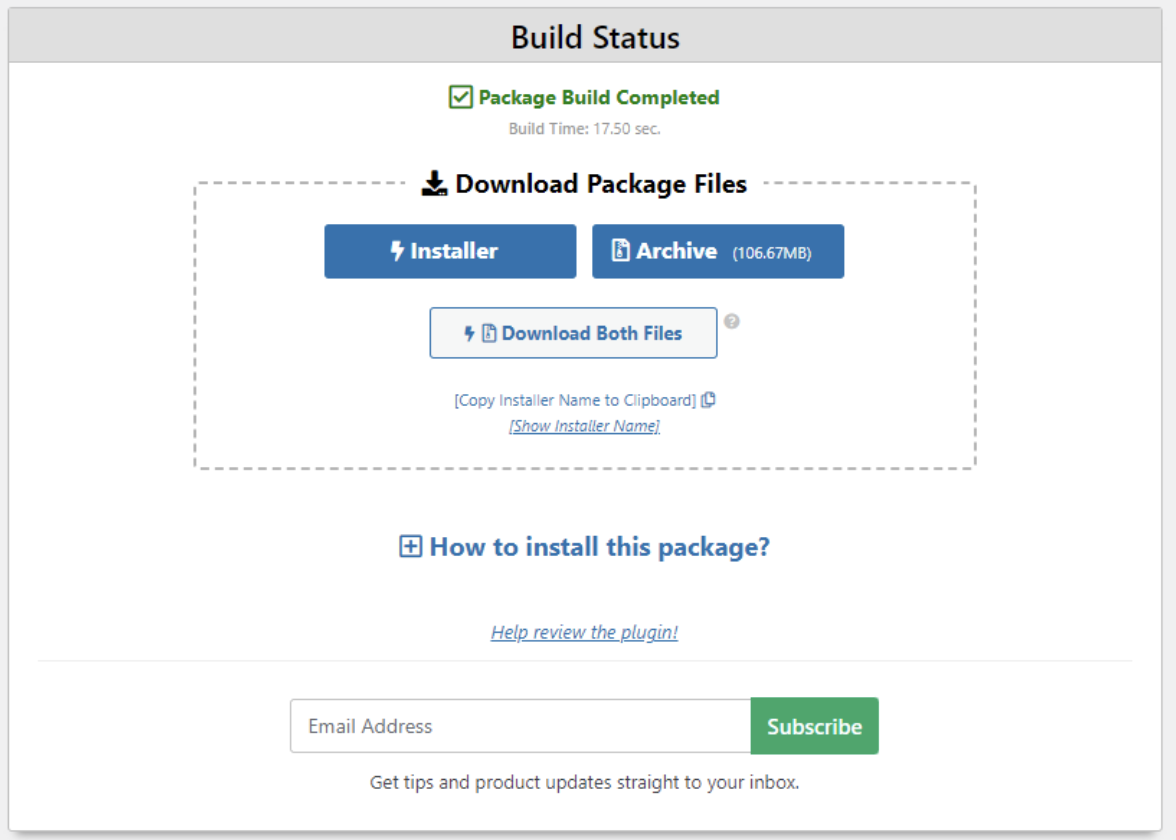
6Once the build process has been completed, you should see the following screen:
-
7Click on the Download both files button. This action will save a zip file and an installer.php file to your computer. It's crucial to understand that you cannot combine the zip file from one backup with the installer.php file from another backup. Both files must originate from the same backup you generated.
-
8Once these files have been downloaded to your local machine, you can make use of an FTP program such as FileZilla to upload these files to the domain you are moving your content to. The following articles will assist with uploading these files via FTP to your domain:
Where to find your FTP login details
How to use FileZilla FTP -
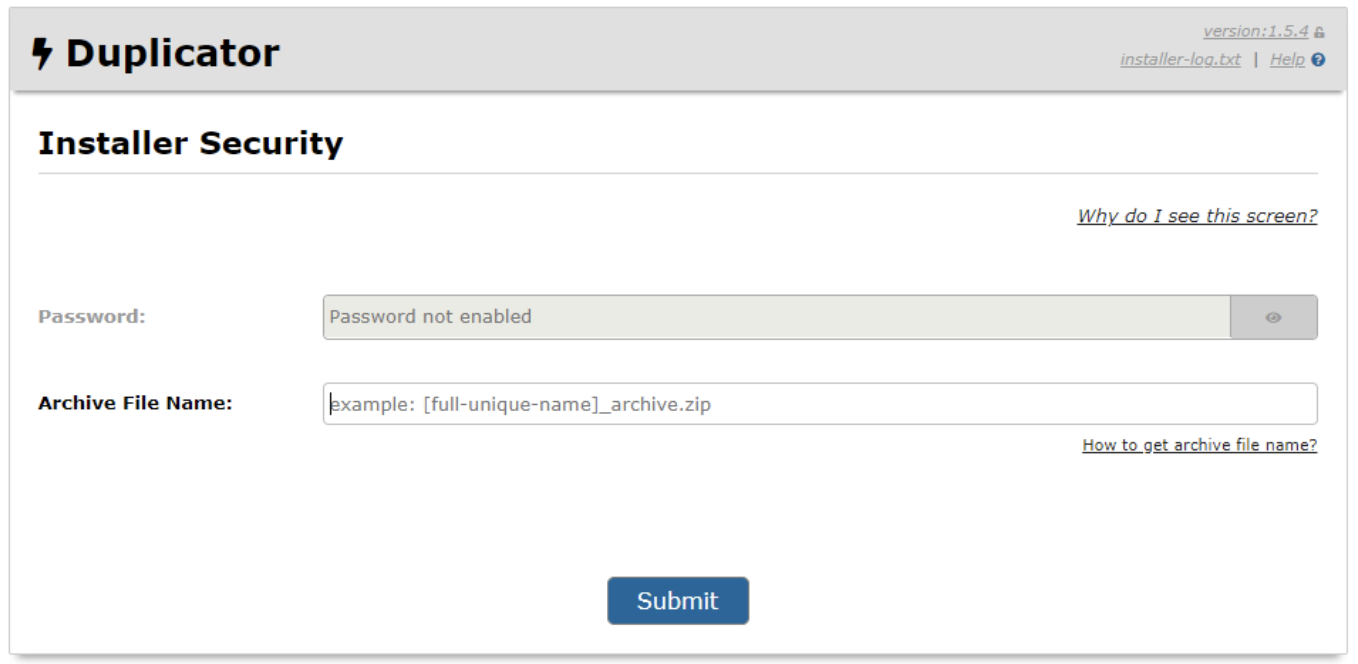
9You can then browse to your domain_name/installer.php and you should see the screen below. Replace domain_name with your actual new domain name.
-
10When prompted, you'll either be asked for the archive file or it will auto-fill. This refers to the file you downloaded and subsequently uploaded to your server. If it's not automatically populated, enter the name of the archive file and then click Submit.
-
11After that, you'll be prompted to set up the new database connection. This means you'll need to create a new database and input its details. You can refer to the following article for guidance on creating the database:
Create and manage a database
Note: When entering your Host/Server details in Duplicator, replace 'localhost' with the actual database server name (e.g. sql32.jnb2.host-h.net), which you can find under Manage MySQL in your control panel. -
12Once you have entered your database details on the above page, click Validate and you should then see the following page:
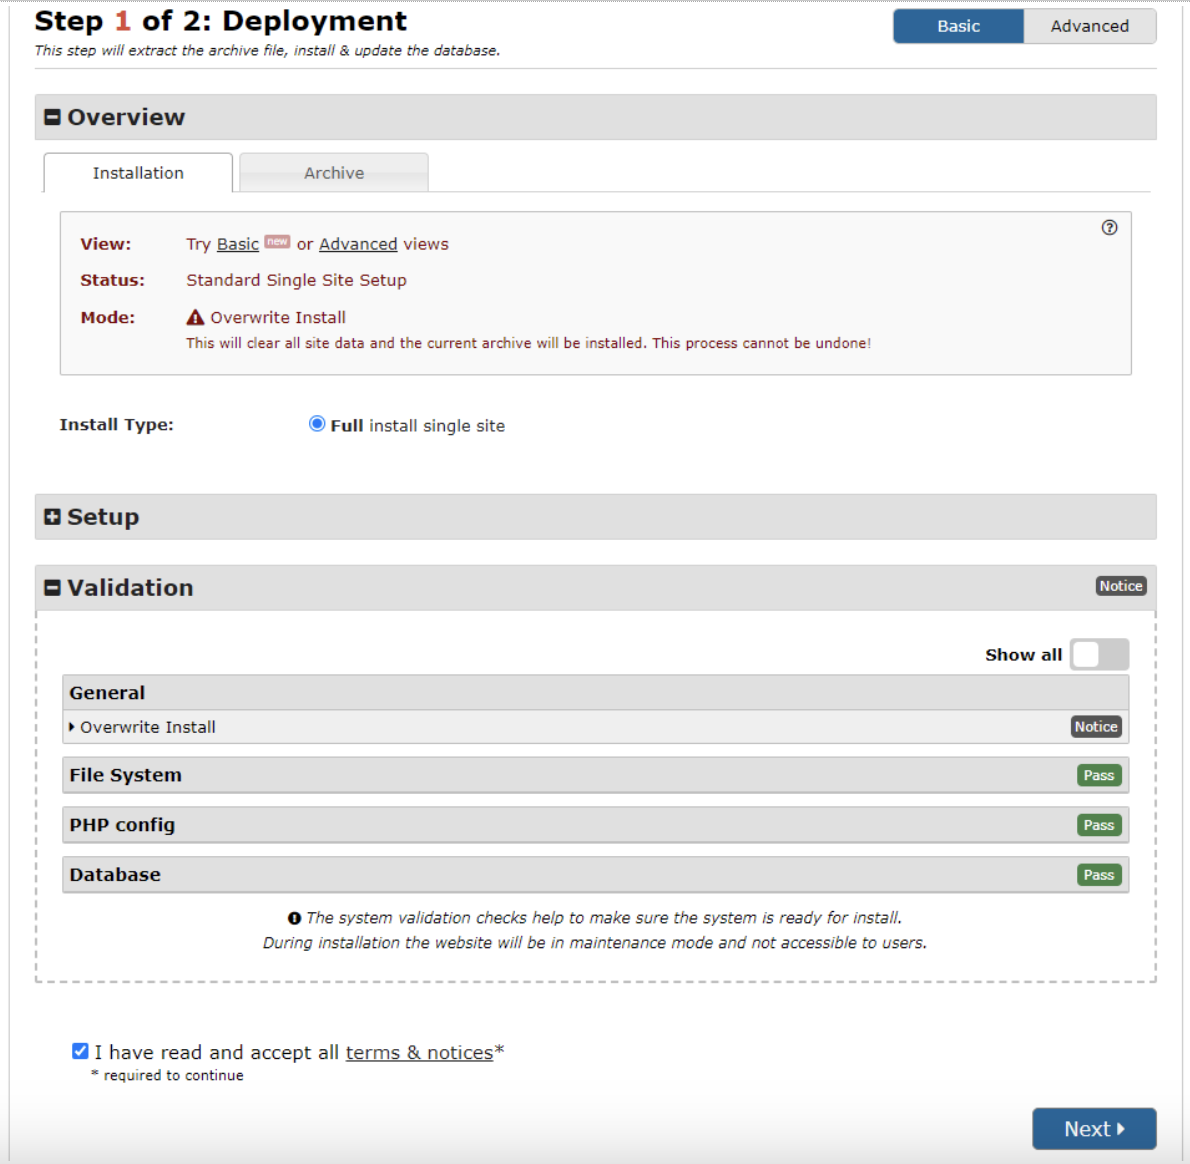
-
13Tick the box to accept the terms & notices and then click on Next.
-
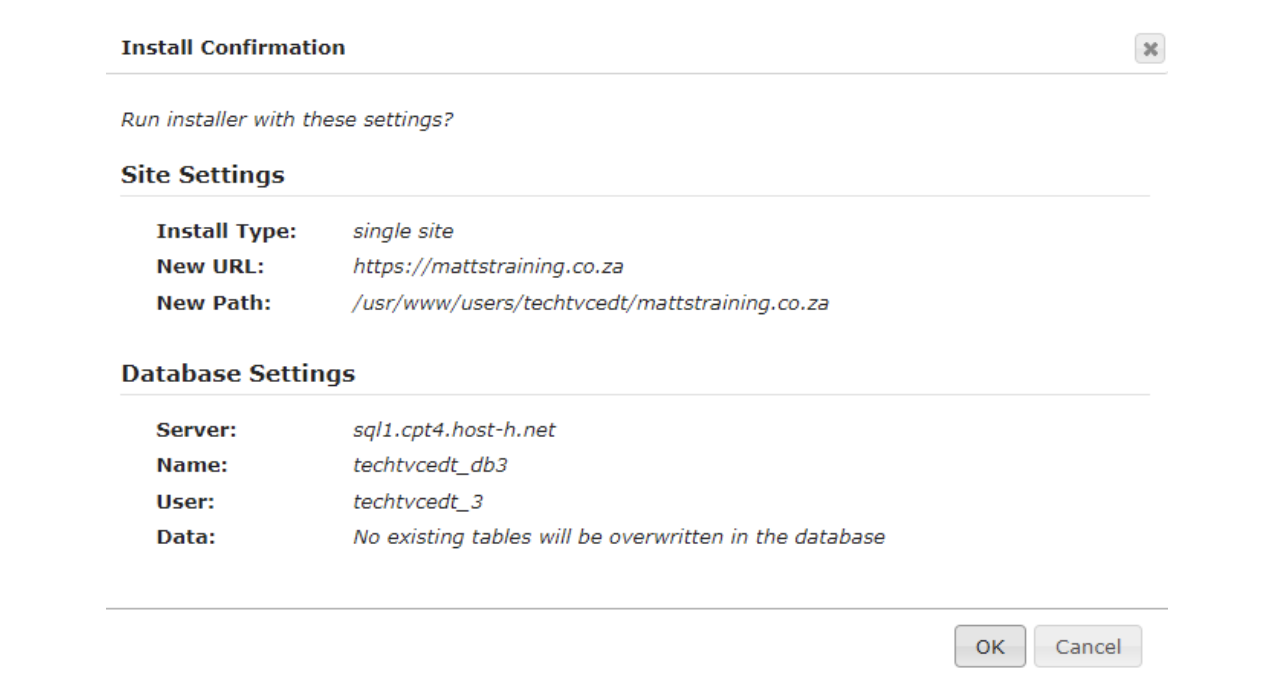
14A confirmation page will appear. Click on OK and Duplicator will proceed to extract your content from the archive file you uploaded to the site.
-
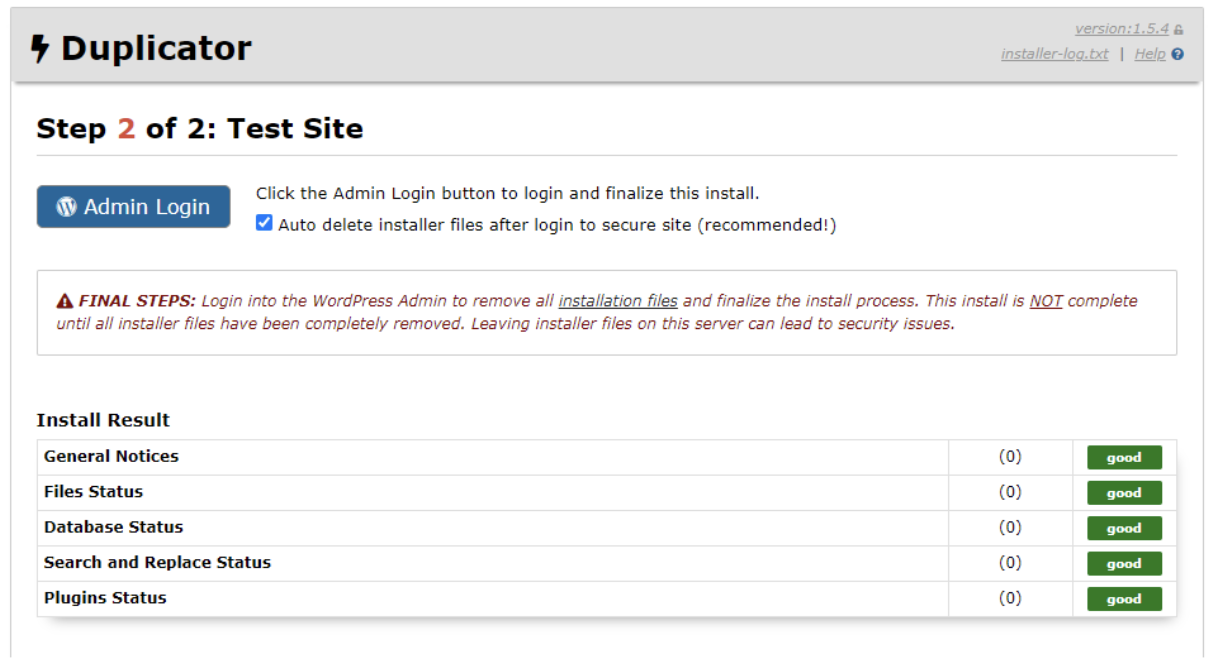
15Once the files have been extracted, click on Admin Login and log in to the backend of your site. Once done, you will see you have successfully migrated your site using Duplicator.