How to update database connection strings via the xneelo Control Panel
If you are still using konsoleH, refer to this article.
Use the File Manager in the xneelo Control Panel (recommended) or FTP program such as FileZilla or CuteFTP to retrieve the configuration file and edit your database configuration.
This is required when setting up a new database or when the database password has been updated. Using Option 1 (File Manager) is recommended as it makes edits directly on the server without the need to download, edit and then upload the configuration file via FTP.
Option 1: Edit connection strings via File Manager
-
Log in to the xneelo Control Panel.
- Select a Product (e.g. Web Hosting) from the side menu.
- Select the domain name.
- Select File Manager under Hosting tools.
- Click on the 3 dots menu to the right of the configuration file:
-
- For WordPress please edit wp-config.php
- For Joomla please edit configuration.php
- For Drupal please edit sites/default/settings.php
- For Magento please edit app/etc/local.xml
- Select File Editor.
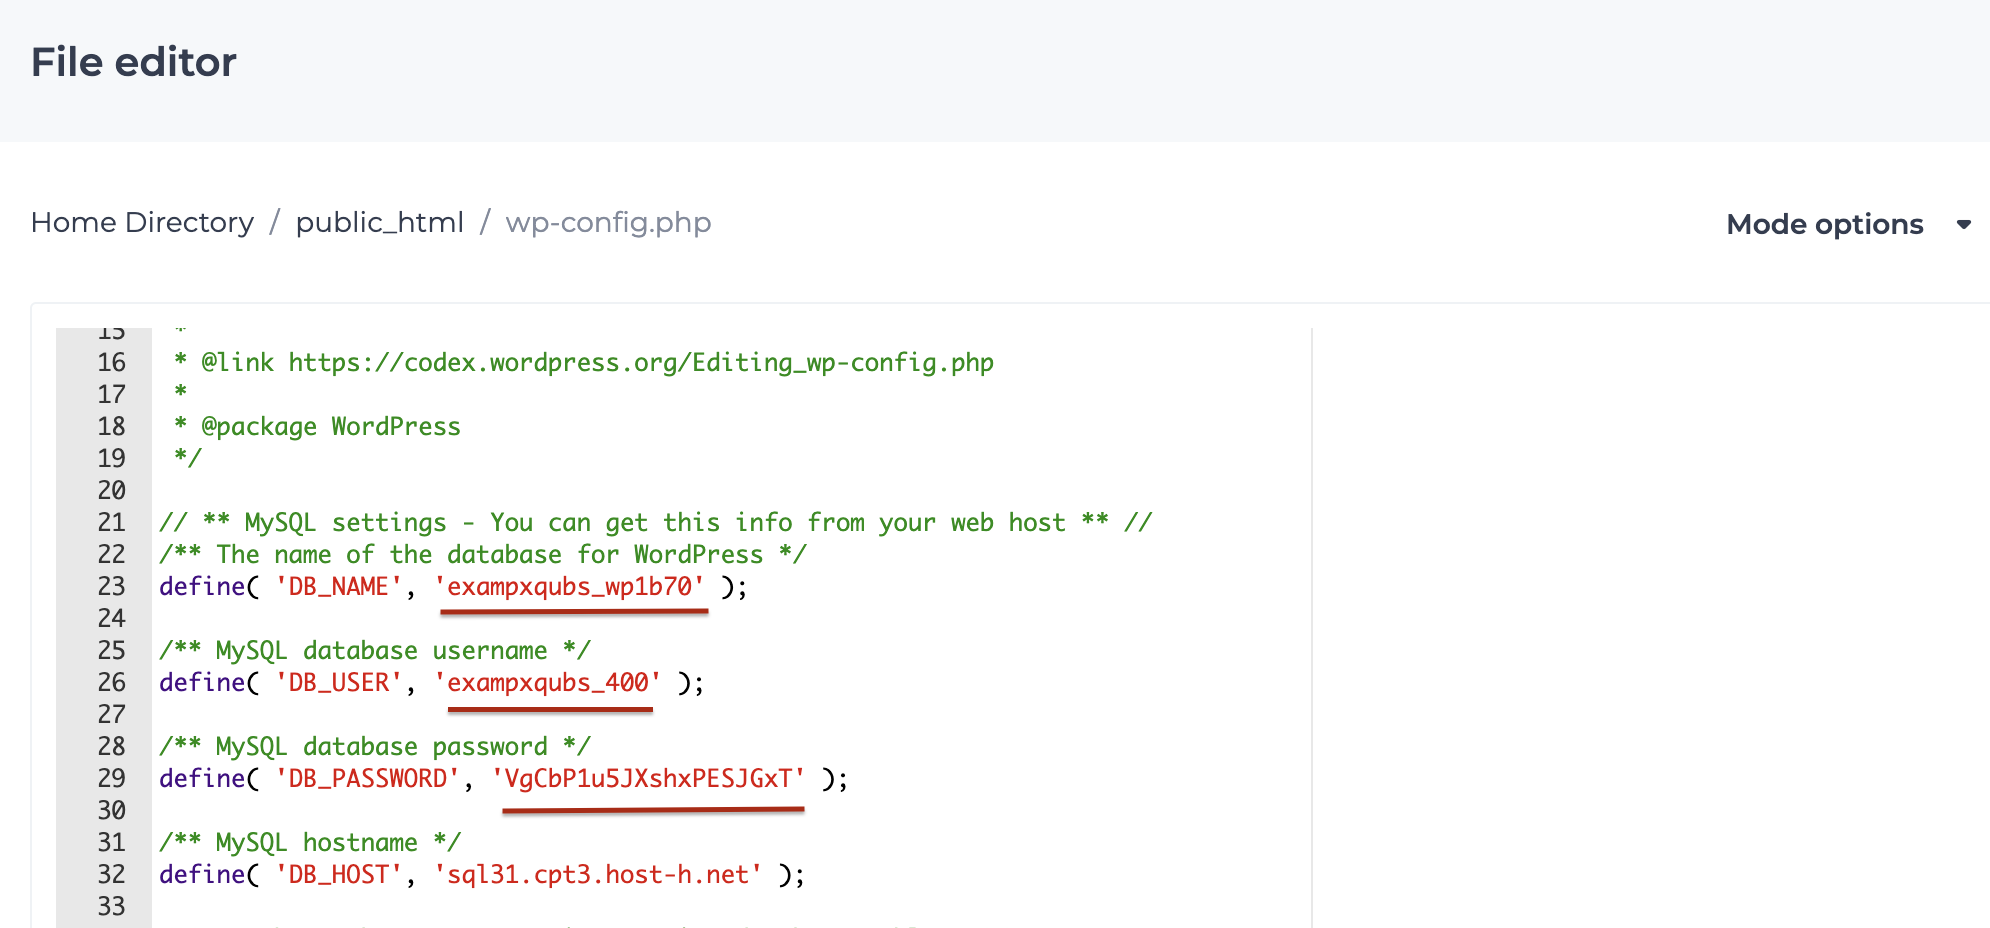
- Search for the information you wish to change and replace it by clicking and replacing the text, where:
-
- DB_NAME is the database name
- DB_USER is the database login
- DB_PASSWORD is the database password
- DB_HOST is the database server name (note that the database does not live on the same server as the website)

- Click Save.
Option 2: Edit connection strings via FTP program
-
Make an FTP connection to your domain with your FTP program.
- Locate the public_html directory (In most programs you will be able to ‘double click’ to access this folder).
- Locate the applicable configuration file for your database eg. configuration.php.
-
- For WordPress please edit wp-config.php
- For Joomla please edit configuration.php
- For Drupal please edit sites/default/settings.php
- For Magento please edit app/etc/local.xml
- Download this file to your local computer.
- Open the file in Notepad or a text editor of your choice and search for the information (hostname, database name, username/login, and password) you wish to change.
- Replace all instances of the old information with the new details e.g. old passwords with new passwords.
- Save your changes.
- Upload the updated configuration file with your FTP program to replace the current one.
Should you be familiar with Telnet or SSH you may wish to access and edit the configuration files directly on the hosting server.


