


How to add an email signature in Webmail
A default signature in the footer of your email is an easy way to add professionalism to your email. An email signature can be set up in a few steps within Webmail.
-
Create a Webmail signature
-
Log in with your full email address (eg. me@my-domain.com) and email password (passwords are case-sensitive).
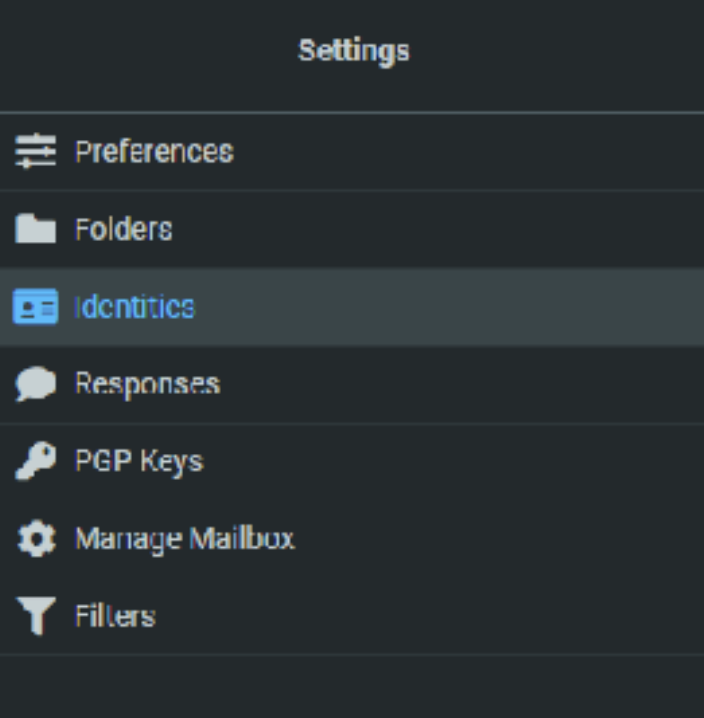
- Click on Settings in the left-hand menu.
- Select Identities from the menu on the left.
- Select the relevant identity from the list or create a new identity by clicking on the Create button at the top right of the screen.
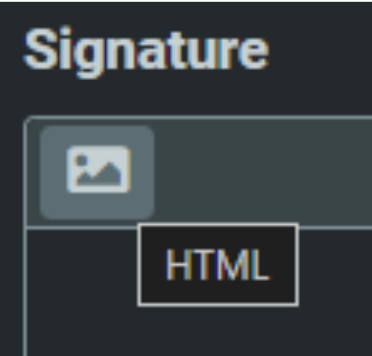
- Compose your custom signature in the available Signature text box.
- Click Save to save your signature.
Note: To customise your text, click on the HTML button at the top of the Signature text box. This will allow you to select your preferred font, font size, and formatting options. If you would also like to add an image to your signature, see the steps below.

-
Add an image to your Webmail signature
If you would like to add an image that you have created for your email signature, it needs to be saved to your website so that when a recipient views your email, the image indicated in your signature will be pulled from the internet.
- In Webmail, select Settings > Identities and select the relevant identity (if there is more than one).
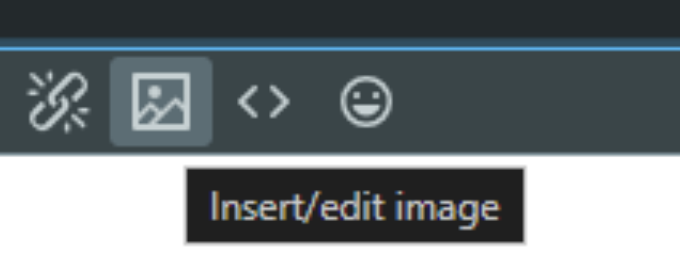
- Click on the HTML button at the top of the Signature text box.
- Select the Insert/edit Image icon from the signature toolbar.
- In the Source textbox enter the image URL
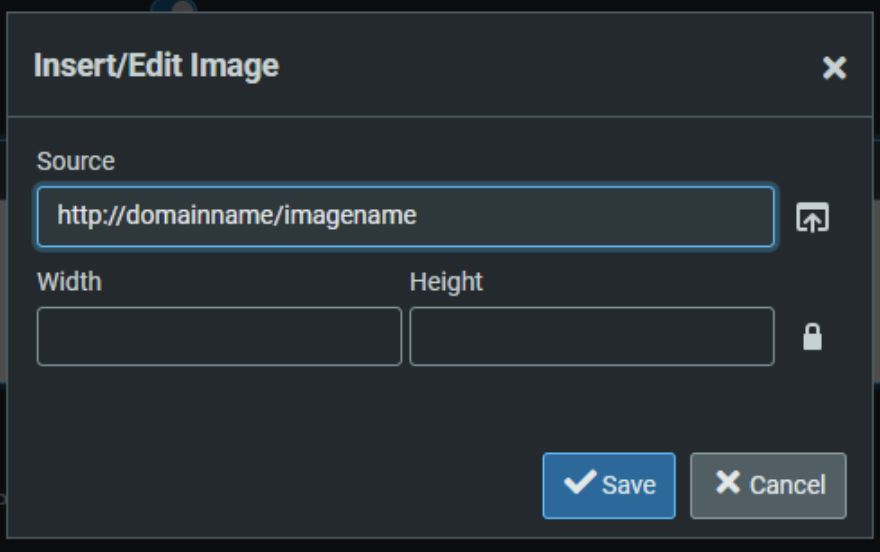
Note: The image name needs to be specified exactly as uploaded to the server – name and format. To check if you have the correct path, try browsing to the specified URL i.e. http://domainname/imagename. If you can see your logo by browsing the URL, you have the correct path.
- Select Save. You will then be able to see the image in the text box.
- Resize the image, if necessary.
- Select Save.
These signature settings will apply only to Webmail and will not automatically appear in your email program.
If your email recipient is not using the HTML setting in their email client, then they will not see your HTML signature.

