


Set up email in OS X Yosemite Mail
Your mailbox is also available online via Webmail.
User Name :
Your user name is your full email address
Incoming Server : mail.
Ports : IMAP 993 / POP 995
Outgoing Server : smtp.
Port : SMTP 465
Encryption: SSL/TLS
![]() Follow this tutorial to manually set up your mail account. If your account is already setup but is giving errors, follow our Troubleshooting guide.
Follow this tutorial to manually set up your mail account. If your account is already setup but is giving errors, follow our Troubleshooting guide.
Replace example.com with your domain name.
Add a new email account
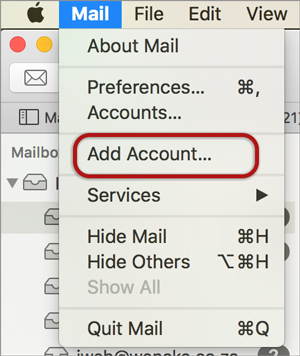
- Launch Mail.
- From the toolbar at the top, select Mail and then Add Account…
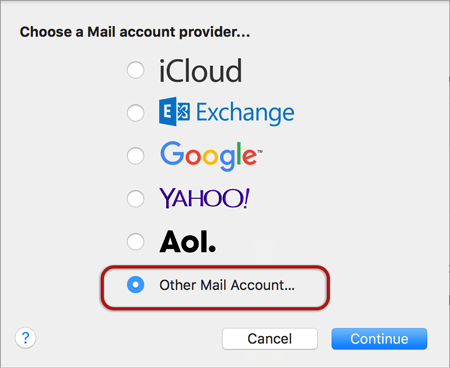
- Select Other Mail Account…

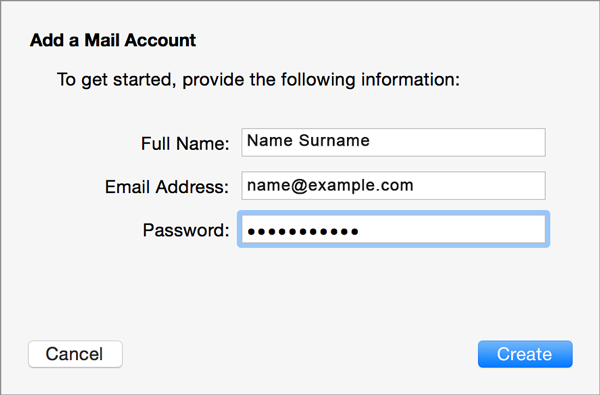
- Enter your details
- Full Name – the name that will appear in the ‘From’ field when you send emails
- Email Address – your full email address
- Password – your email password (forgotten passwords cannot be restored but they can be reset via your control panel)
- Select Create

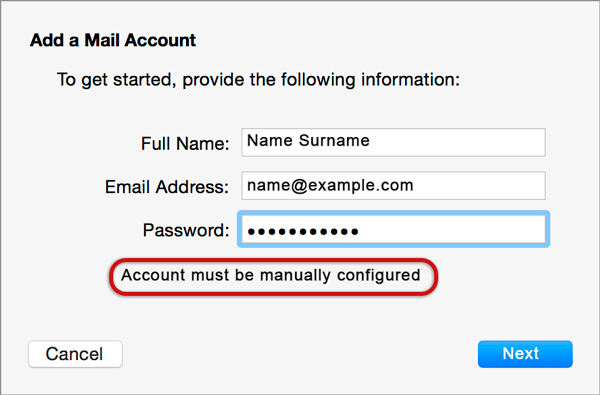
- A pop up will appear that reads ‘Account must be manually configured’. Select Next
Incoming Mail Server Info
- Enter these details:
- Account Type– Select POP or IMAP (this guide defaults to IMAP)
- Mail Server – has mail. before the domain name e.g. mail.example.com*
- User Name– your full email address
- Password– your email password (forgotten passwords cannot be restored but they can be reset via your control panel)
- Select Next
Outgoing Mail Server Info
- SMTP Server –has smtp before the domain name e.g. smtp.example.com*
- User Name– your full email address
- Password – your email password (forgotten passwords cannot be restored but they can be reset via your control panel)
- Select Create
* Note: In isolated cases mail.domain (e.g. mail.example.com) and smtp.domain won’t work. In these cases you will need to use the server name instead e.g. www34.cpt1.host-h.net. Find my server name.
You have completed your account setup. Your Mac mail program should now be set to send and receive email. We recommend sending a test email.
Email still not working? Read our Troubleshooting guide


