


How to set up email in Outlook 2002 / 2003
Your mailbox is also available online via Webmail.
User Name :
Your user name is your full email address
Incoming Server : mail.
Ports : IMAP 993 / POP 995
Outgoing Server : smtp.
Port : SMTP 465
Encryption: SSL/TLS
This step-by-step guide takes you through the process of setting up a new email account in Entourage.
If the Mail account is already set up, but giving errors – then refer to our Troubleshooting guide.
♦ Replace your-domain with your domain name.
First, check your password
Check your password by browsing to Webmail and trying to log in. If you aren’t able to log in, then you have the incorrect password. Forgotten passwords can be reset in the control panel – you will need to get your domain or web administrator to update it for you if you don’t have access.
Add a new email account
-
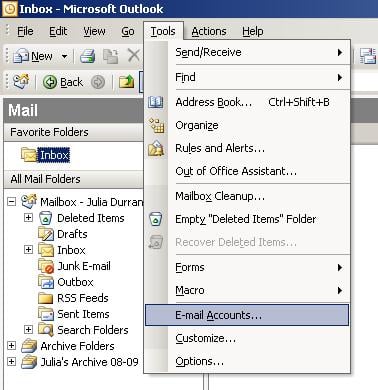
1Launch Outlook 2002/2003
-
2Select Tools from the top menu bar and then E-mail Accounts
-
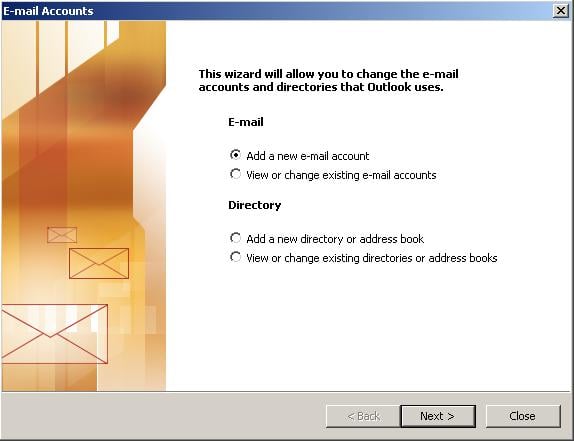
3On the pop-up screen, select Add a new email account then click Next
-
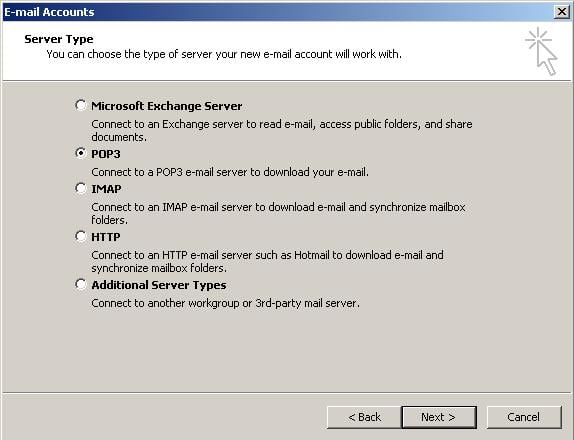
4Under Server Type, select POP3 or IMAP and then click Next
-
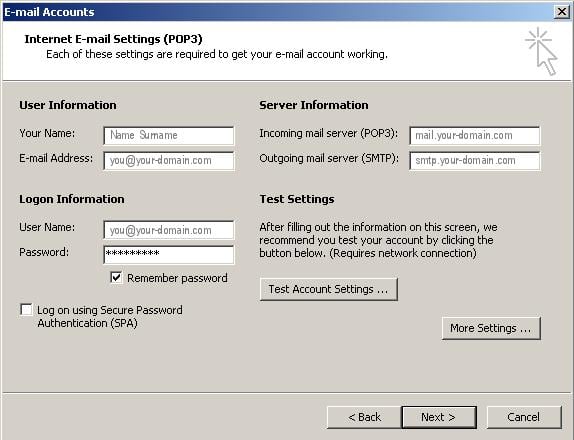
5Enter the relevant details under User, Server and Logon Information. Check that your username is your full email address and, under Server Information, make sure to use the prefix pop. and smtp. before your domain name
-
6Once complete, click More Settings
-
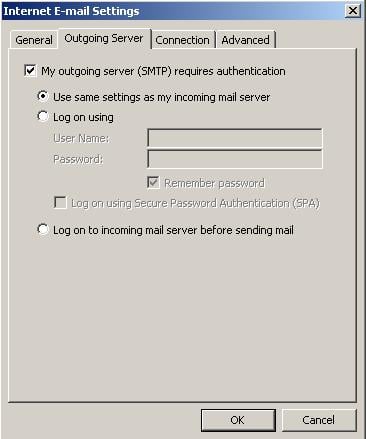
7On the pop-up, select the Outgoing Server tab
-
8Ensure that the My outgoing server (SMTP) requires authentication checkbox is selected, as well as Use same setting as my incoming mail server
-
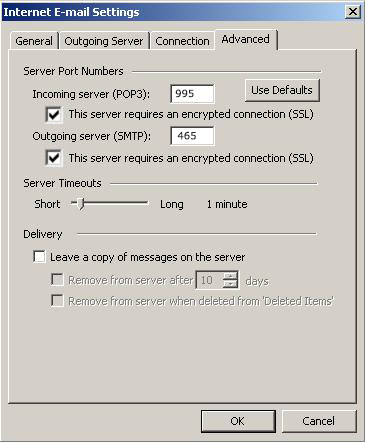
9Select the Advanced tab
-
10The Incoming Server ports: POP is 995 or IMAP is 993
-
11Set the Outgoing Server (SMTP) port to 465
-
12This server requires an encrypted connection (SSL) is ticked
-
13Click OK at the bottom of the screen.
-
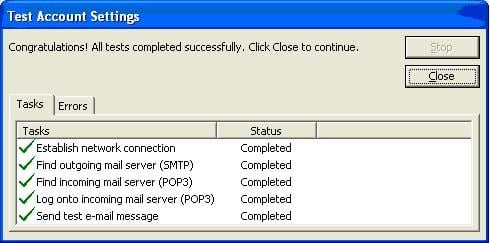
14Click Test Account Settings to check if your details are correct
-
15Click Close, then Next and Finish
-
16Your Outlook mail program should now be set up to send and receive mail
Email still not working? Read our Troubleshooting Guide

