


How to change your SiteBuilder design template
Xneelo’s SiteBuilder provides a selection of regularly updated professionally created design templates for your website. You can change the look of your website at any time by switching to a different design template without losing your content.
-
Change your SiteBuilder design template via the xneelo Control Panel
-
1
-
2Select a Product (e.g. Web Hosting) from the side menu.
-
3Click on the domain name.
-
4Scroll down to Optional extras and select SiteBuilder.
-
5Select Launch SiteBuilder.
-
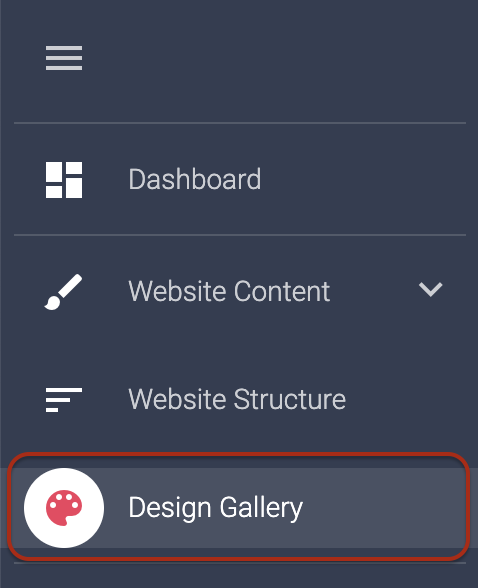
6Select Design Gallery from the navigation bar on the left.
-
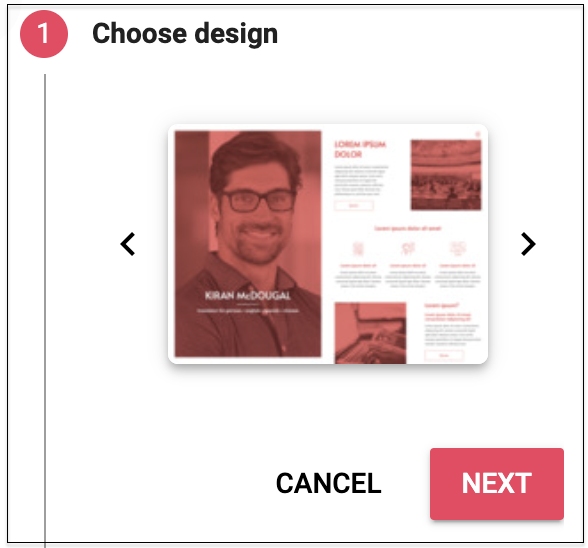
7Browse through the design templates and click Preview to view the template in greater detail.
-
8Select Adapt Design to display the design in all responsive views for various devices and screen orientations and show accurately crafted responsive layouts. Select Adapt Design again to return to the menu.

-
9If you would like to implement this design, select Next.
-
10Try your content within the preview before you apply any design changes to your site. Select the applicable checkboxes and click Next.
-
11Select this design for your website with the chosen settings by selecting Apply. Please note that this change cannot be undone.
-
12To see how the design will work before publishing your website with the new design, select Preview on the top right-hand corner and resize your browser window to see how the screen design adjusts as you resize your browser.
-
13If you’re happy with what you see, select Publish on the top right-hand side.

-
You may mark your favorite designs and save them after creating the initial website. All favorites added by a user are available in the design gallery and can be changed anytime without losing the content.

