


How to manually install WordPress via konsoleH
If you are using our new Control Panel, refer to this article.
Make the switch and discover a simpler, more secure way to manage your hosting.
Our WordPress AppInstaller is a quick and convenient way to install the latest version of WordPress to a hosting account. However, in some cases, you may prefer to manually install WordPress.
Note: This guide applies to installations on a main hosting account (e.g. Basic, Master). If you are installing WordPress on a sub- or multiple domain, please refer to the following guide:
How to manually install WordPress on a sub- or Multiple domain
Requirements
- Access to your web hosting account via FTP (we recommend FileZilla), including:
- Your FTP Username and Password (where to find these details)
- The Host name (your domain name or server IP address)
- A database and access details
- Your web browser of choice
Download WordPress
- Browse to WordPress.org/download and download the free WordPress software to your local computer. This will be the latest version.
- Unzip the file.
Create a Database
WordPress requires a database. This database is created via the konsoleH control panel of your hosting account.
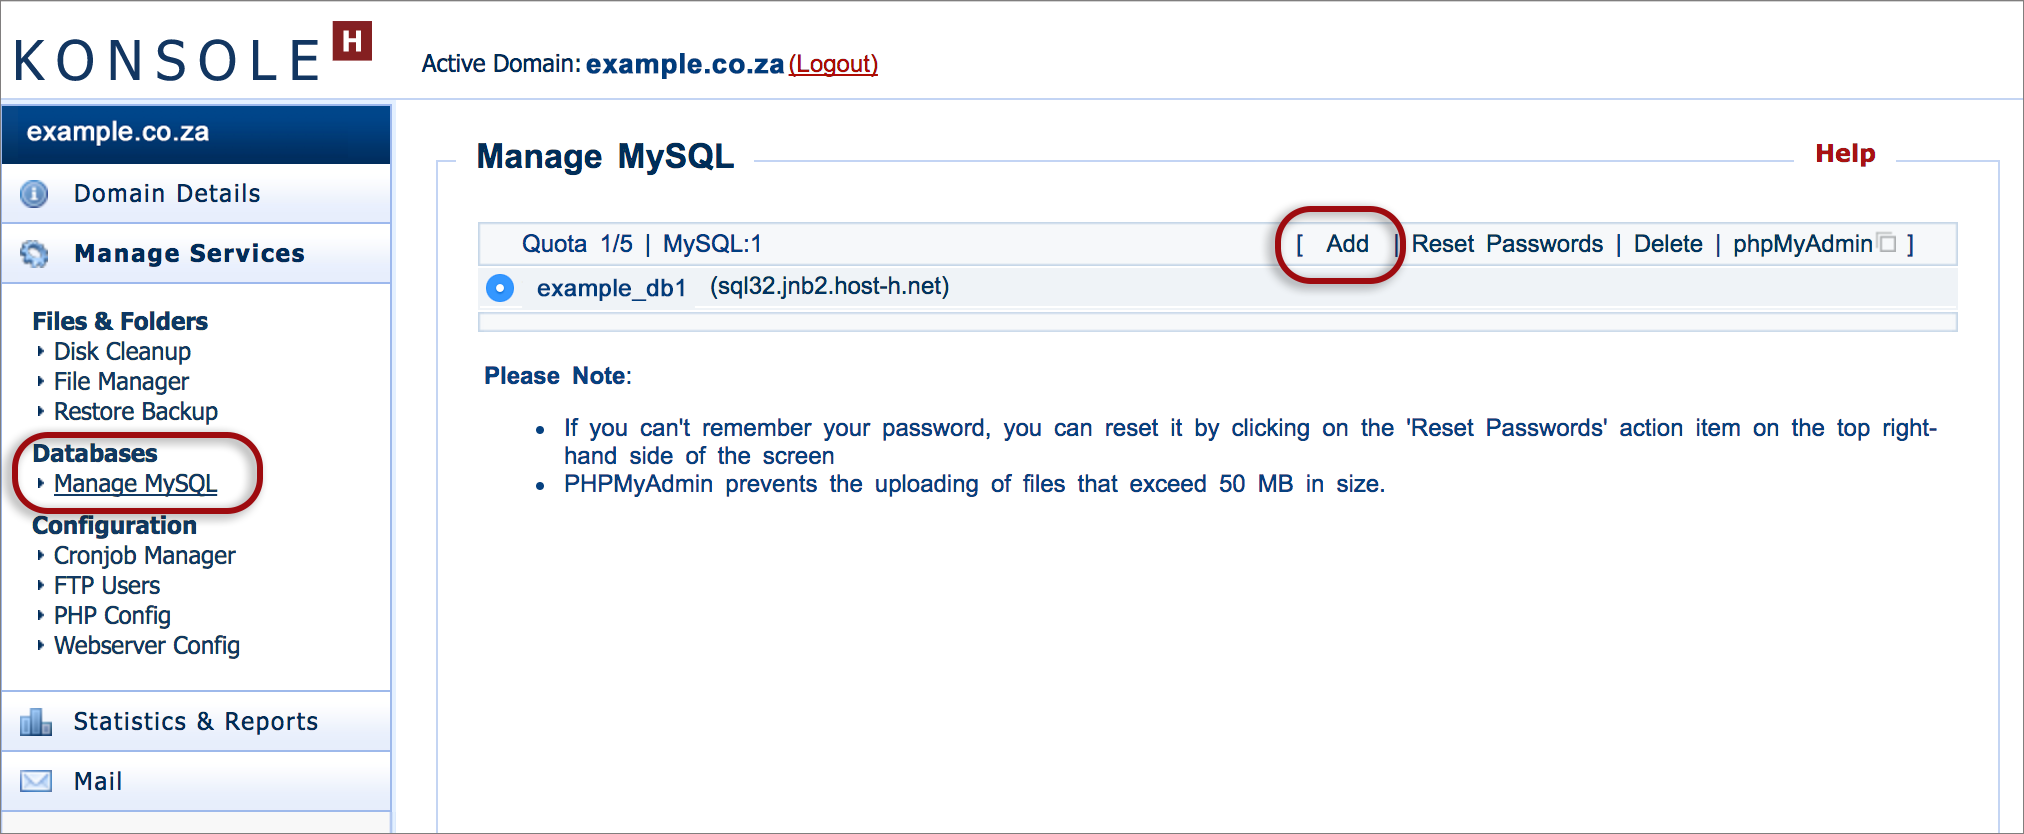
- Browse to konsoleH and log in
- Under Manage Services, select Databases > Manage MySQL
- To create a new database, click Add
- The database access information is displayed. This page allows you to customise these details if required
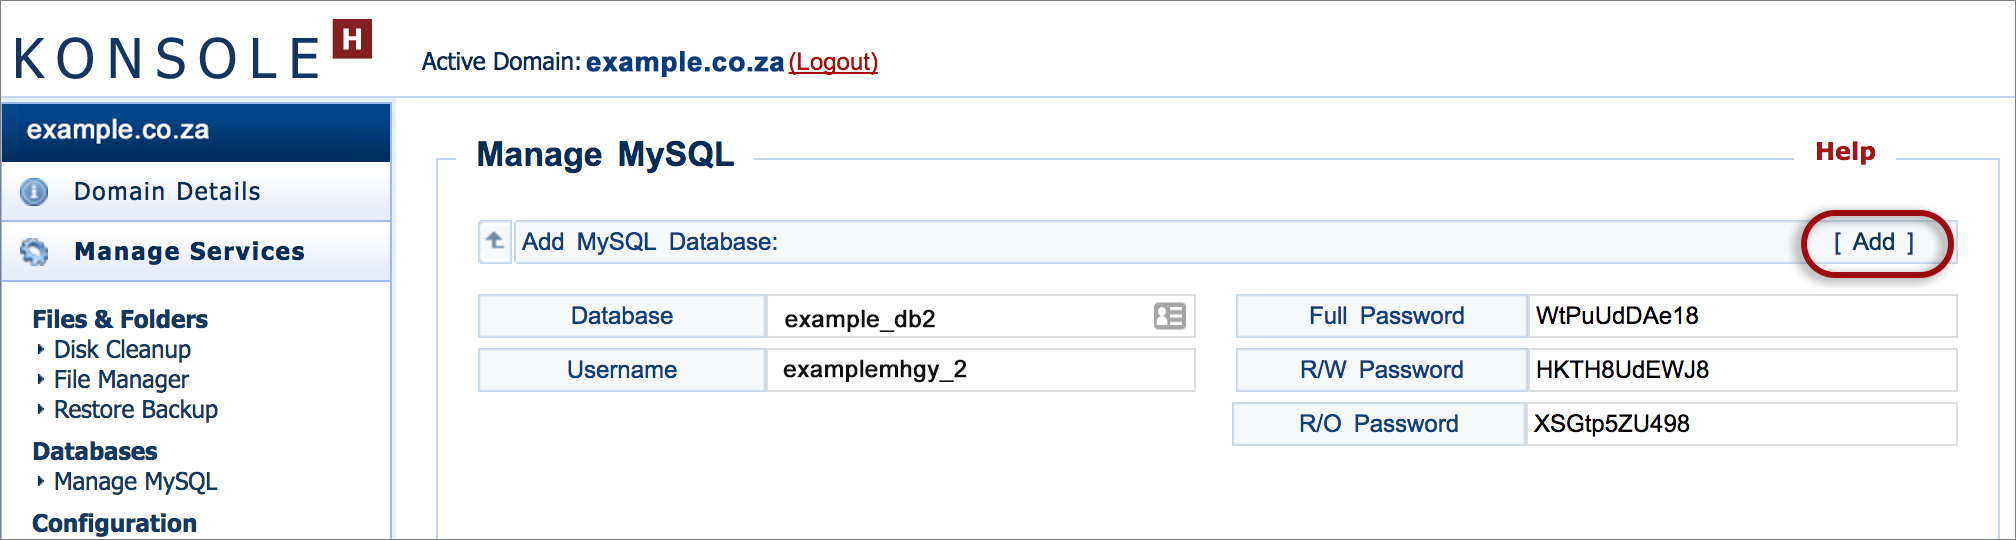
- NB: Record the Database name, Username and Full Password
- Select Add in order to confirm the details and create the database. Your new database will now be included in the list – record the Database Server name (e.g. sql32.jnb2.host-h.net)
Upload WordPress to your hosting account
The WordPress software that you previously downloaded to your local computer now needs to be uploaded to your hosting account on our web server. This is done via FTP e.g FileZilla.
Drag and drop to upload all the unzipped WordPress files (excluding the WordPress directory itself) from your local computer (left pane) into the public_html directory on the web server (right pane).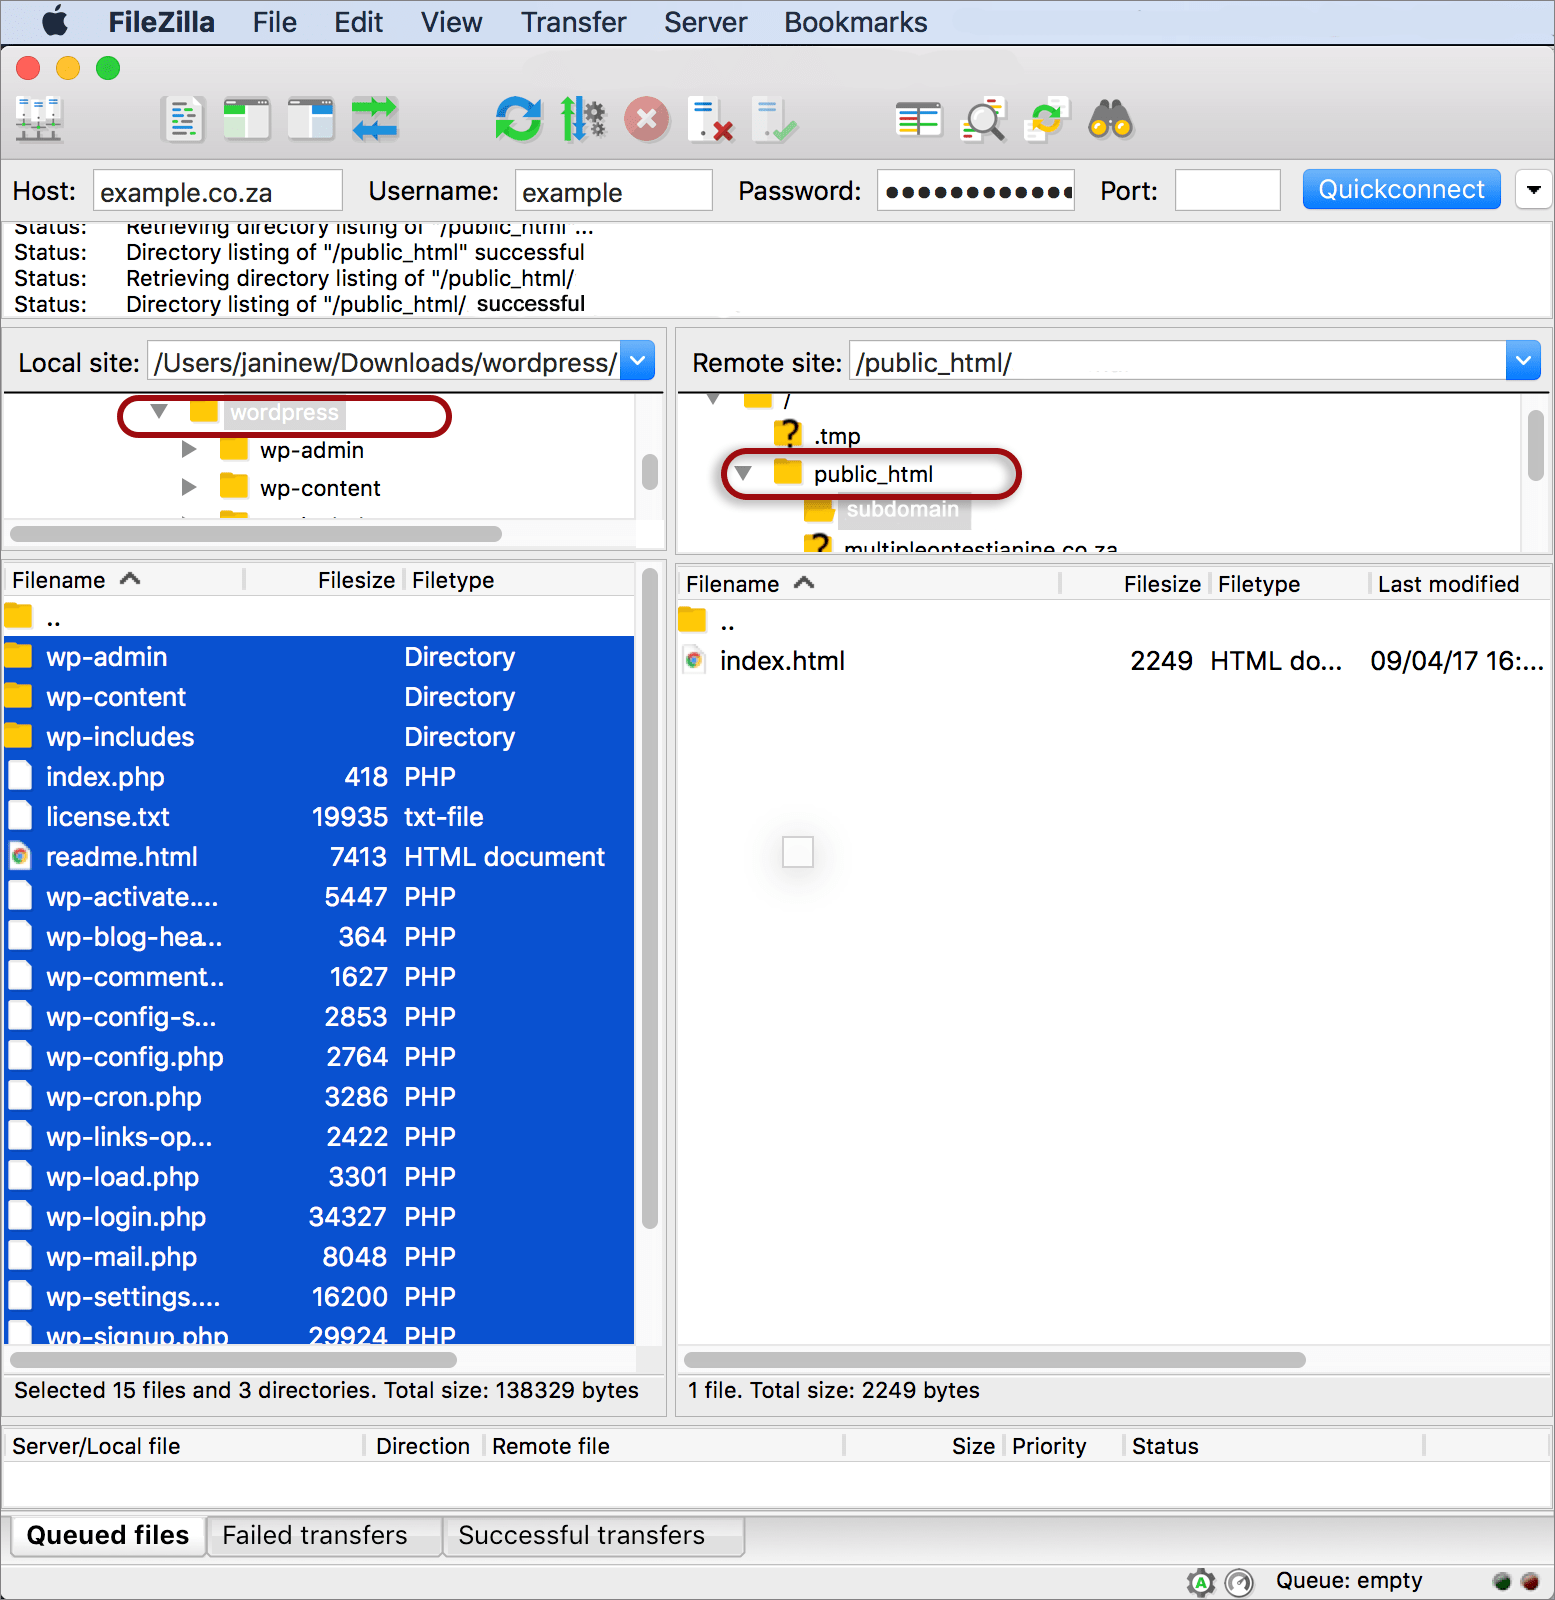
Run the Install script
Run the WordPress installation script by accessing the URL in a web browser:
- Browse to your domain name
- Allow WordPress to try and create a wp-config.php file by providing your database access details when prompted. If you get an ‘error establishing a database connection’ message despite using the correct details, see Configure the wp-config.php file for help. Click Submit

- Information needed: Enter all the relevant information to give you Admin access to your WordPress installation. Note all this information can be changed later.
- Click Install WordPress
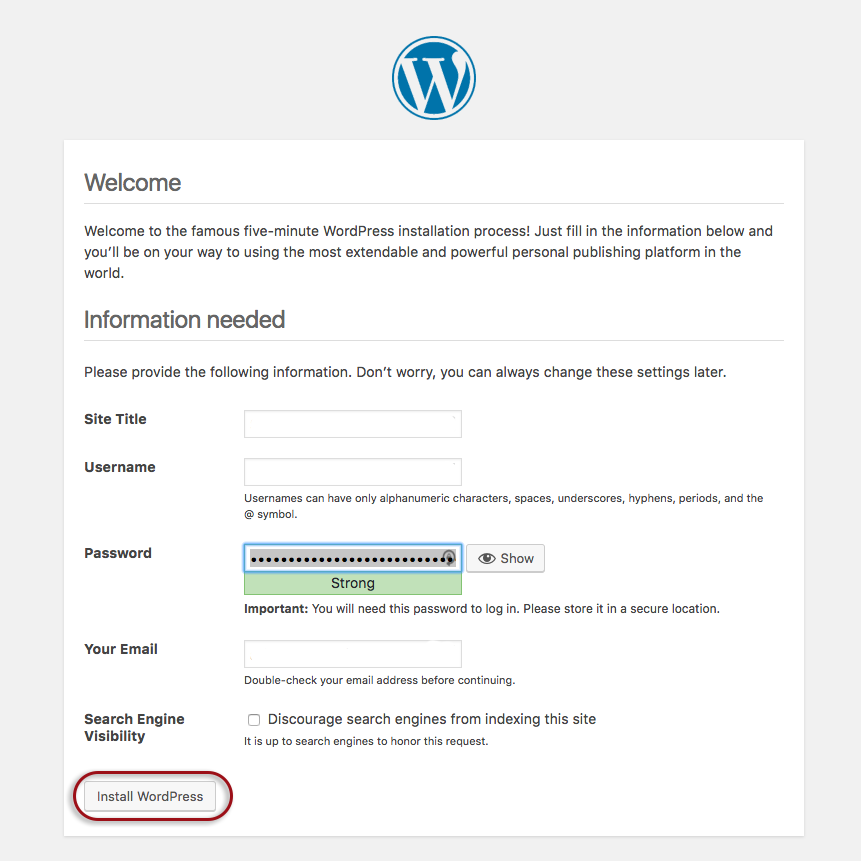
- If your installation is successful, a login prompt will be displayed
For assistance with troubleshooting WordPress installation or general problems, see WordPress.org’s
FAQ Installation and FAQ Troubleshooting

The new xneelo Control Panel is here
Experience a simpler, more secure way to manage your hosting. Most features are now live and ready for you. Switch now

