How to change your WordPress username via the xneelo Control Panel

The information in this article is related to the new xneelo Control Panel.
If you are still using konsoleH, refer to this article.

The default WordPress username is admin. Keeping this standard username makes it easier for hackers to gain access to your site. We strongly recommend that you change your username to a unique administrator name, making it harder for hackers to gain entry to your WordPress admin area.

You can change your WordPress username in the xneelo Control Panel or in WordPress.


  • Change your WordPress username in the Control Panel

    1. 1
    2. 2
      Select a Product (e.g. Web Hosting) from the side menu.
    3. 3
      Search for and select the domain name.
    4. 4
      Under Hosting tools, select Manage MySQL.
    5. 5
      Click on the 3 dots menu to the right of the relevant database.
    6. 6
      Select phpMyAdmin. This will open another tab on your browser. The phpMyAdmin tool allows you to administer your database.
    7. 7
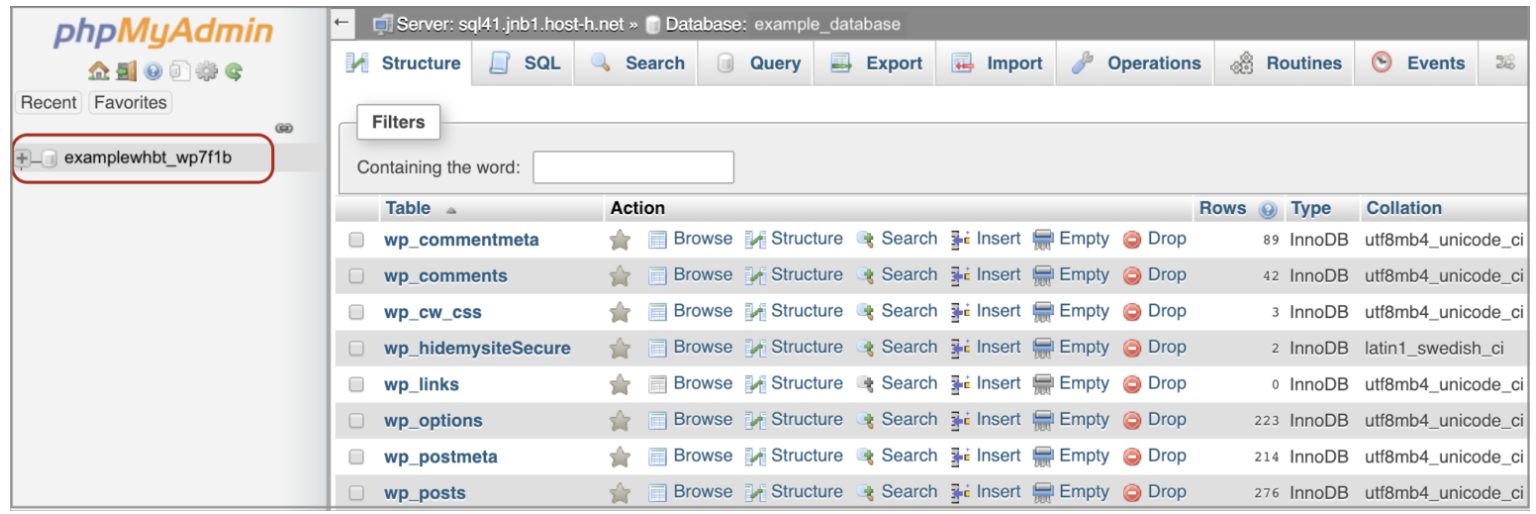
      Click on your database name on the left-hand side. A list of all the tables in your database will display.
    8. 8
      Select wp_users.
    9. 9
      You should now see a table of all your WordPress users. Click Edit next to the Admin user entry to change the username for the specific administrator.
    10. 10
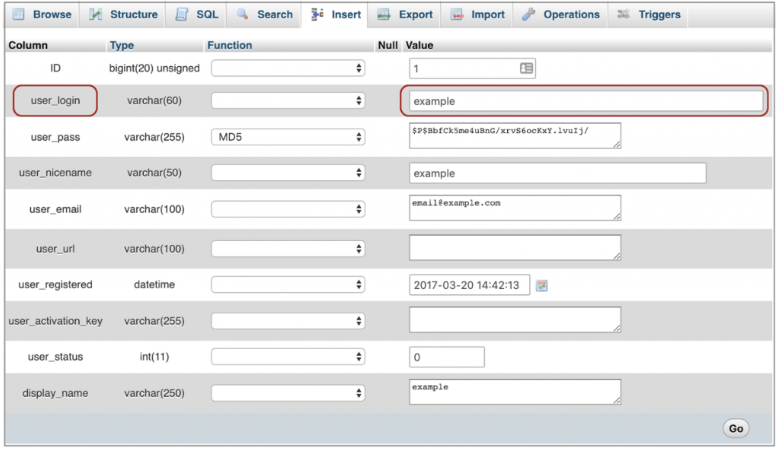
      Update the username in the user_login field as desired. user login
    11. 11
      Select Go to save the changes. You have now successfully changed your WordPress username.


  • Change your WordPress username in WordPress

    1. 1
      Browse to WordPress and log in.                                                                                                     
    2. 2
      From the menu on the left-hand side, select Users. A list of all of your Users will appear.
    3. 3
      Usernames cannot be changed directly in WordPress. You are required to create a new user with a unique username to replace the default admin user. Select Add New
    4. 4
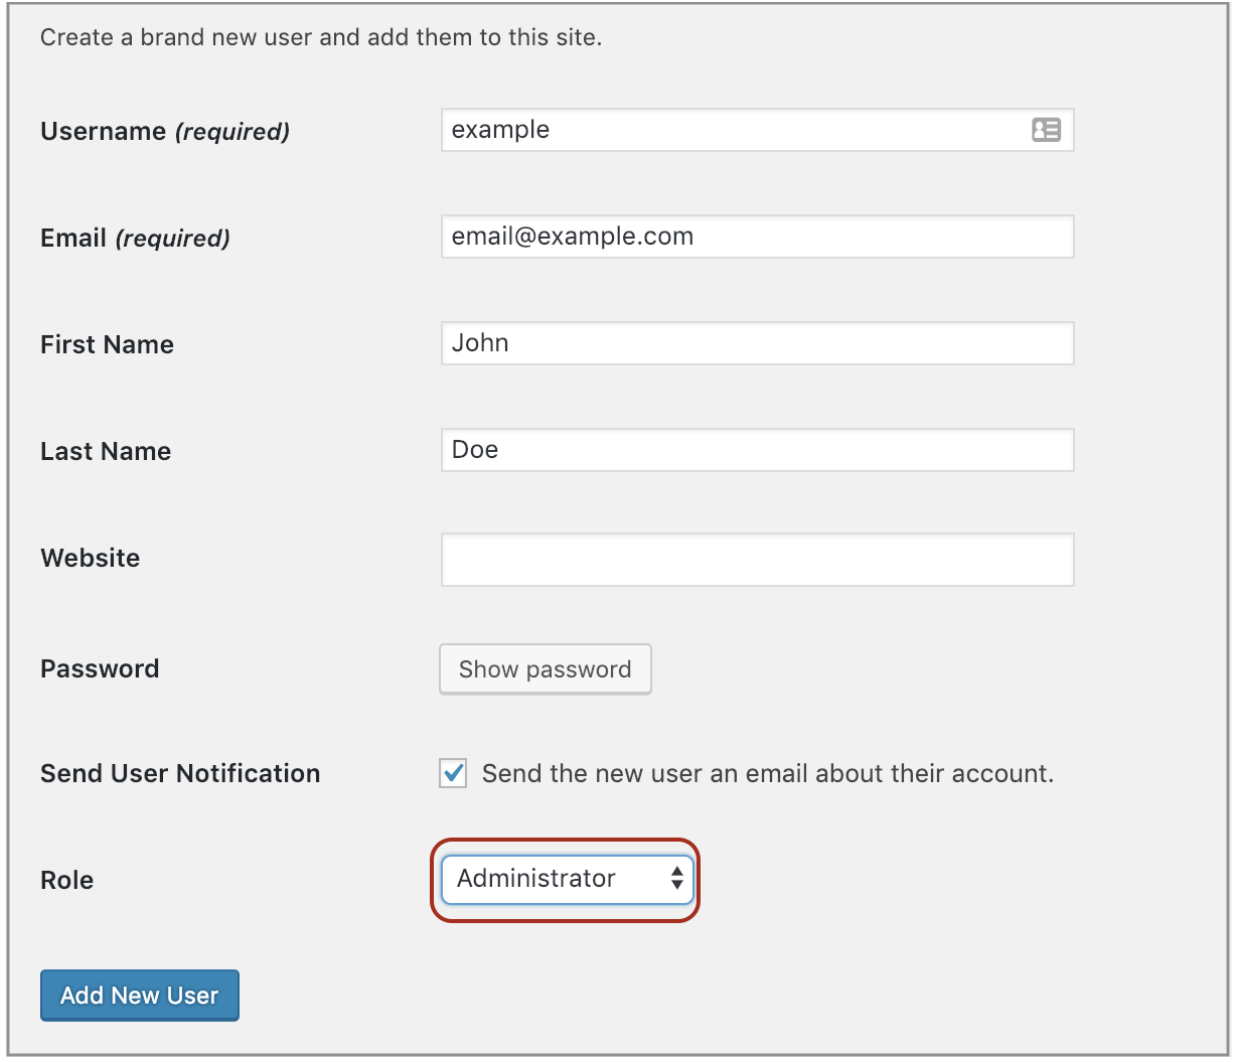
      Complete the required fields and ensure you are using a strong password.  From the Role dropdown menu, select Administrator.                                                                           
    5. 5
      Select Add New User to save your details.
    6. 6
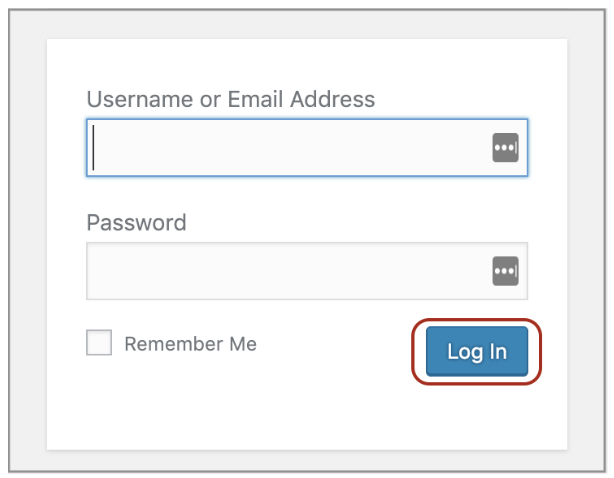
      As you are logged in as the default admin user, you will need to log out of WordPress. Log into WordPress again, this time with your new username and password (the unique user you have just created).
    7. 7
      Once logged in, select Users on the left-hand side to view all users. Select Delete under the default admin user.
    8. 8
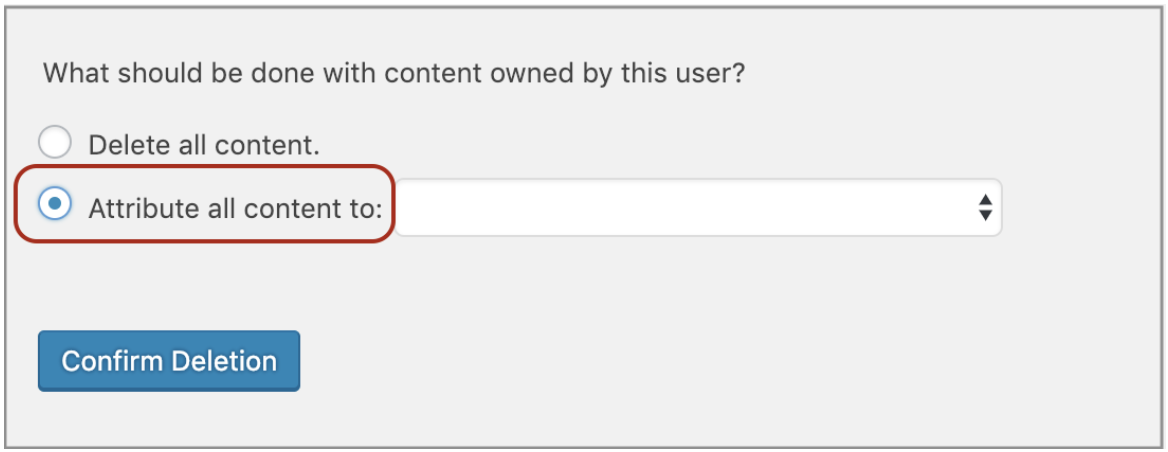
      A deletion confirmation screen will appear. Before proceeding, ensure  the radio button that reads Attribute all content to has been selected. From the dropdown menu select the newly created username.
    9. 9
      Select Confirm Deletion. You have now successfully changed your WordPress username. The default admin username will be removed and all content will be linked to the user-specified above.