


How to create email filtering rules
Email filtering is an effective way of managing your incoming email. By applying filtering rules, incoming email is automatically processed according to your own predefined criteria. Mail can be moved, deleted, replied to, flagged, etc.
Examples
- send mail from a specified address to a folder
- send mail with a specified subject to a folder
- send an autoreply to incoming mail
- delete mails which contain certain words
While it is possible to set up email filtering in your mail program (e.g. Outlook), the most effective method is to set up rules directly on the server using Webmail (even if you never use Webmail to access your mail). The rules will be effective across all your devices.
Create email filtering rules
Steps
-
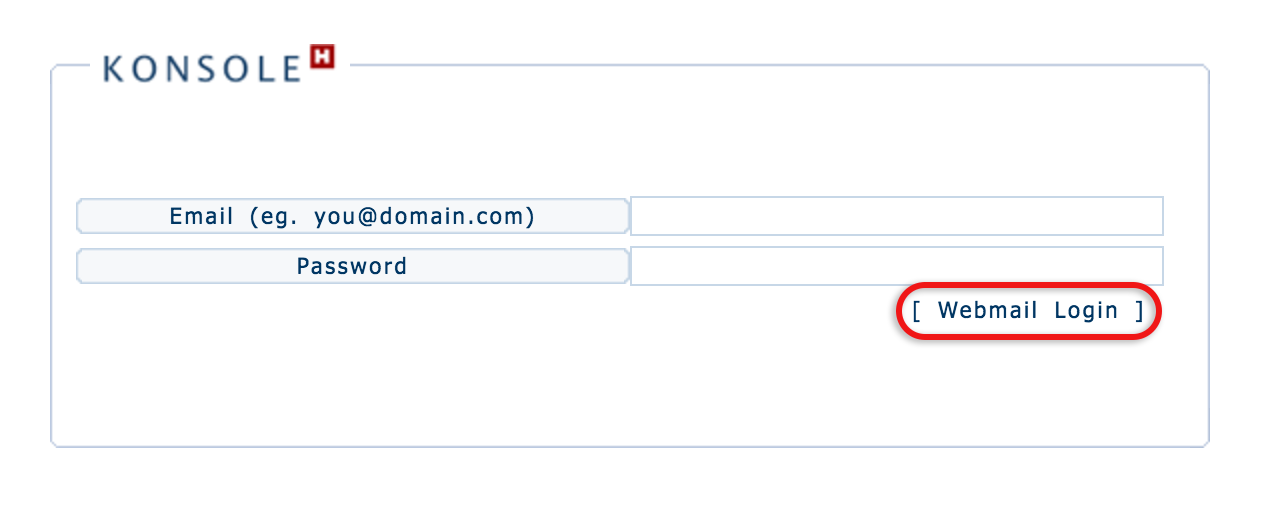
1Browse to the Webmail login page.
-
2Log in with your full email address and email password, then click [Webmail Login].
-
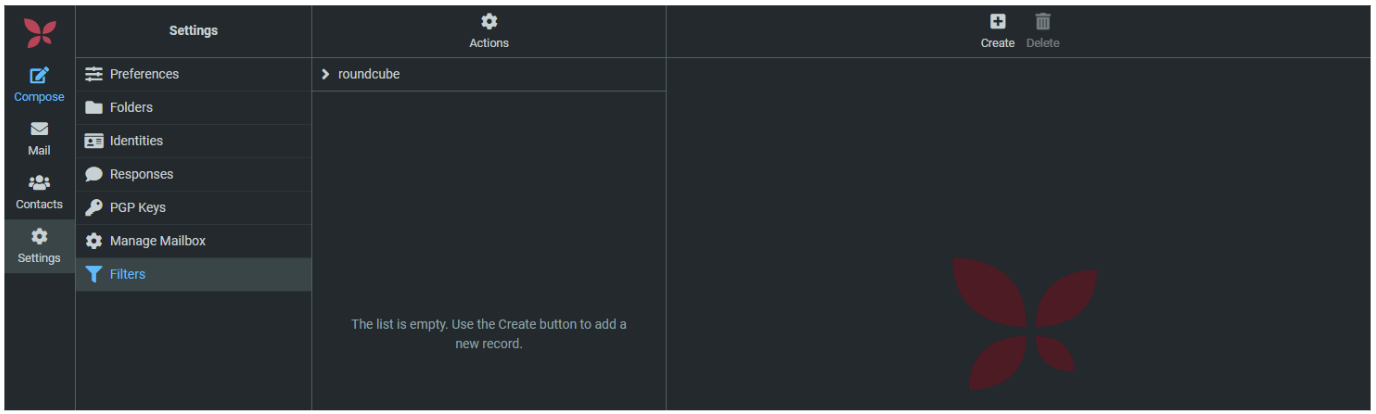
3Select Settings from the left-hand menu.
-
4Select Filters from the menu on the left.
-
5Using the roundcube (default) filter set, click the Create [+] at the top right of the screen.
-
6Create the relevant filter.
- Give the filter a name.
- Choose the incoming mail criteria using the dropdown arrows.
- Choose the actions that should be executed using the dropdown arrows.
-
7Select the Save button.
These filtering rules are applied directly to your mailbox and these filters are always active and will apply to all devices using that mailbox.
The filters will apply to all incoming mail, and not to mail that has already been received.
Only one filter set may be active at a time.

