


How to set up an autoresponder
An automated reply email (also known as an autoresponder, auto-reply or out-of-office email) can be set up in either your mail client e.g. your desktop computer, via the control panel or within Webmail. Refer to the various templates below for suggestions on what to include.
-
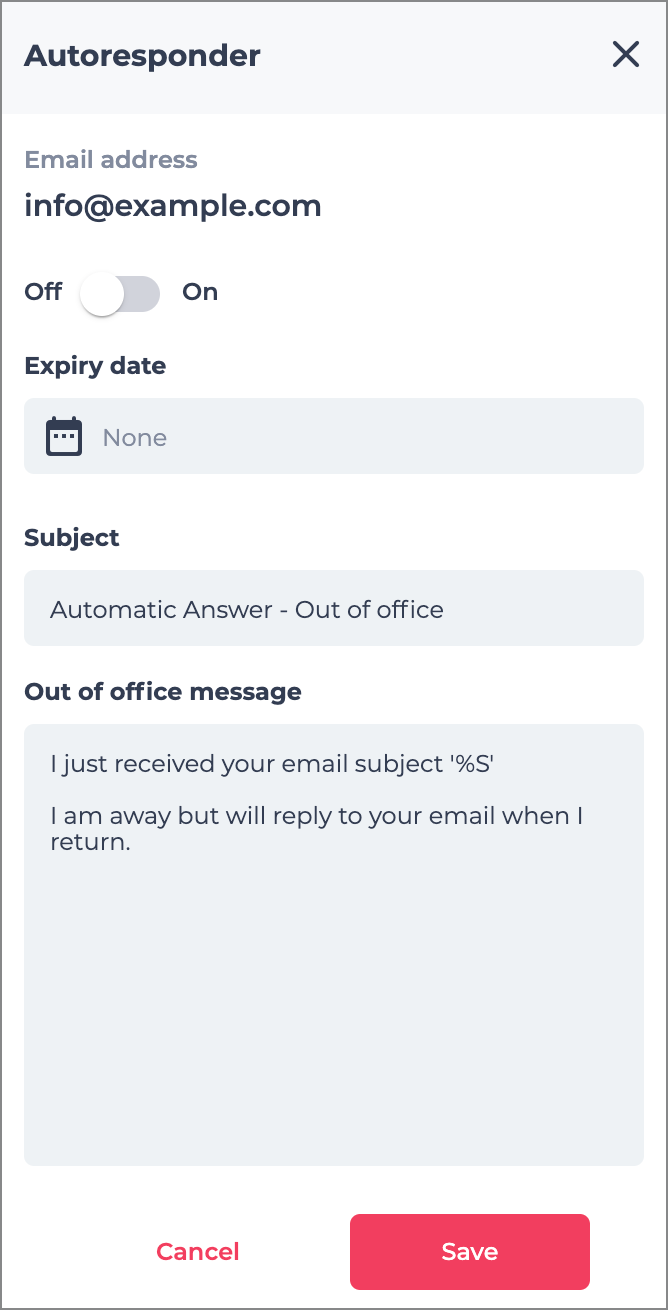
Xneelo Control Panel
Set up an Autoresponder on a mailbox via the xneelo Control Panel:
-
1Log into the xneelo Control Panel.
-
2Search for and select the domain name.
-
3Scroll down and select Mail Admin under Mail tools.
-
4Select the 3 dots menu on the right of the relevant email account and click on Autoresponder.
-
5Toggle the switch to On.
-
6Expiry Date: Select your date. The autoresponse will be deactivated by 06h00 on that date.
-
7Edit the Subject and Out of office message as required.
-
8Click Save.
-
9Your autoresponder is now active. To test it, send an email to the address and see if you receive the auto response.
-
-
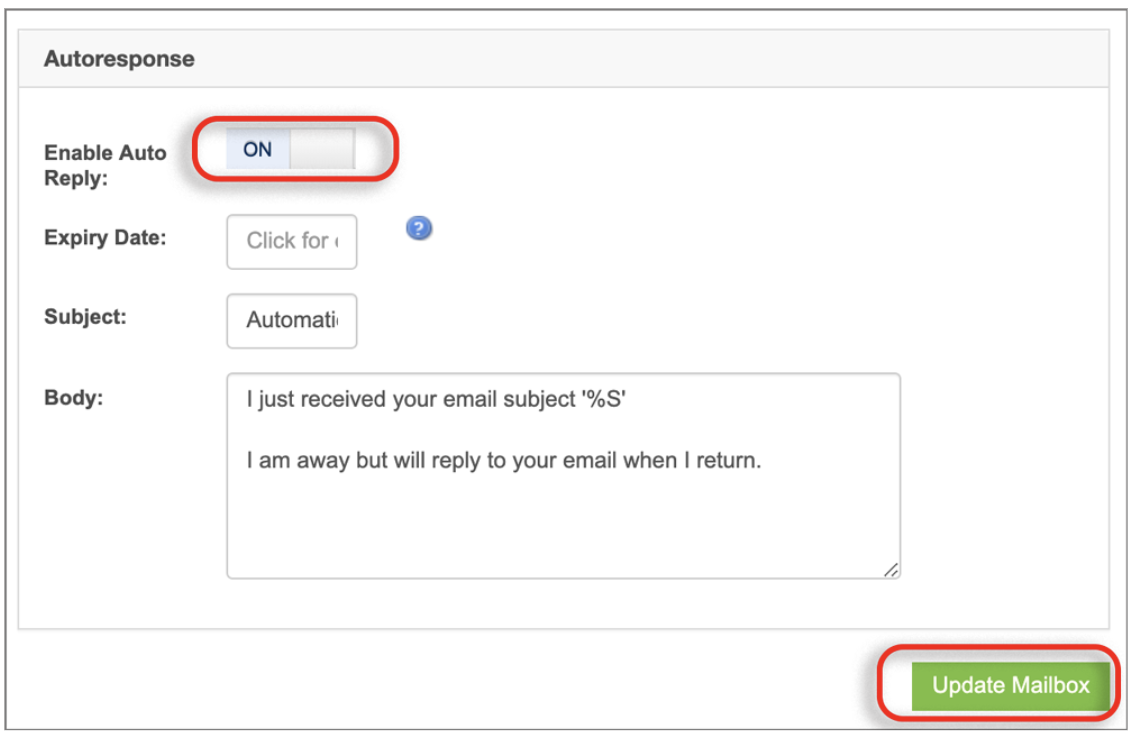
Webmail
Set up an Autoresponder on a mailbox via Webmail:
-
1Browse to Webmail.
-
2Log in with your full email address and email password (passwords are case-sensitive).
-
3Select Settings from the left-hand menu.
-
4Select Manage Mailbox.
-
5Log in with your mailbox password.
-
6Scroll down to Autoresponse and edit as needed.
-
7Toggle the OFF switch to ON.

-
8Click on Update Mailbox at the bottom of the page.
-
9Your Autoresponder is now active. To test it, send an email to the address and see if you receive the auto-response.
-
Disclaimer: If an email receives a spam score higher than the threshold set for the domain, it will automatically be delivered to the spambucket folder. This action will overrule any auto-responder or email forwarding settings.


