Set up email in OS X El Capitan
Follow this tutorial to manually set up your mail account. If your account is already set up but is giving errors, try our Troubleshooting guide.
Check your password by browsing to Webmail and trying to log in. If you aren’t able to log in, then you have the incorrect password.
Forgotten passwords can be reset via your Control Panel – you will need to get your domain or web administrator to update it for you if you don’t have Control Panel access.
Add a new email account
- Launch Mail
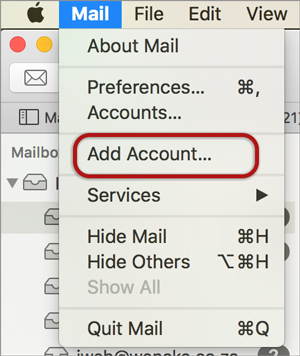
- From the toolbar at the top, select Mail and then Add Account…
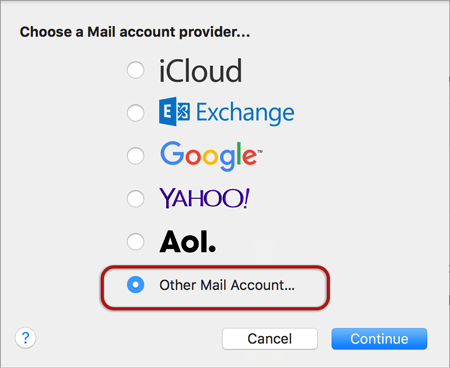
- Select Other Mail Account…

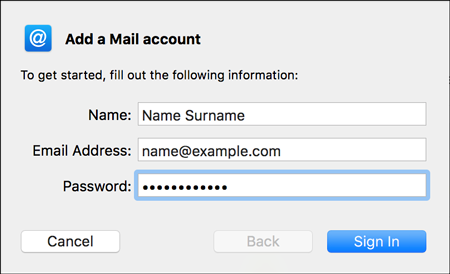
- Enter your details
- Name (which will appear in the ‘From’ field when you send emails)
- Email Address
- Password (Forgotten passwords can be reset via your control panel)
- Select Sign In

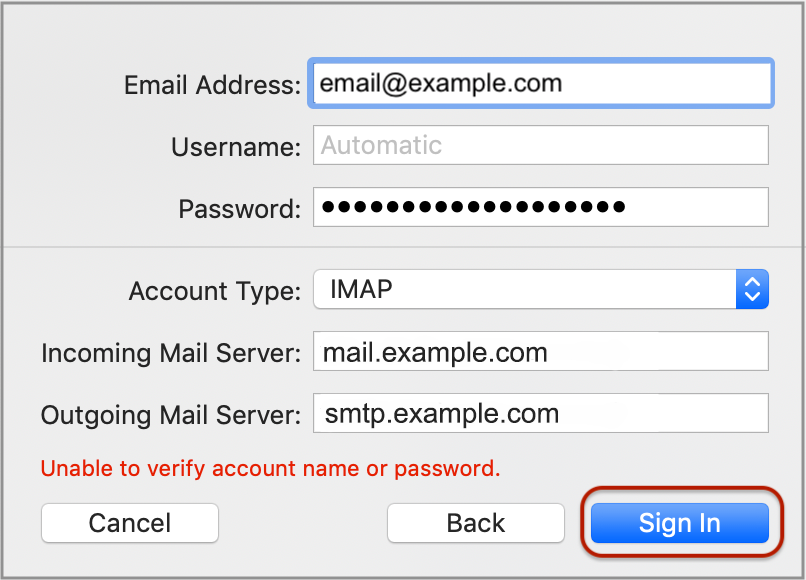
- Complete the settings as follows:
- User Name is the full email address
- Account Type is IMAP or POP according to preference (IMAP is the default)
- Incoming Mail Server has mail. before the domain name e.g. mail.example.com*
- Outgoing Mail Server has smtp. before the domain name e.g. smtp.example.com*
- Select Sign In

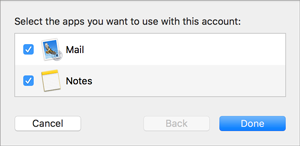
- Select any apps > Done

- From the toolbar at the top, select Mail and then Preferences…
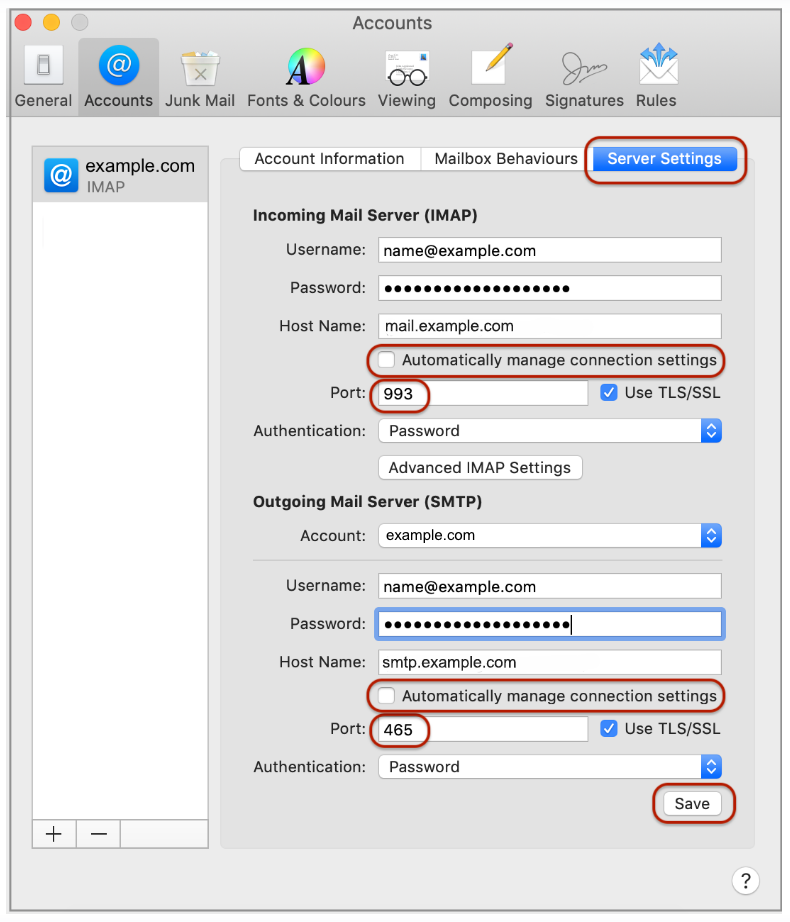
- Select Server Settings:
- Complete the Incoming Mail Server settings:
• Untick Automatically manage connection settings
• Fill in the correct Port number – Port 993 for IMAP/ Port 995 for POP
• Ensure Use SSL/TLS is ticked - Complete the Outgoing Mail Server settings:
• Untick Automatically manage connection settings
• Fill in the correct Port number – 465 for SMTP
• Ensure Use SSL/TLS is ticked

- * Note: In isolated cases mail.domain (e.g. mail.example.com) and smtp.domain won’t work. In these cases you will need to use the server name instead e.g. www34.cpt1.host-h.net. Find my server name.
- Your Mail account is now set up with SSL. You will see your new account in the list with any other mail accounts.
If you experience problems, refer to our Troubleshooting guide.


