


How to change the database password for WordPress sites via konsoleH
If you are using our new Control Panel, refer to this article.
Make the switch and discover a simpler, more secure way to manage your hosting.
WordPress makes use of a database for much of its functionality. For shared servers (Web Hosting and Volume Plan), this database lives on a specialised database server, separate from the web server that hosts your WordPress website. For Managed Servers, the database is on the same web server as the content.
If the database password is reset for security reasons, then the wp-config.php file included with your web files also needs to be updated accordingly, or else the website will break.
1. Change your database passwords via konsoleH
In this step, you will change your database password on the database server.
Note: Subdomains and Multiple Domains make use of databases from the primary/ parent hosting package, so you need to log in to the main account domain.
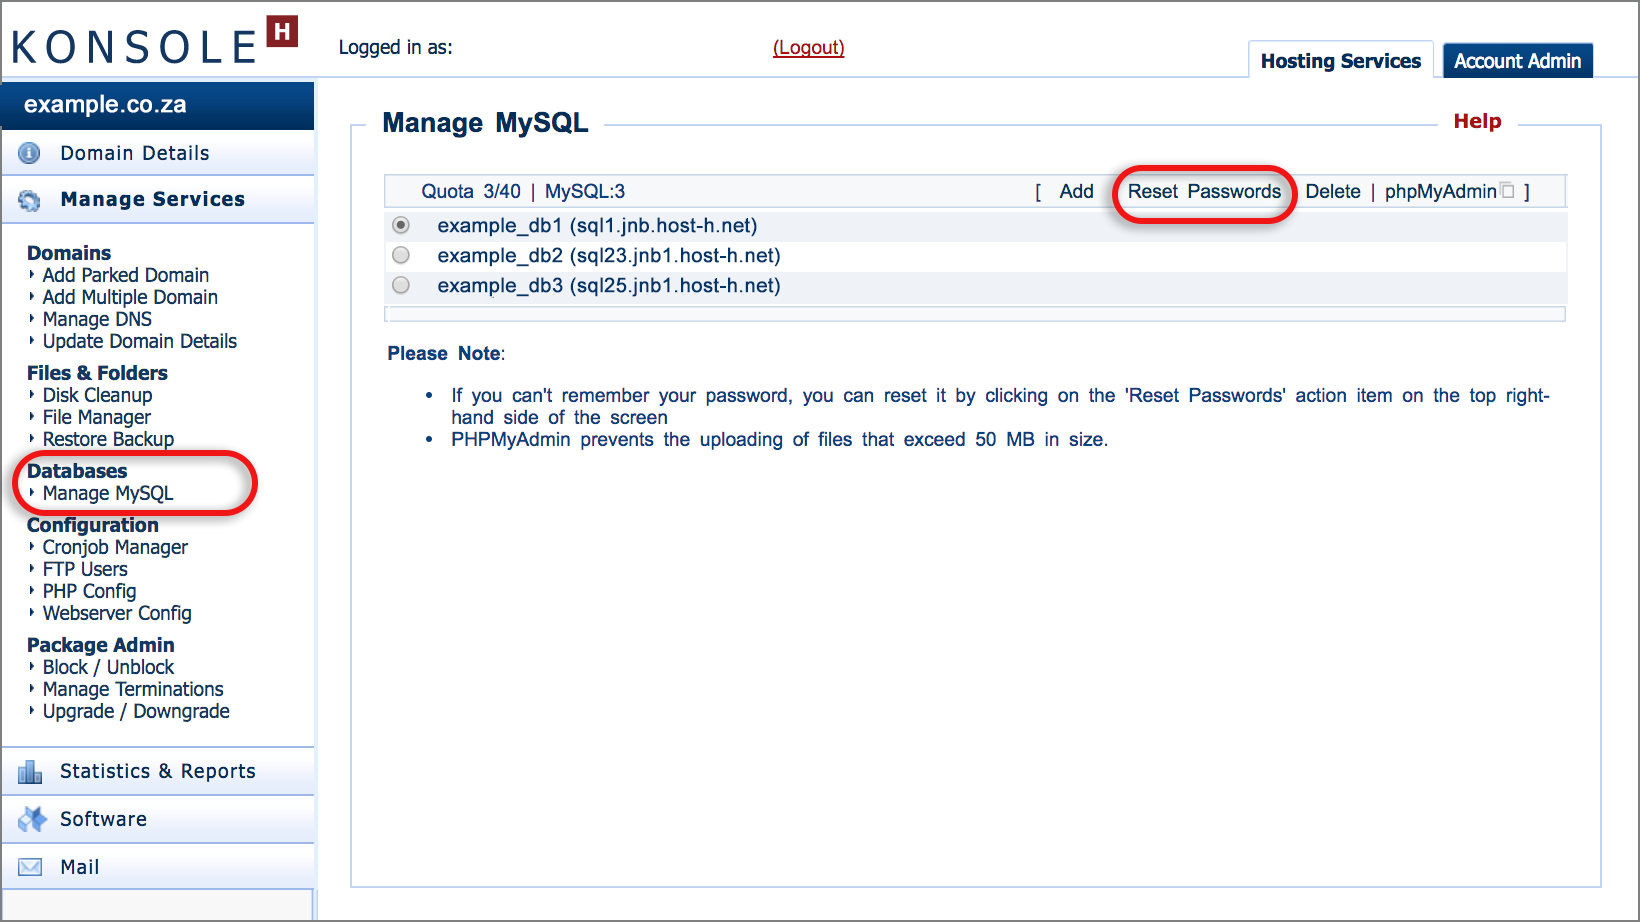
- Browse to konsoleH and log in at Admin or Domain level
- Admin level: Select or search for the applicable domain
- Select Manage Services in the left-hand menu
- Select Databases > Manage MySQL
- Select the applicable database and click Reset Passwords
- Manage MySQL
- The Full Password is the most important. It allows access to the entire database and allows you to create or delete any database information, columns or rows. The other passwords can be ignored.
- Enter your new database password(s), which can be your own choice or click Generate Password to use an auto generated, secure password.
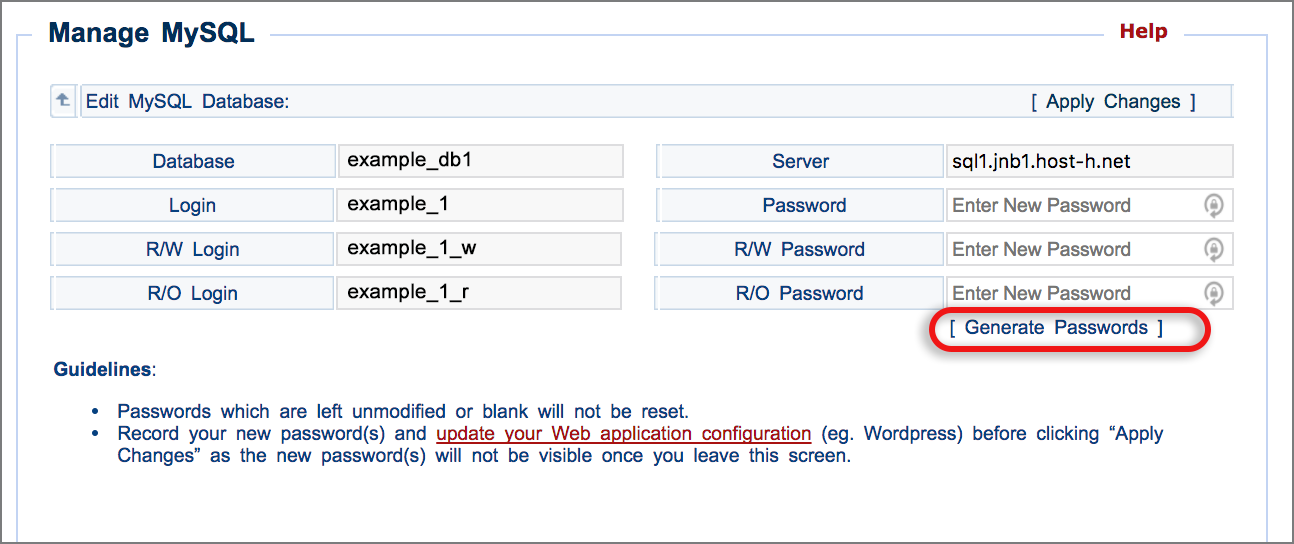
- Important: Record your new password(s) in your own secure location before clicking Apply Changes (top right)
2. Edit connection strings via File Manager:
In this step, you will update the password on your account on the webserver.
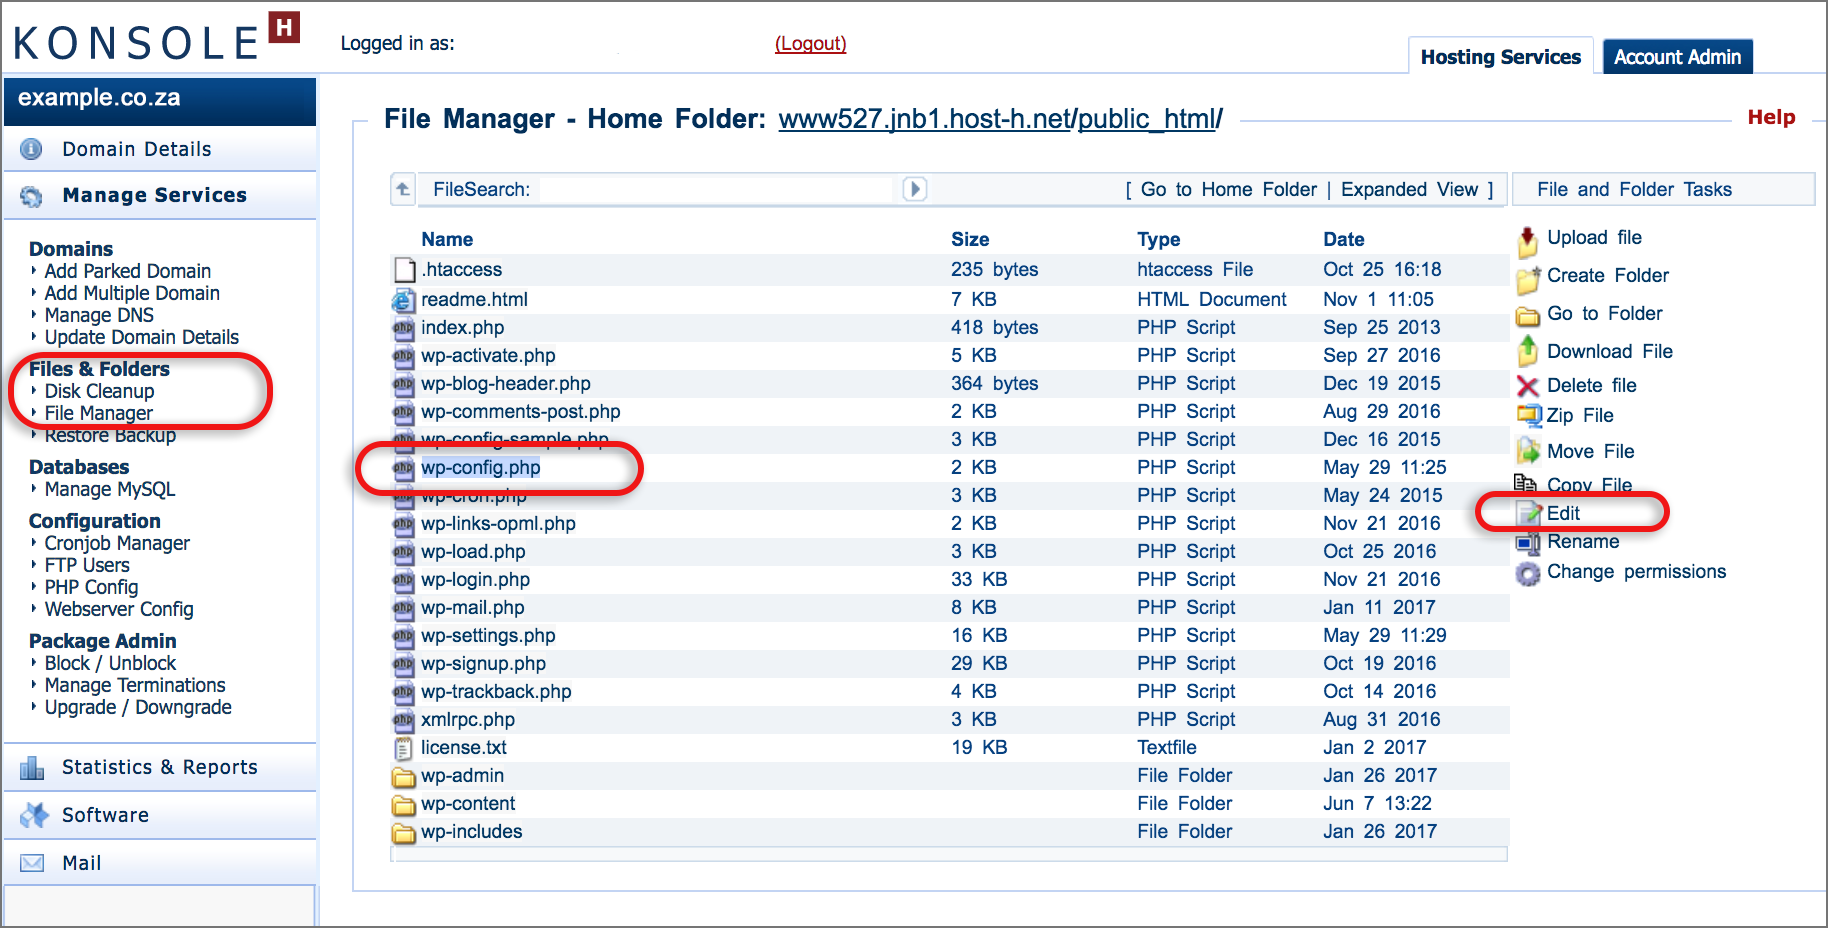
- Click Manage Services from the left-hand menu
- Select Files & Folders > File Manager
- Select the wp-config.php file and click on it
- Note: If the domain is a subdomain or Multiple Domain, you will need to access the File Manager of the main account and then find the relevant domain’s files within the public_html folder.
- Select Edit from the right hand menu
- Search for the information you wish to change, click in the text and replace, where
- DB_NAME is the database name
- DB_USER is the database login
- DB_PASSWORD is the database password
- DB_HOST is the database server name (note that for shared servers, the database does not live on the same server as the website)
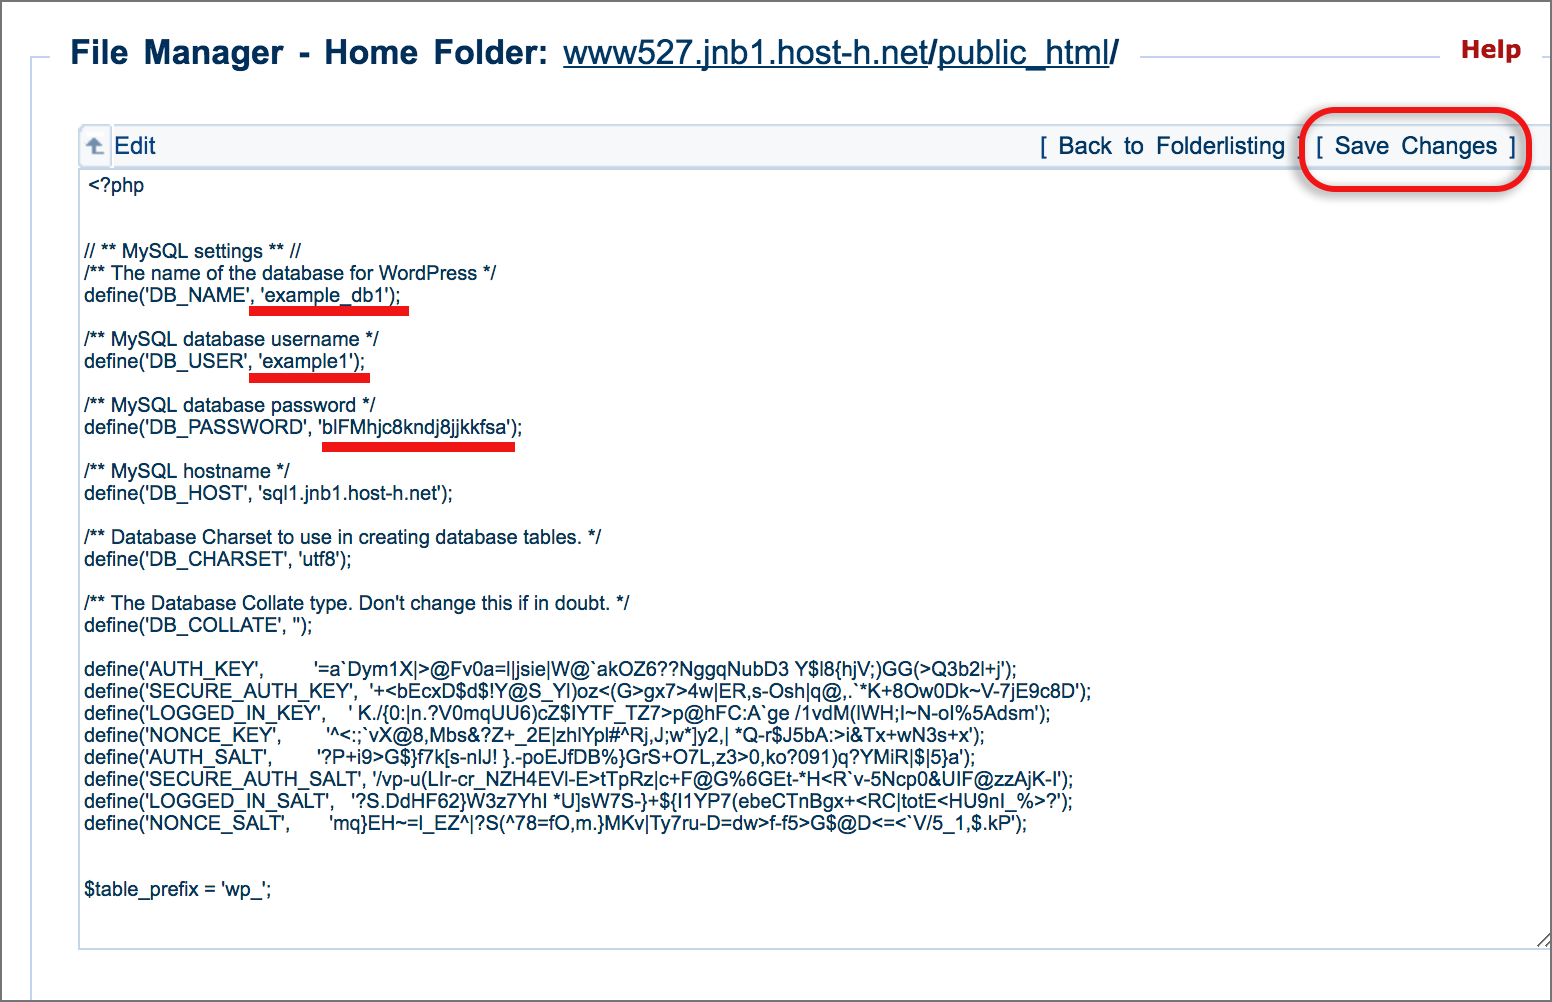
- Click Save Changes

The new xneelo Control Panel is here
Experience a simpler, more secure way to manage your hosting. Most features are now live and ready for you. Switch now

