


Self-Managed Server Remote Management security
What is the RMI or Remote Control?
The Remote Management Interface or Remote Control is a remote access and management hardware module that allows you to set up and troubleshoot your Self-Managed Server from a remote location. This feature, included with all Self-Managed products, can be used for:
- Initial server setup and troubleshooting
- Server recovery and maintenance
- Remote access to allow complete power control and software installation maintenance
Important Security recommendations
If you’re using a public IP address to access the RMI, please implement these security measures to prevent this device and IP from being used in abuse scenarios (eg: external attacks of 3rd party systems or sending spam mails via the mail sending mechanism).
The following security measures are recommended according to your relevant software:
-
Intel
Please read this article if you’re accessing your server’s RMI with a private IP address.
1. Delete unnecessary users and reset the password(s)
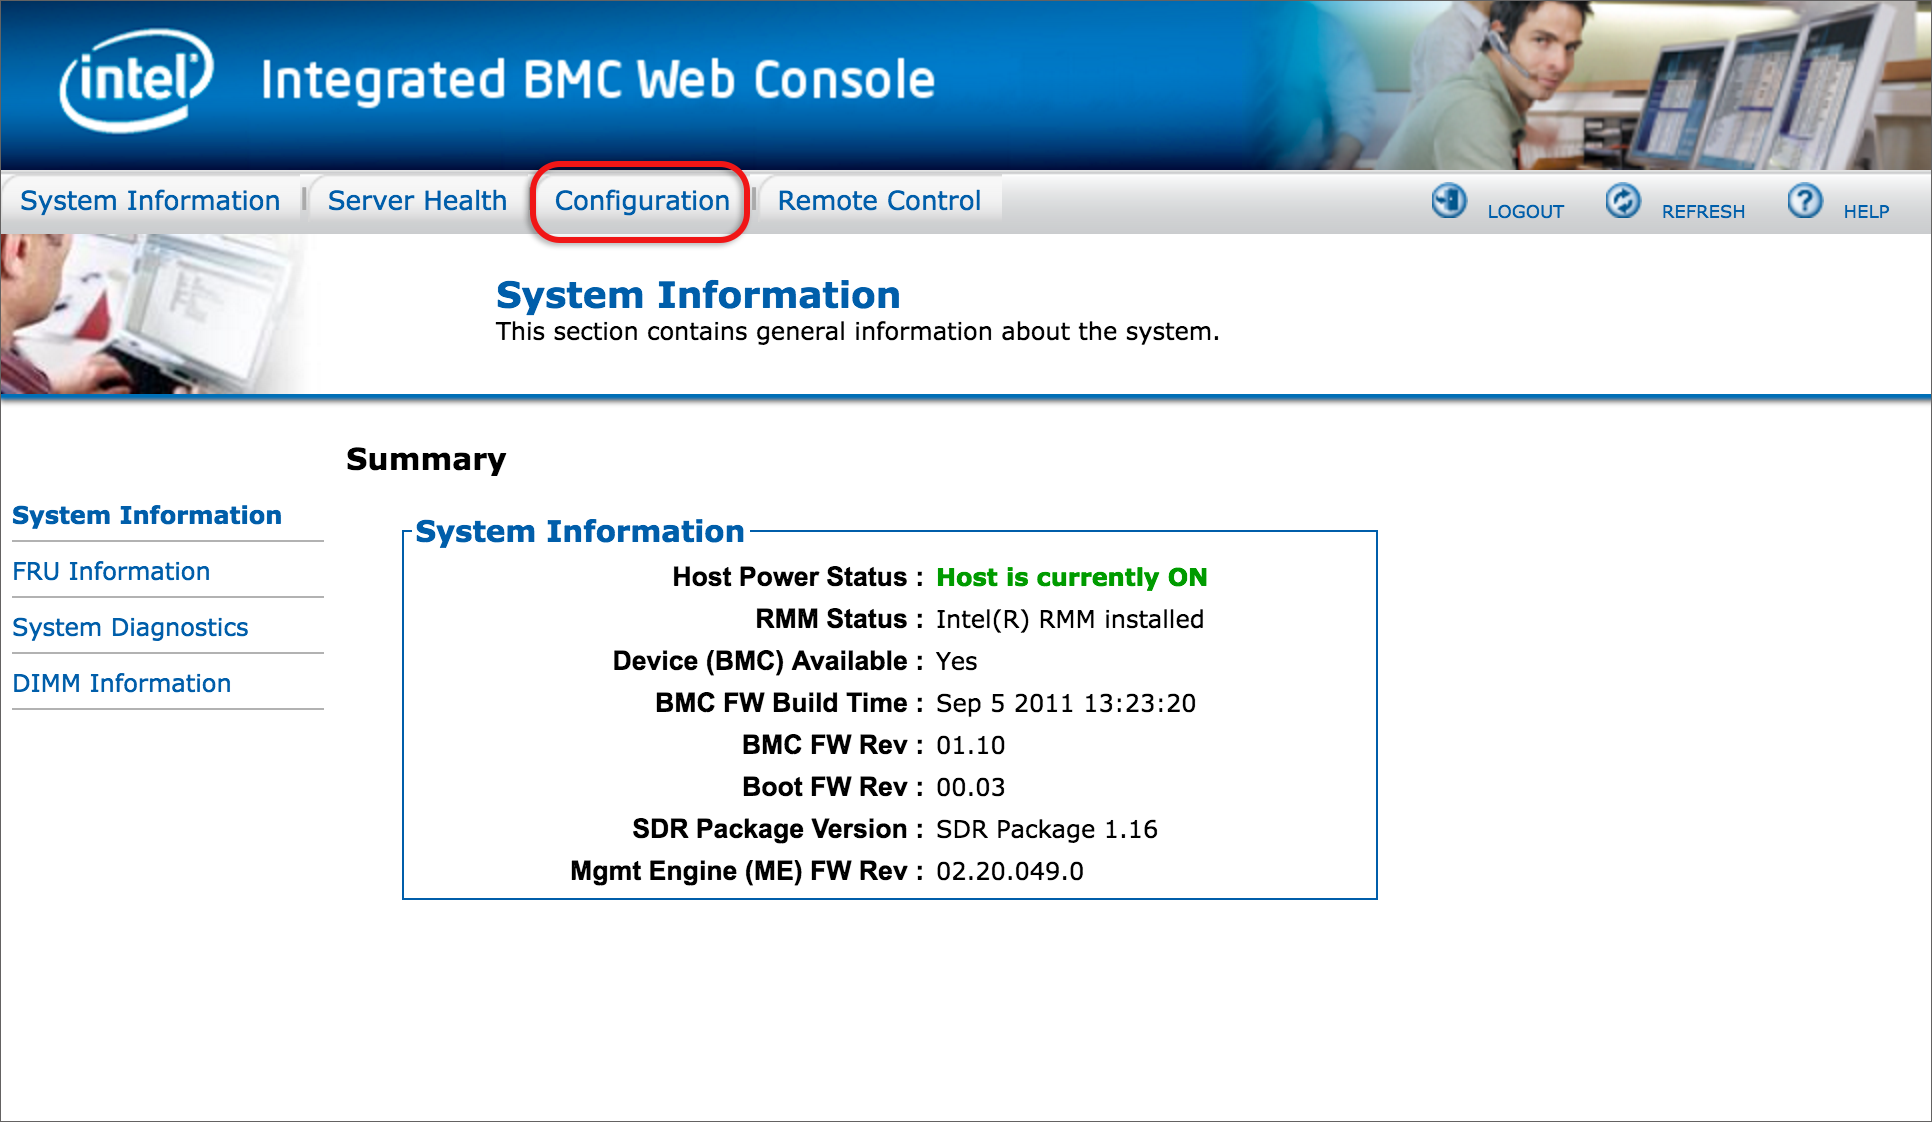
- Log in to the Remote Control
- Select the Configuration tab from the top menu
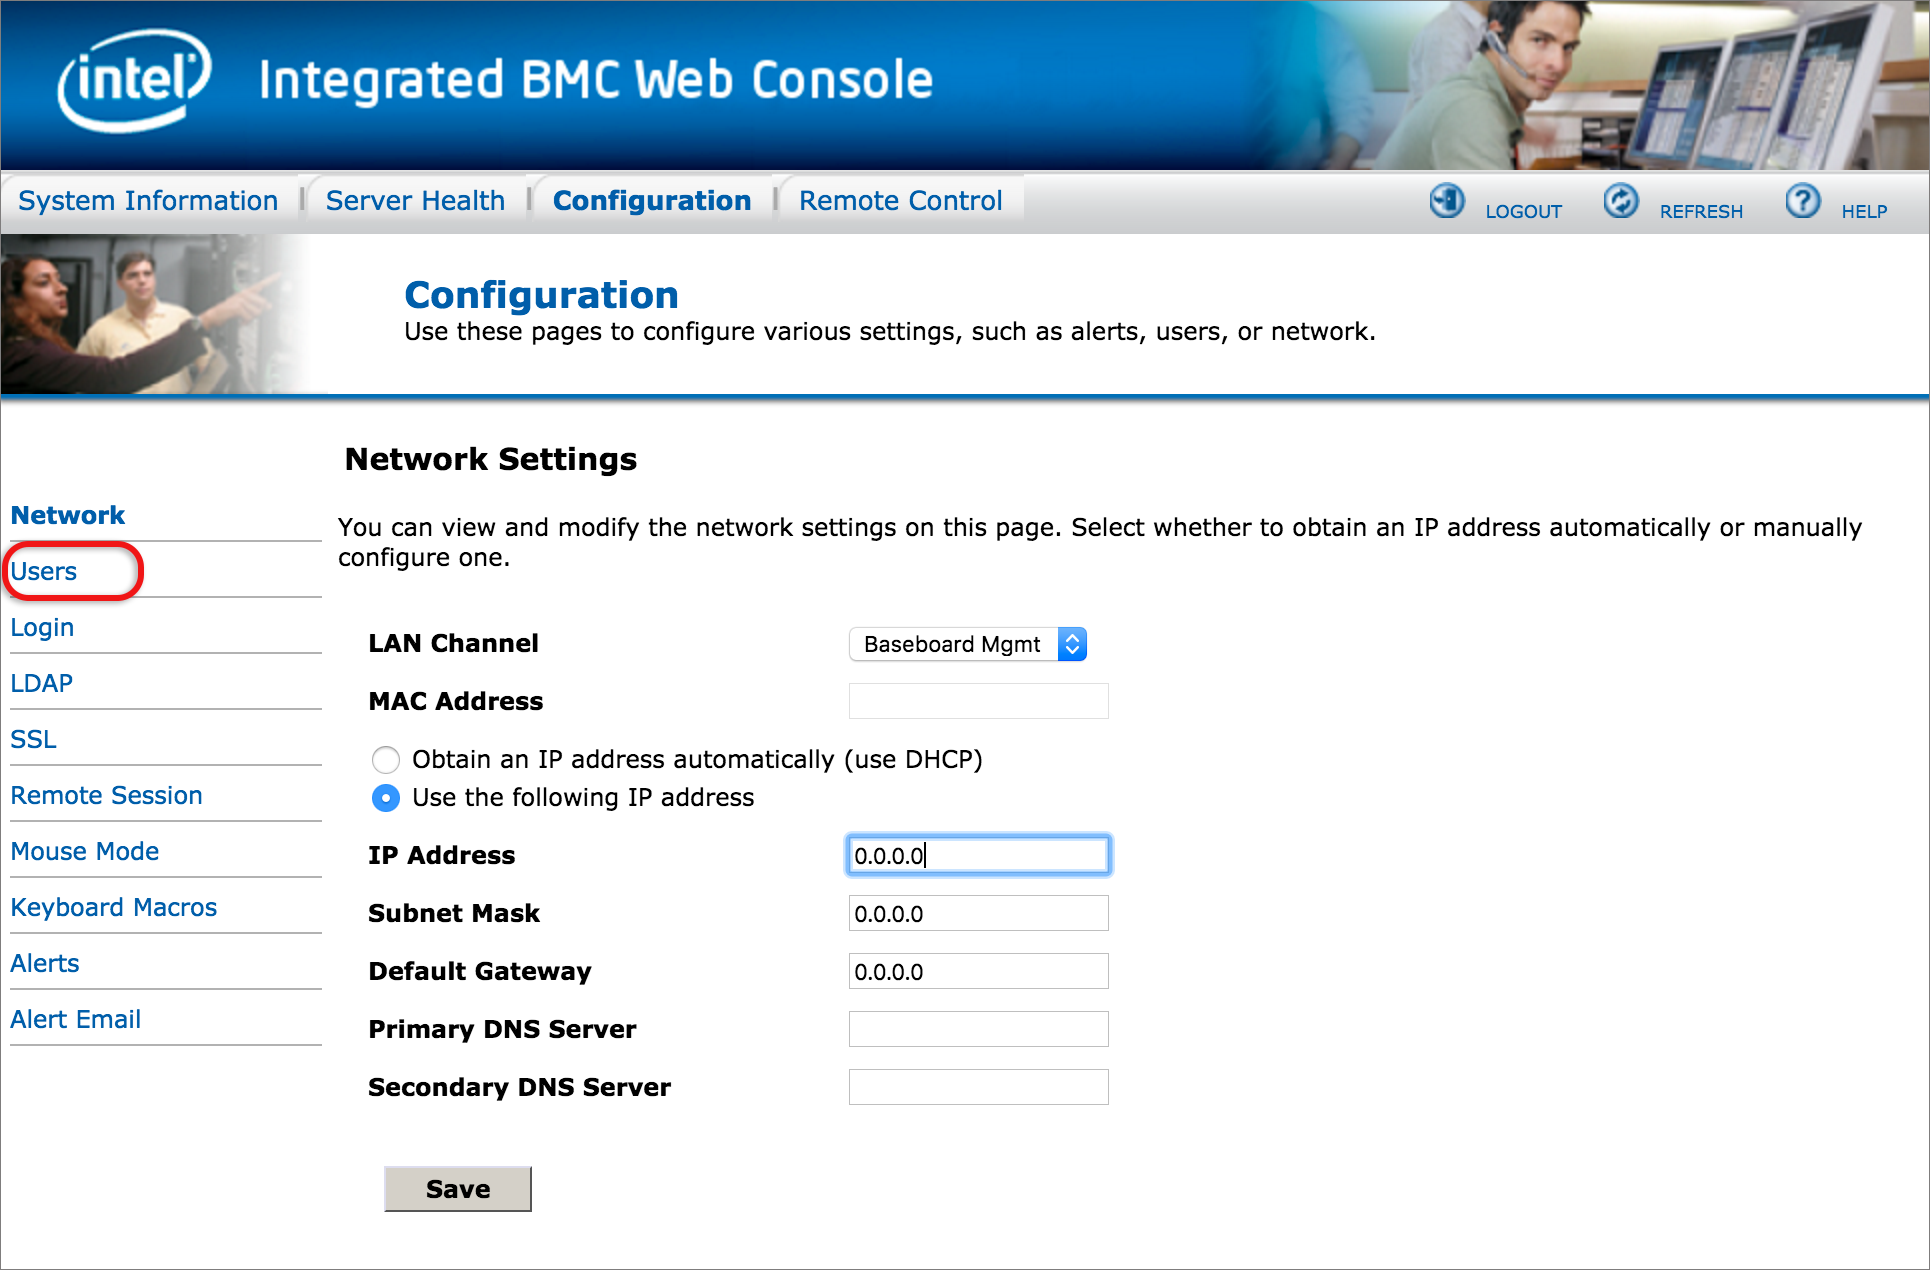
- Select Users from the left hand menu
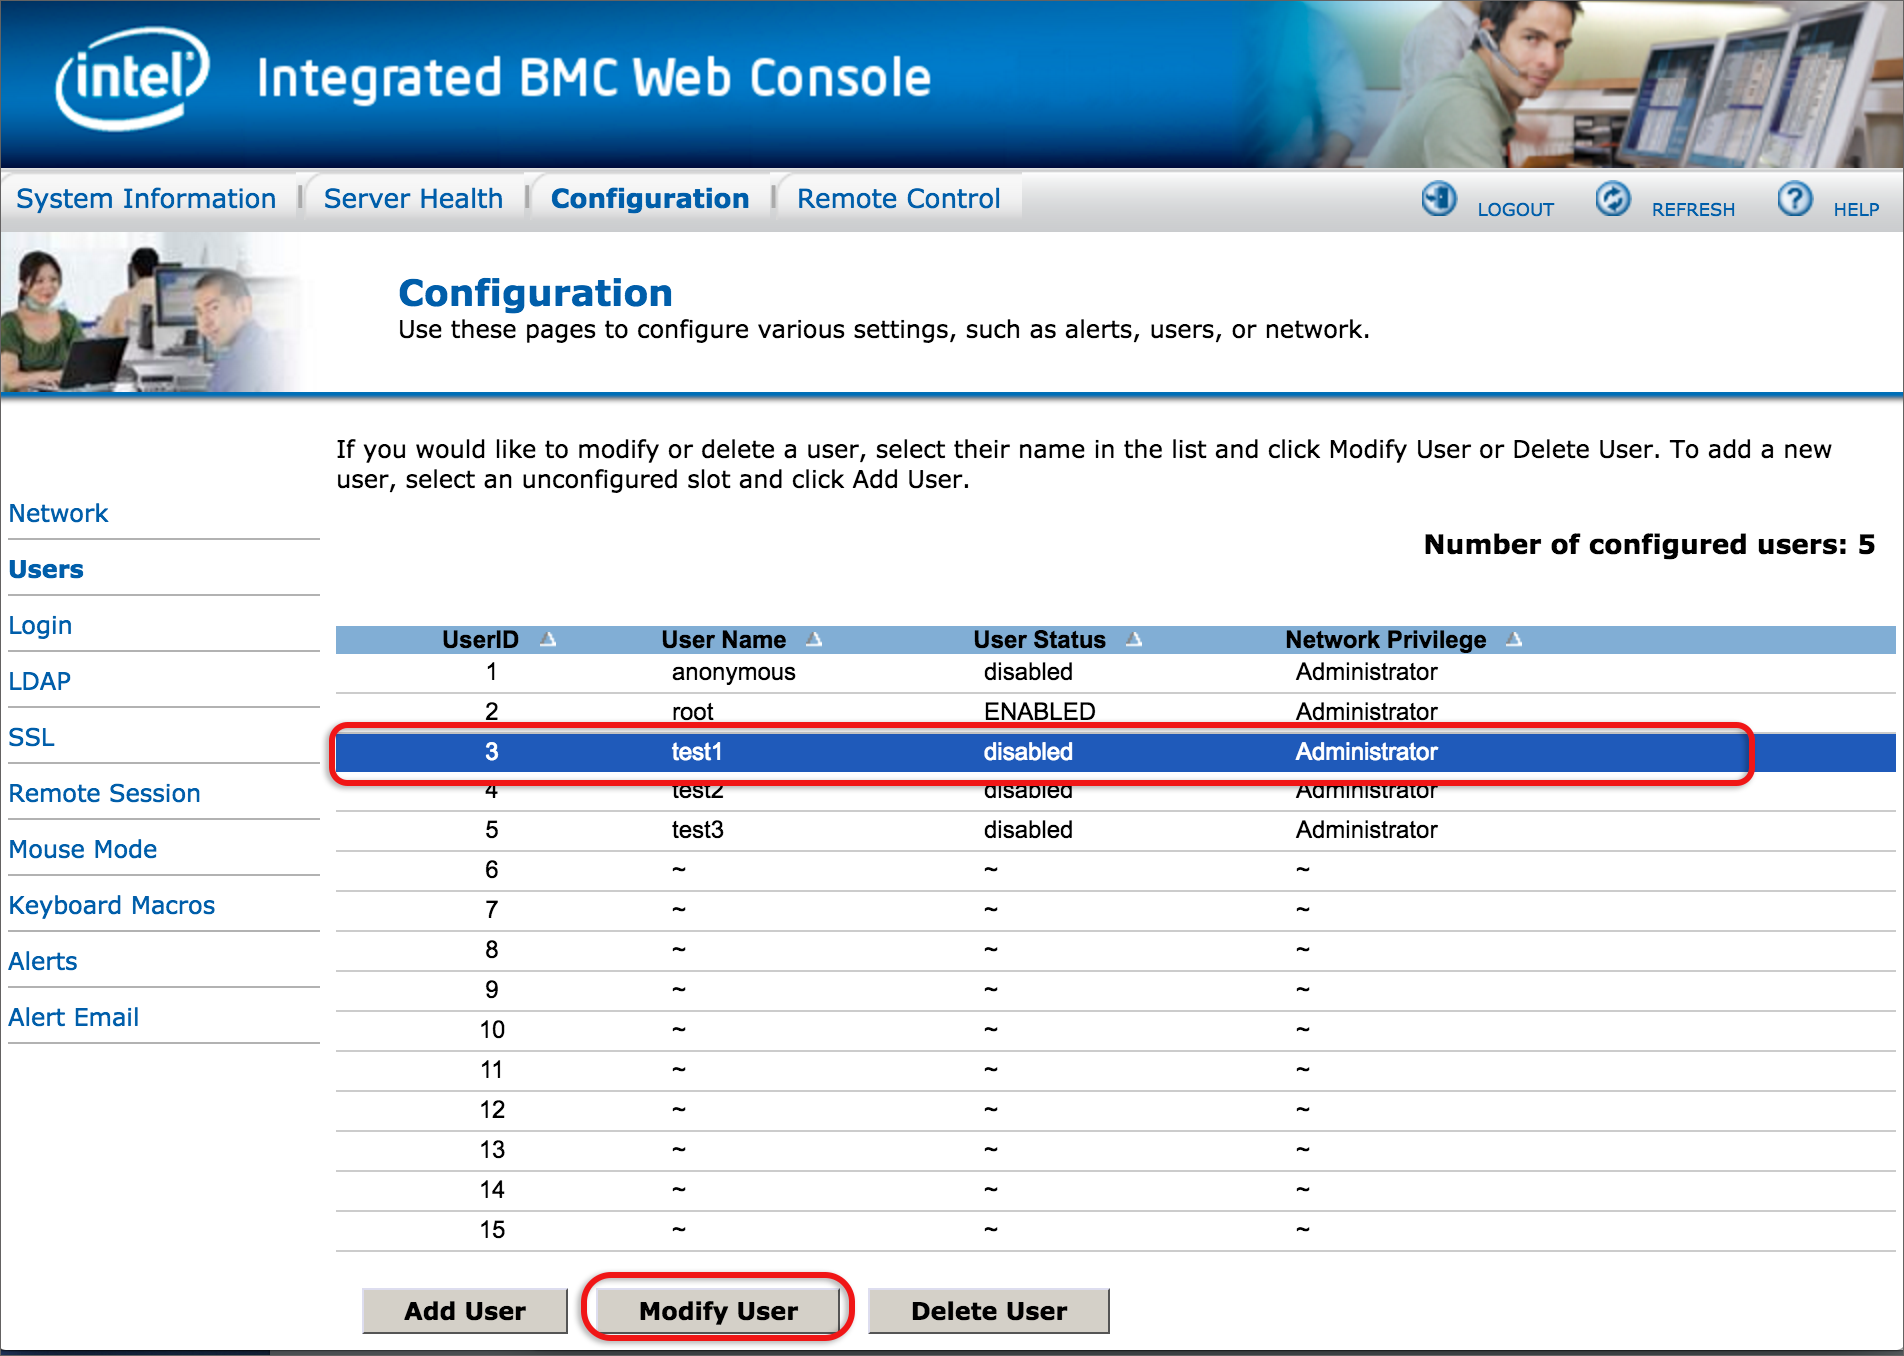
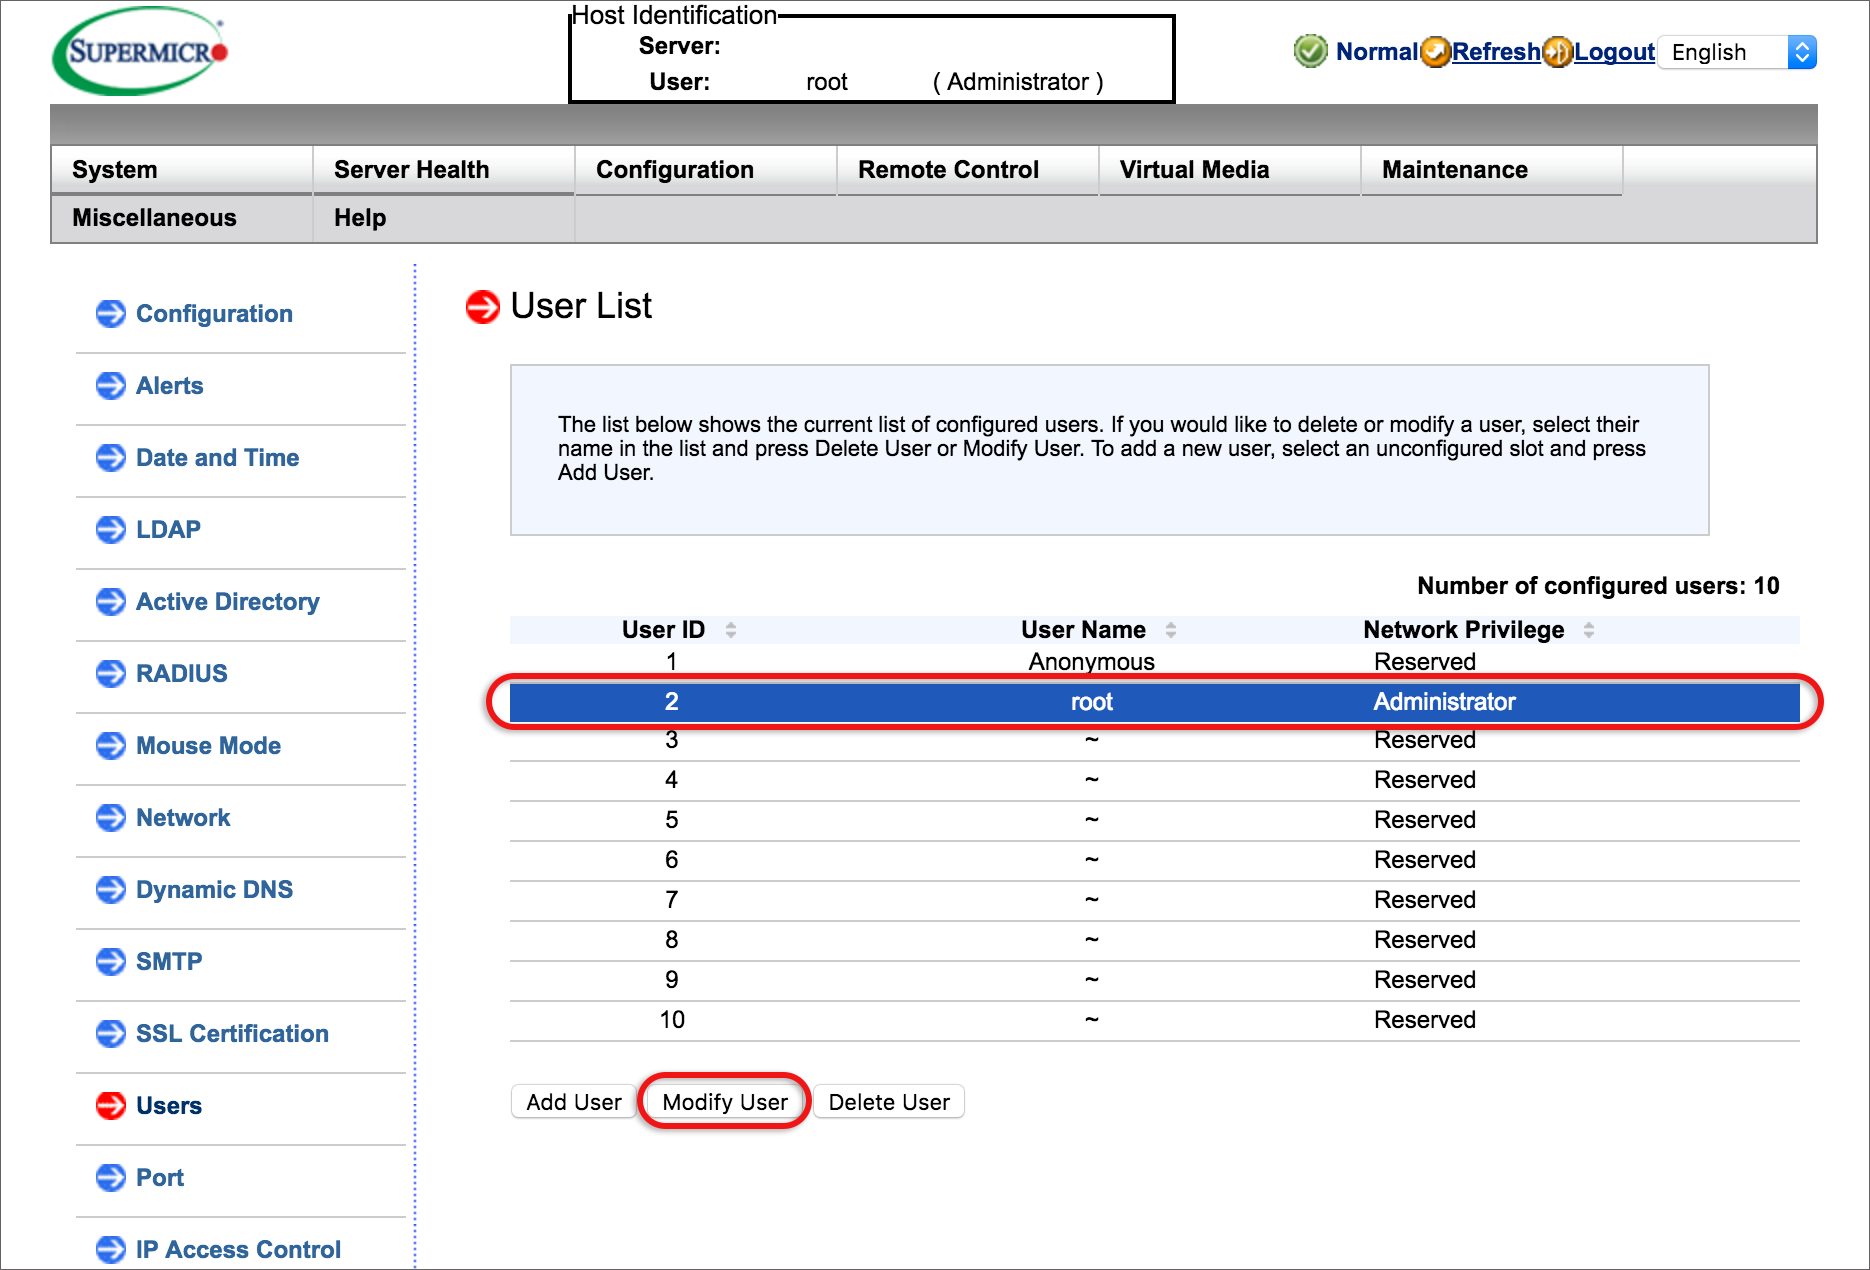
- Delete all users that are not required by selecting the UserID and then clicking the Delete User button. Only the root user can’t be deleted and may be the only one required.
- Update the user(s) passwords: select the relevant user, then click Modify User.
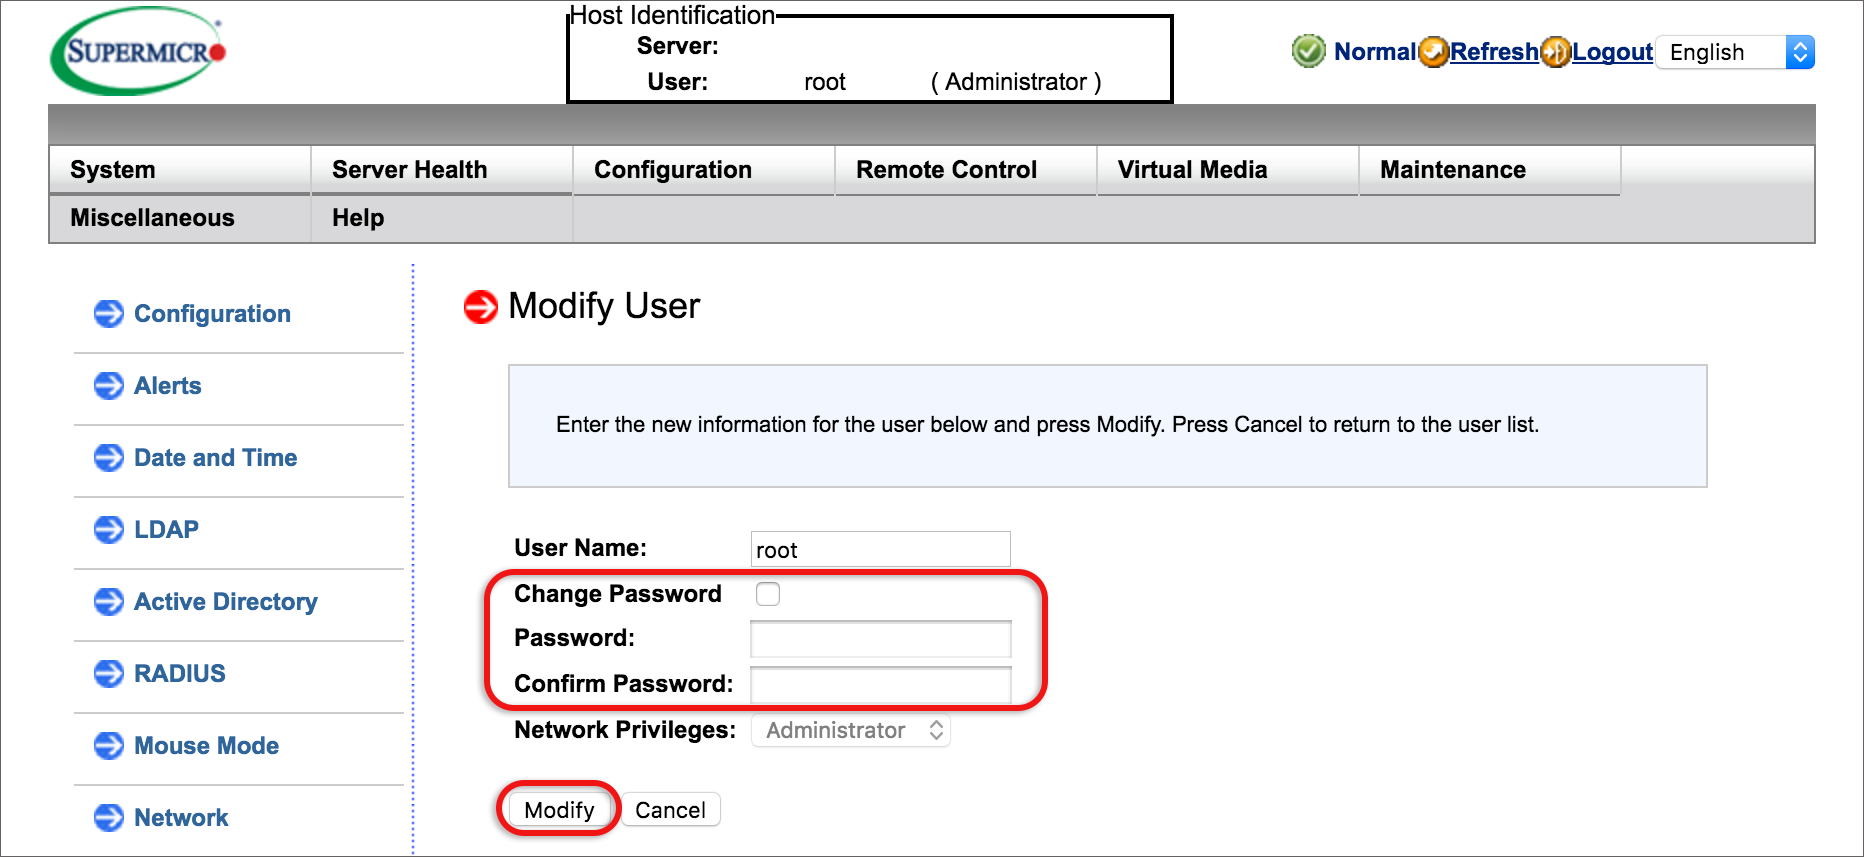
- Ensure that Change Password is ticked and then specify a new password of up to 16 characters.
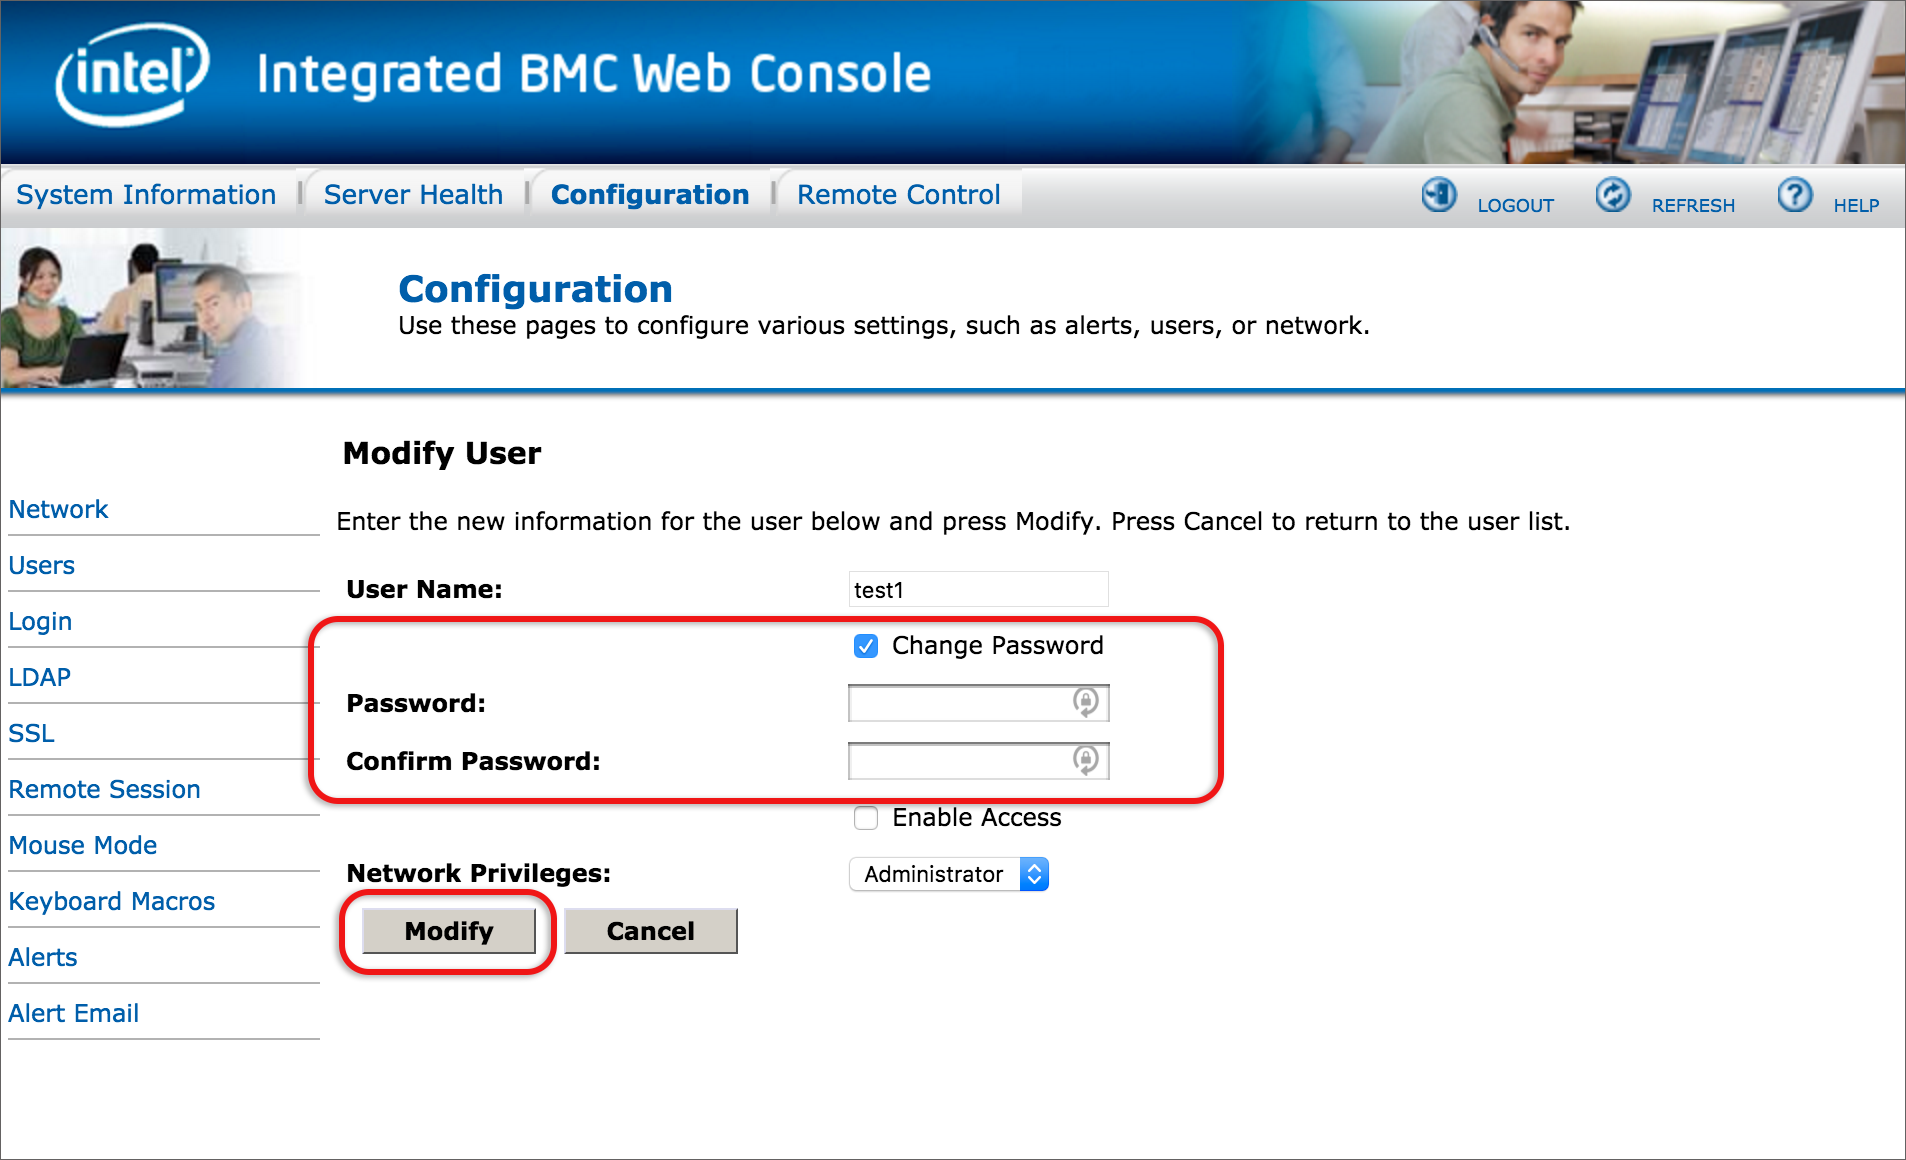
- Click Modify
You have now successfully updated your password for your user.
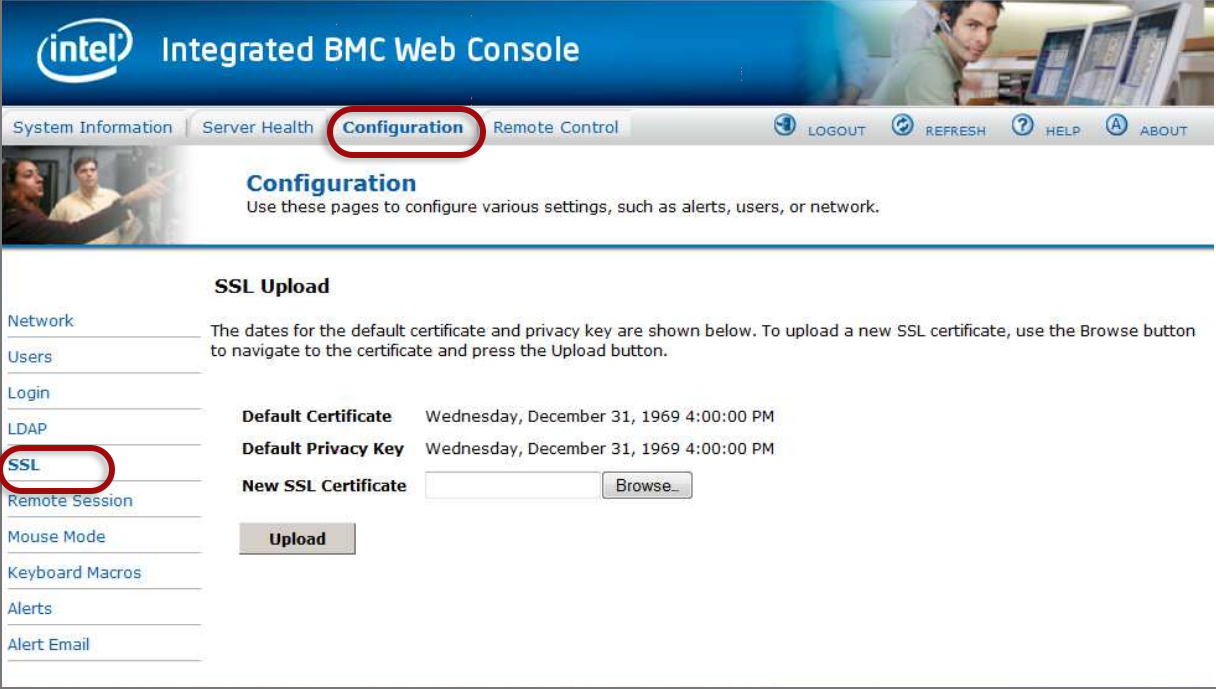
2. Install an SSL certificate
Upload an SSL certificate and privacy key, which allows the device to be accessed in a secure mode.
On the Configuration tab, select SSL.
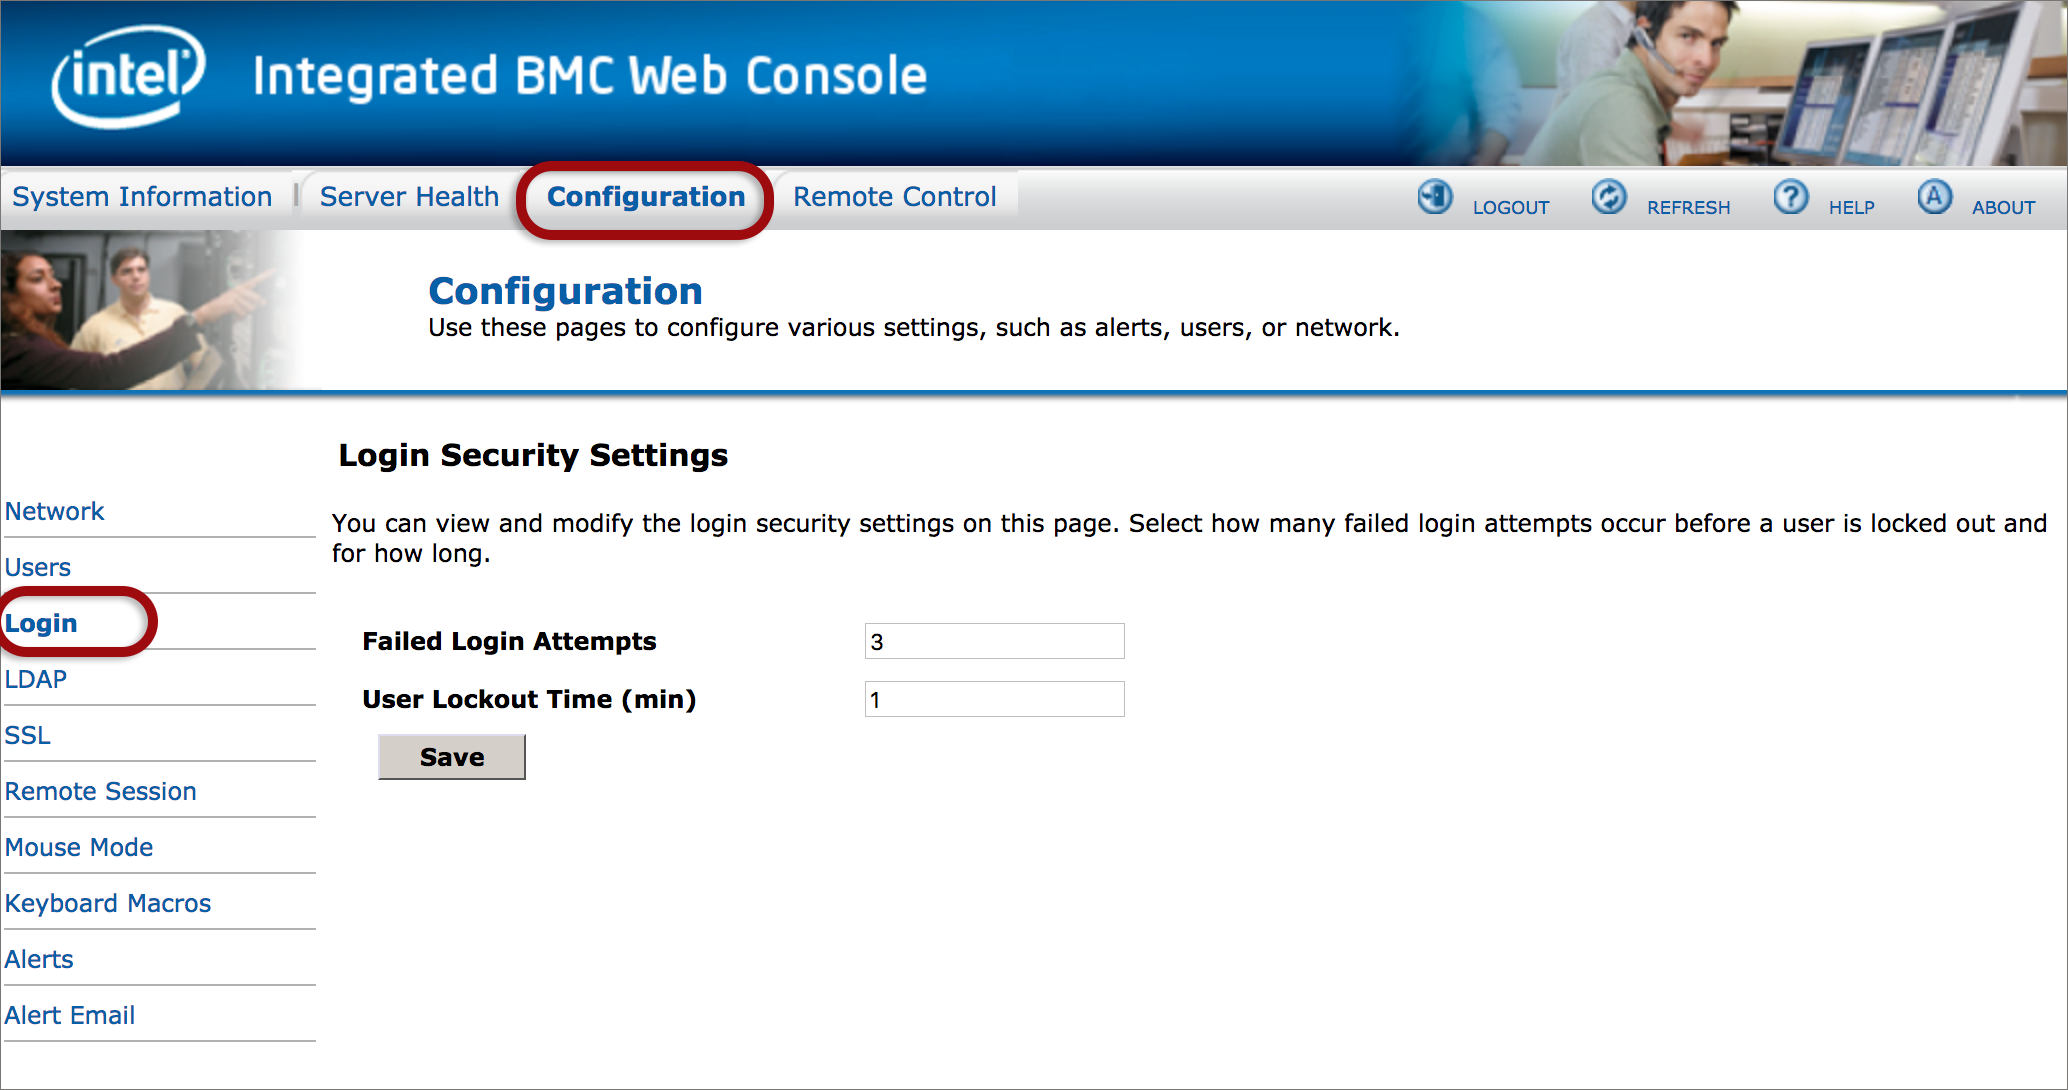
3. Set timeout after failed login attempts
If you’re using a public IP address, you have the option of choosing your own timeout interval and number of failed log in attempts. We suggest a fairly long timeout e.g. 15 minutes to deter brute force login attempts.
On the Configuration tab, select Login from the left menu.
For customers using a private IP address via the RMI Tunnel, this is not applicable. The network is only accessible as long as the bundle session is active.
4. Delete all services that are not used or required
If you don’t use certain services provided as options, e.g. mail, rather delete these services to avoid the risk of them being used for abuse.
-
Supermicro
1. Delete unnecessary users and reset password(s)
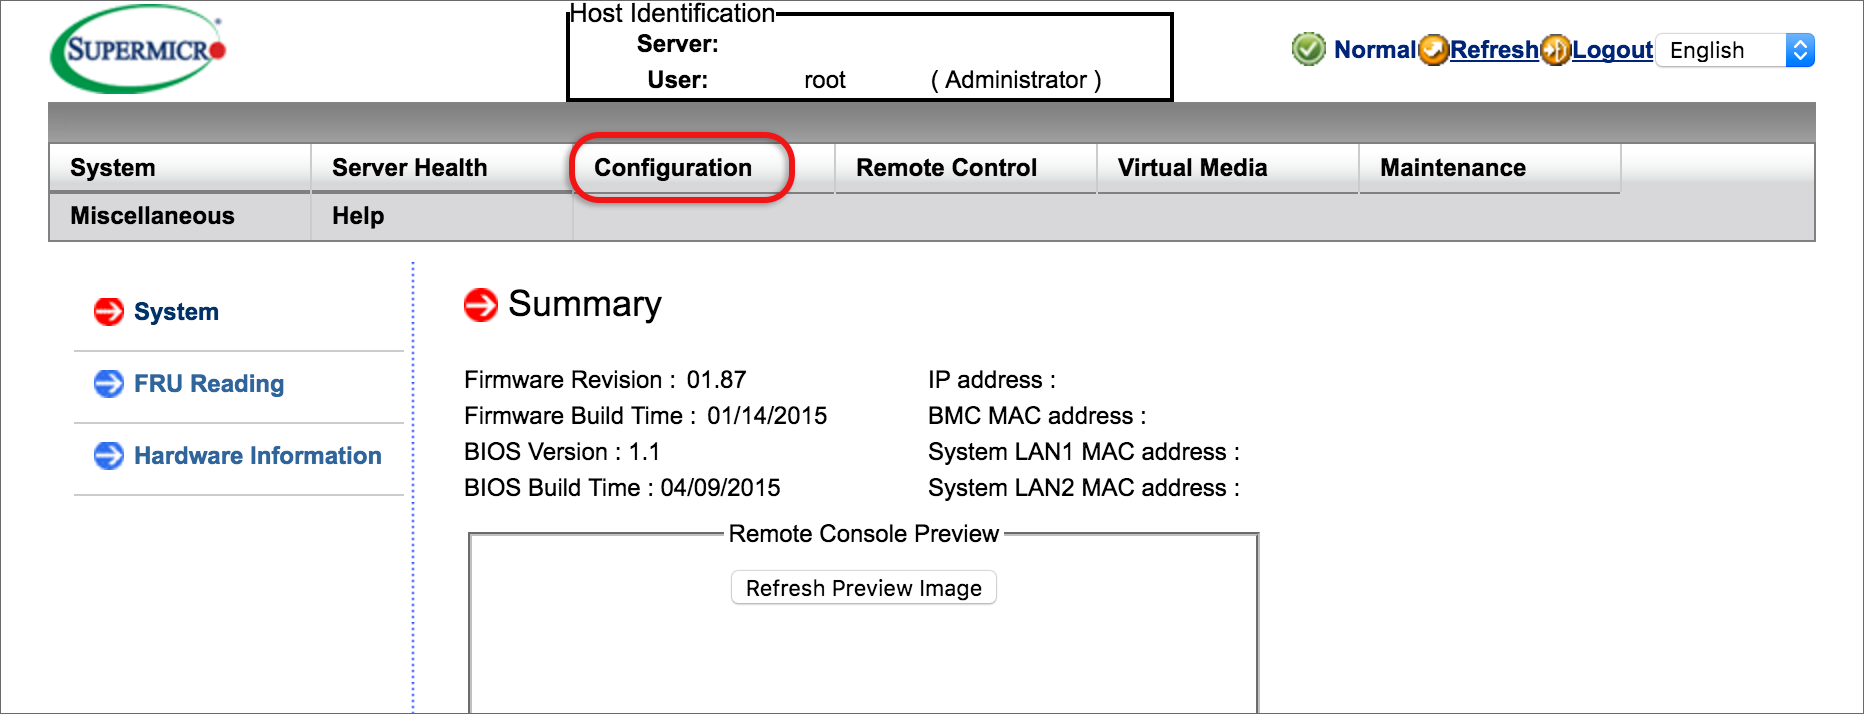
- Log in to the Remote Control
- If a Runtime error notification pops up, press Cancel
- Select the Configuration tab from the top menu
- Select Users from the left side menu
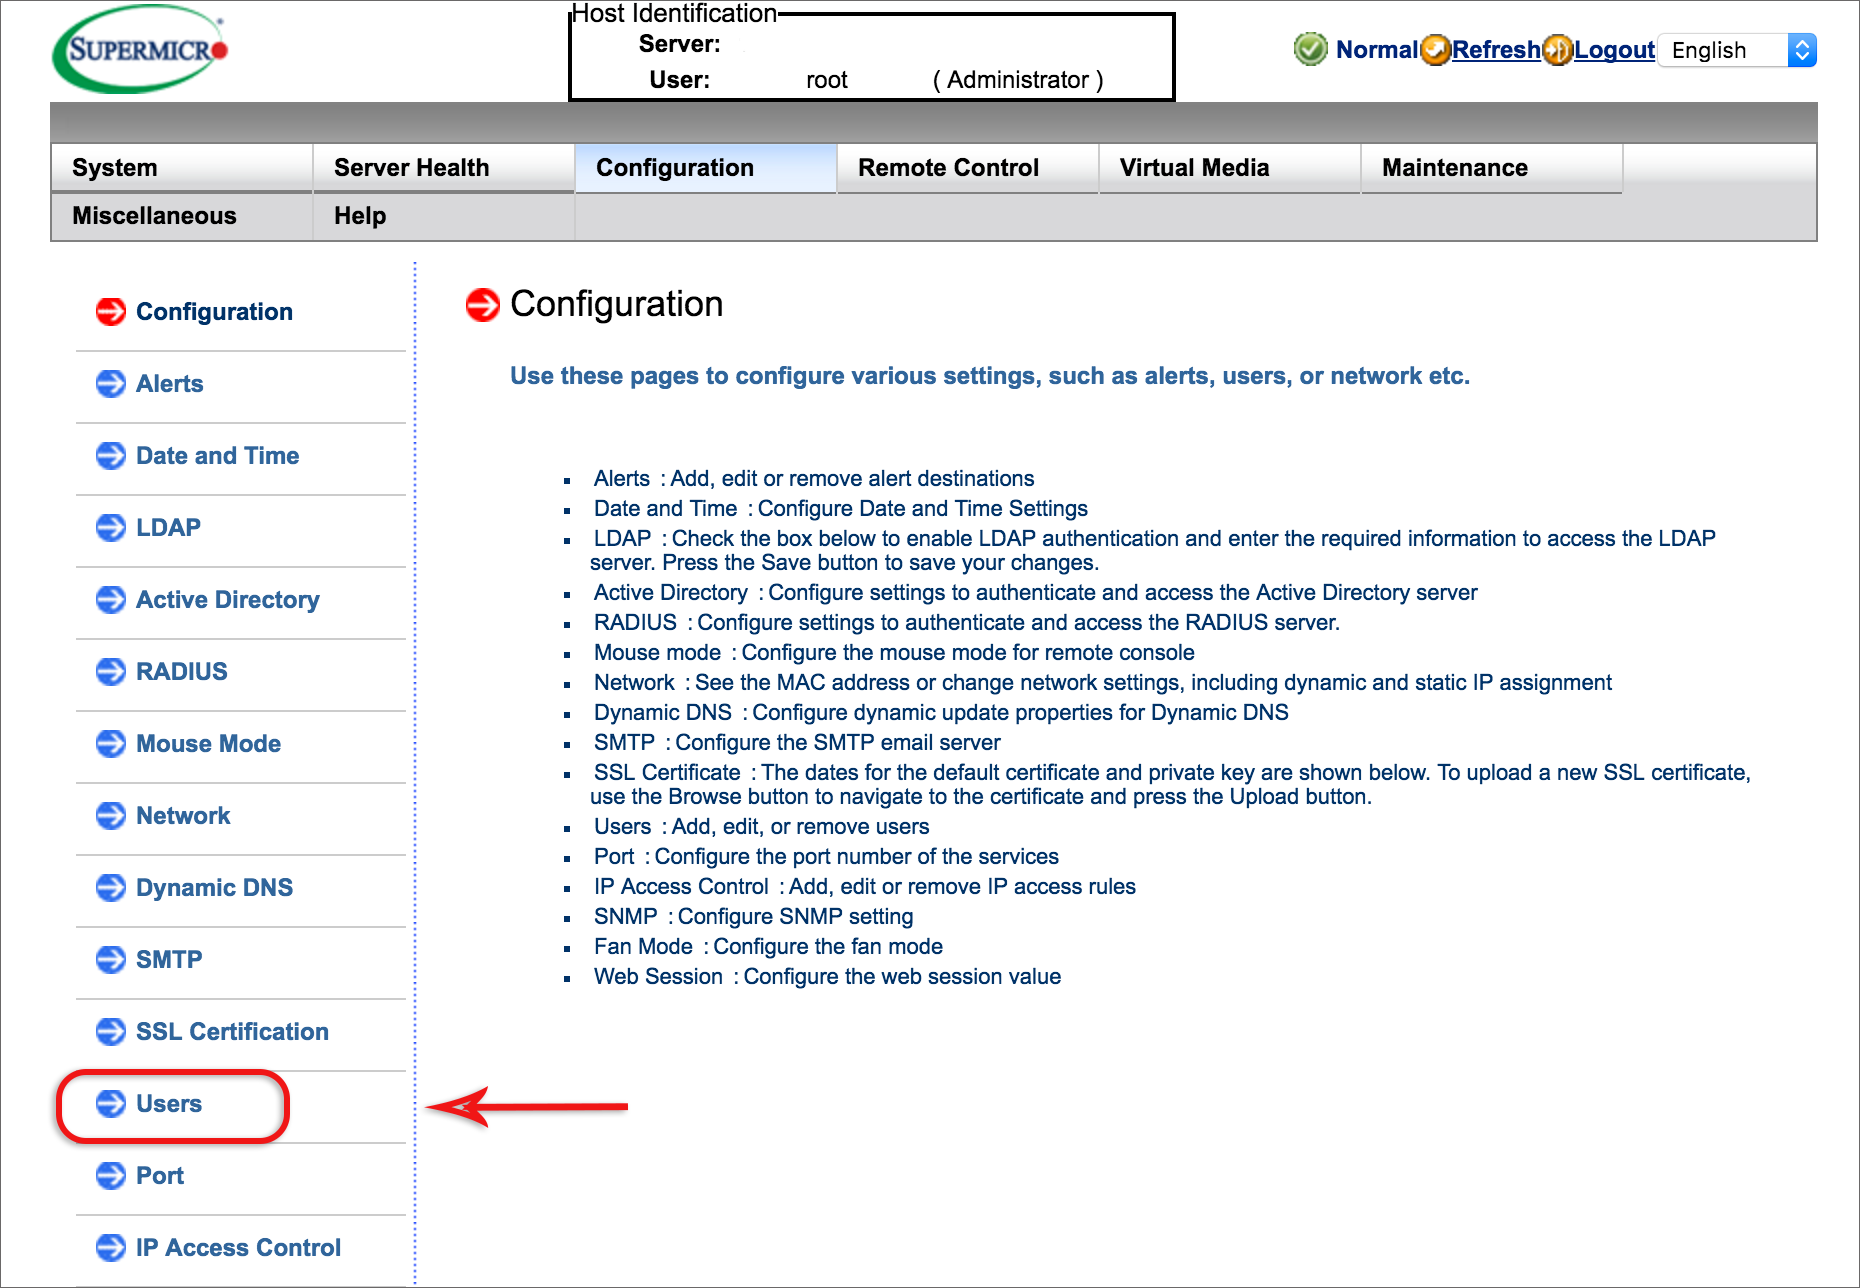
- Delete all users that are not required by selecting the UserID and then clicking the Delete User button. Only the root user can’t be deleted and may be the only one required.
- Update the user(s) passwords: select the relevant user, then click Modify User.
- Ensure that Change Password is ticked and then specify a new password of up to 19 characters.
- Select the Modify button at the bottom of the page.
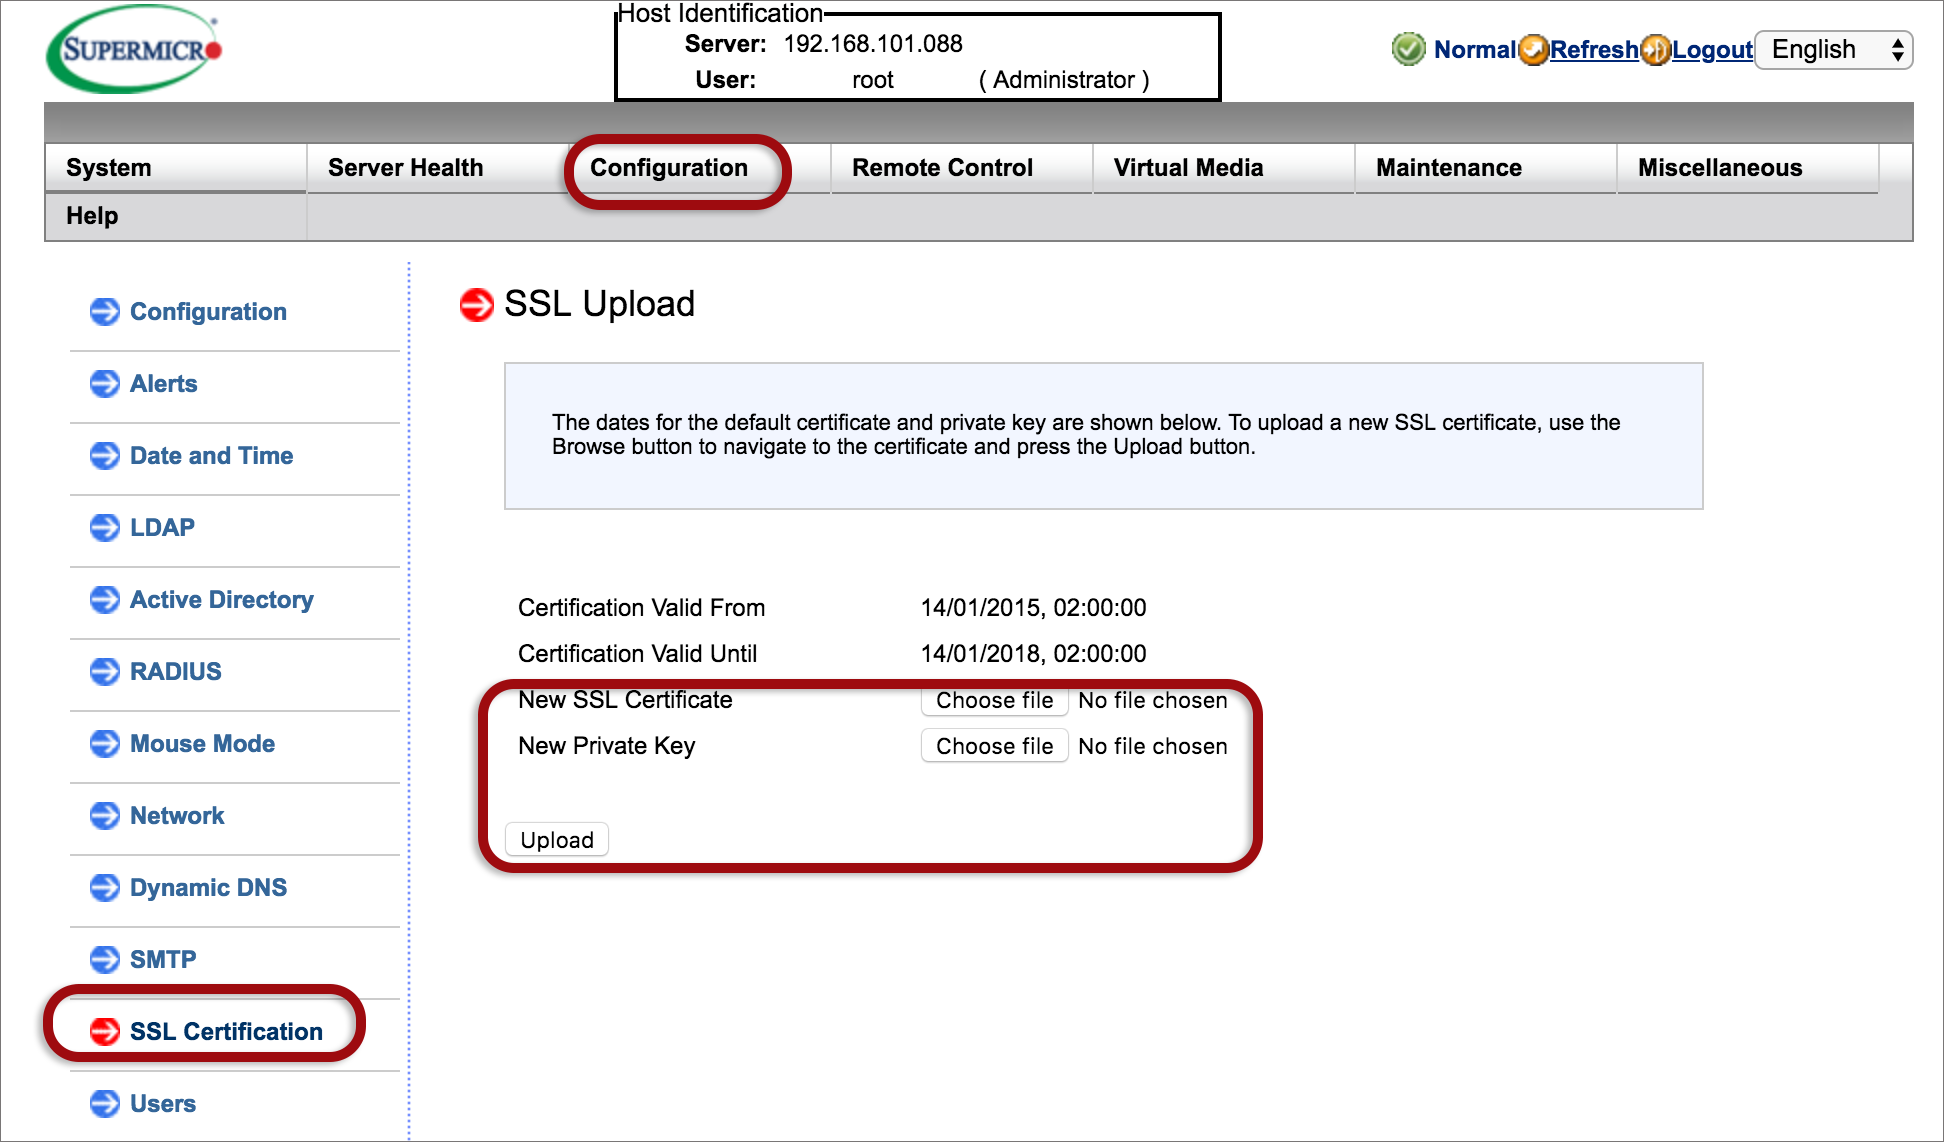
2. Install an SSL certificate
Upload an SSL certificate and privacy key, which allows the device to be accessed in a secure mode. On the Configuration tab, select SSL certification then browse and upload the SSL certificate and privacy key.
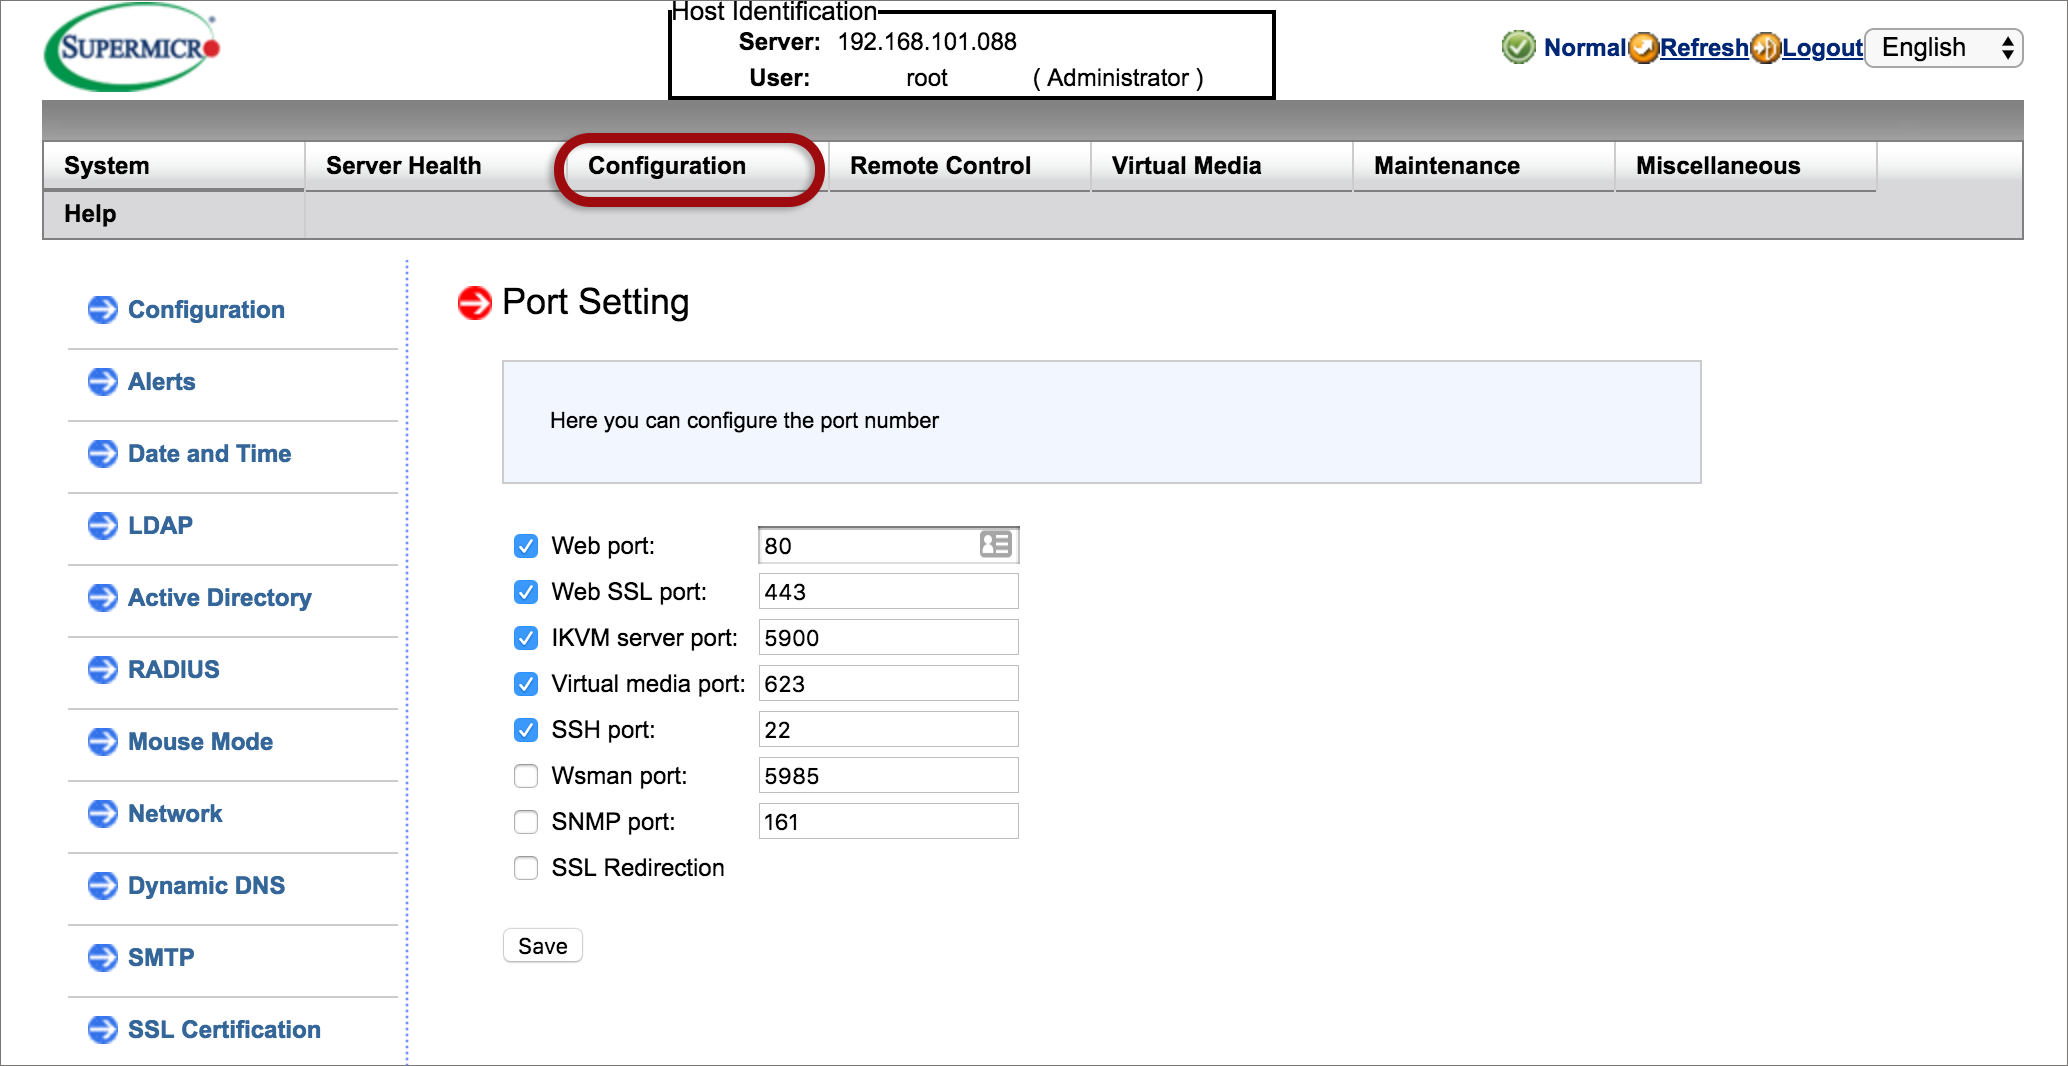
3. Block ports
On the Configuration tab, select Port from the left menu. The current or default ports will be displayed. You can change the default ports to those that are not commonly used to reduce the risk of malicious entry via these ports. Click Save.
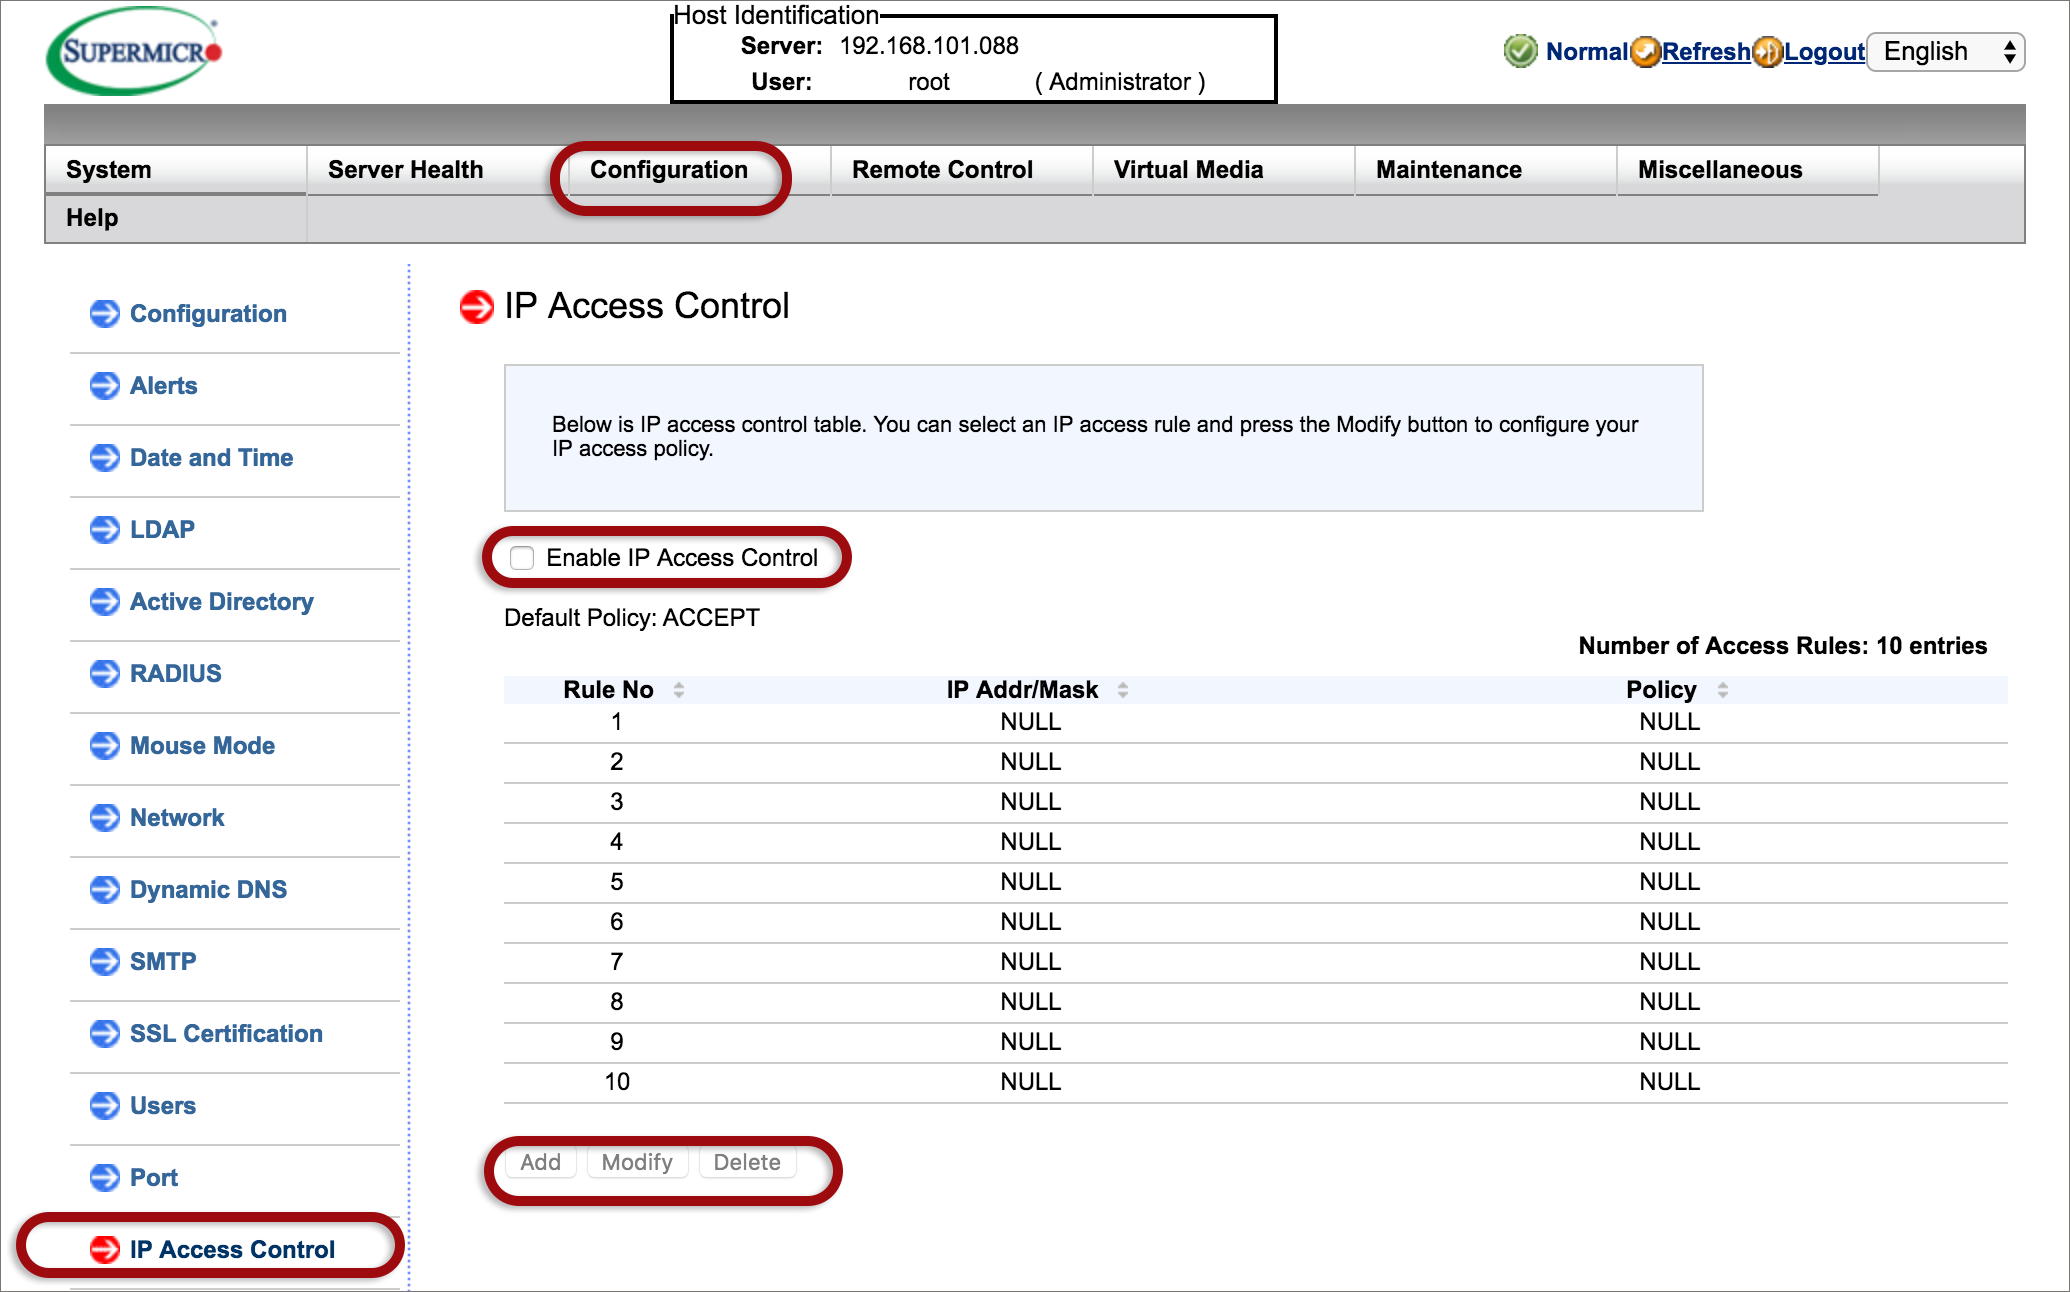
4. IP access control
For customers using a private IP address via the RMI Tunnel, this is not applicable. The network is only accessible as long as the bundle session is active.
This firewall feature allows you to limit access except from your IP(s) e.g. your office. Enabling the IP Access Control allows you to create IP Access rules.
- On the Configuration tab, select IP Access
- Tick to activate Enable IP Access Control
- Click Add to add your rule, providing your IP address.
- Enter the information needed
- IP Address/Mask: This item allows you to grant access to a specific IP address or a range of IP addresses. For example, if you wanted to specify a range of IP addresses from 192.168.0.1 to 192.168.0.126, you would enter 192.168.0.1/25.
- Policy: Select to allow access for the IP address(es) entered above. Select Drop to deny access.
- Click Save
5. Delete all services that are not used or required
If you don’t use certain services provided as options, e.g. mail, rather delete these services to avoid the risk of them being used for abuse.

