Android email troubleshooting
This guide will help you fix errors in the setup of an email account on an Android device.
Is this a first time set up? Then use our new email setup guide, rather than this troubleshooting guide.
Replace example.com with your domain name.
Launch your mail application
1. Start by selecting the mail icon from your applications screen.
![]()
![]()
![]()
![]()
Open Menu
2. You need to access your Incoming & Outgoing Server settings.
Depending on your device either:
a. Select the Menu button and then select More > Account Settings
Choose the relevant account – proceed to step 5
OR
b. From your Inbox, select Manage Accounts
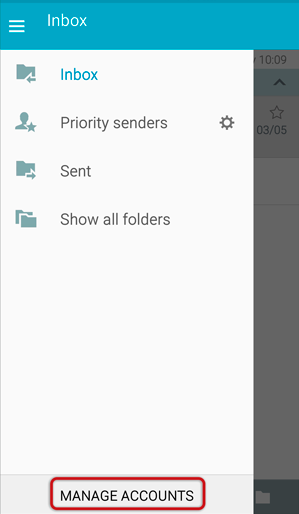
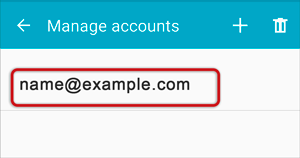
3. Select the relevant account
4. Click More Settings
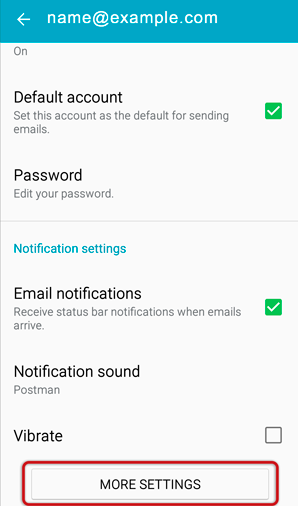
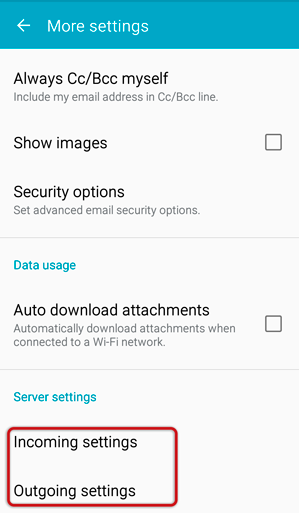
Select Incoming Settings
5. Scroll down to the bottom of the page, and select Incoming Settings
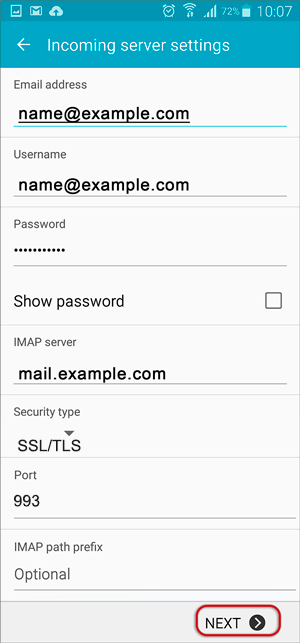
Confirm Incoming server settings
6. Ensure that your incoming server details are specified correctly
- User Name is the full email address
- The Password is correct (forgotten passwords can be reset via your control panel)
- The POP or IMAP server starts with mail. followed by your domain name e.g. mail.example.com
- Security type is SSL/TLS
- Port is 465
then select Next
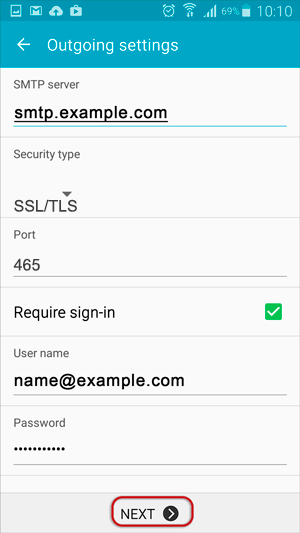
Confirm Outgoing server settings
7. Ensure that your outgoing server settings are correct
- SMTP server starts with smtp. followed by the domain name e.g. smtp.example.com*
- Security type is SSL/TLS
- Port is 465
- User Name is the full email address
- The Password is correct (forgotten passwords can be reset via your control panel)
and then select Done to save the account settings:
Setup Completed
Your account should now be setup successfully.
* Note: In isolated cases mail.domain (e.g. mail.example.com) and smtp.domain won’t work. In these cases you will need to use the server name instead e.g. www34.cpt1.host-h.net. Find my server name.
Still struggling? Refer to our guide of common email problems or contact us.


