


How to create a SiteBuilder website
SiteBuilder is a third party website publishing tool that allows you to create and maintain a professional website using a What You See Is What You Get (WYSIWYG) application. You don’t need any previous knowledge or experience with HTML coding or programming. Once you have chosen to publish your website, it is immediately available online and can be edited afterward.
We offer two versions
- SiteBuilder Lite (limited features available)
- SiteBuilder Standard
To create a SiteBuilder website you first have to set up an account and order a Web hosting package.
Please note that if you have just ordered your domain or upgraded to a hosting package, you may see an error: ‘Could not log in to your hosting account’ when using SiteBuilder for the first time. This is due to DNS propagation and will resolve within a maximum of 2 hours.
Create a SiteBuilder website
To get started, install your preferred version of SiteBuilder via your control panel.
Next, Launch SiteBuilder to begin creating/ editing your site.
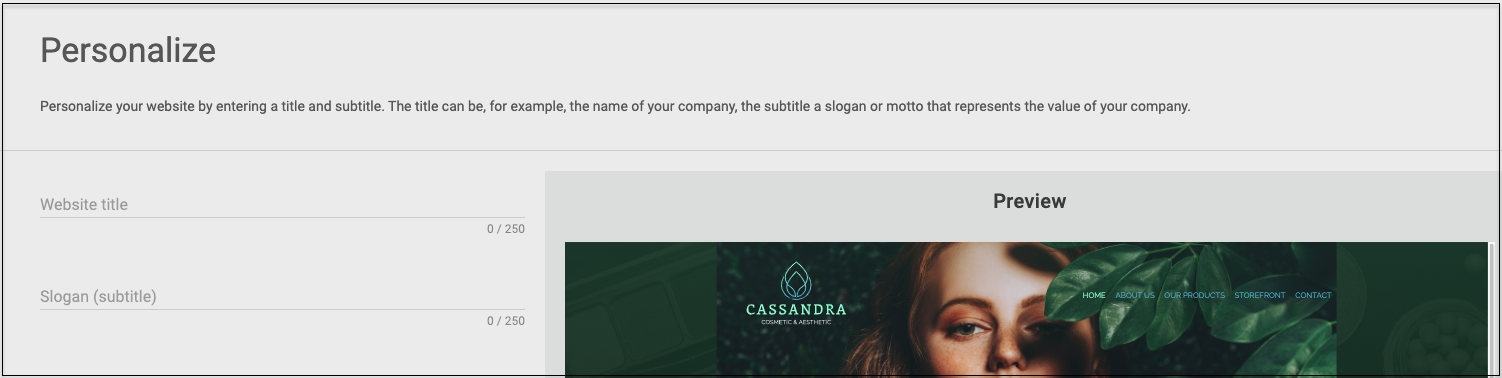
The SiteBuilder Wizard will prompt you Choose a Design, Add Content and Personalise your website. This information can be changed at any time while you are building your site.
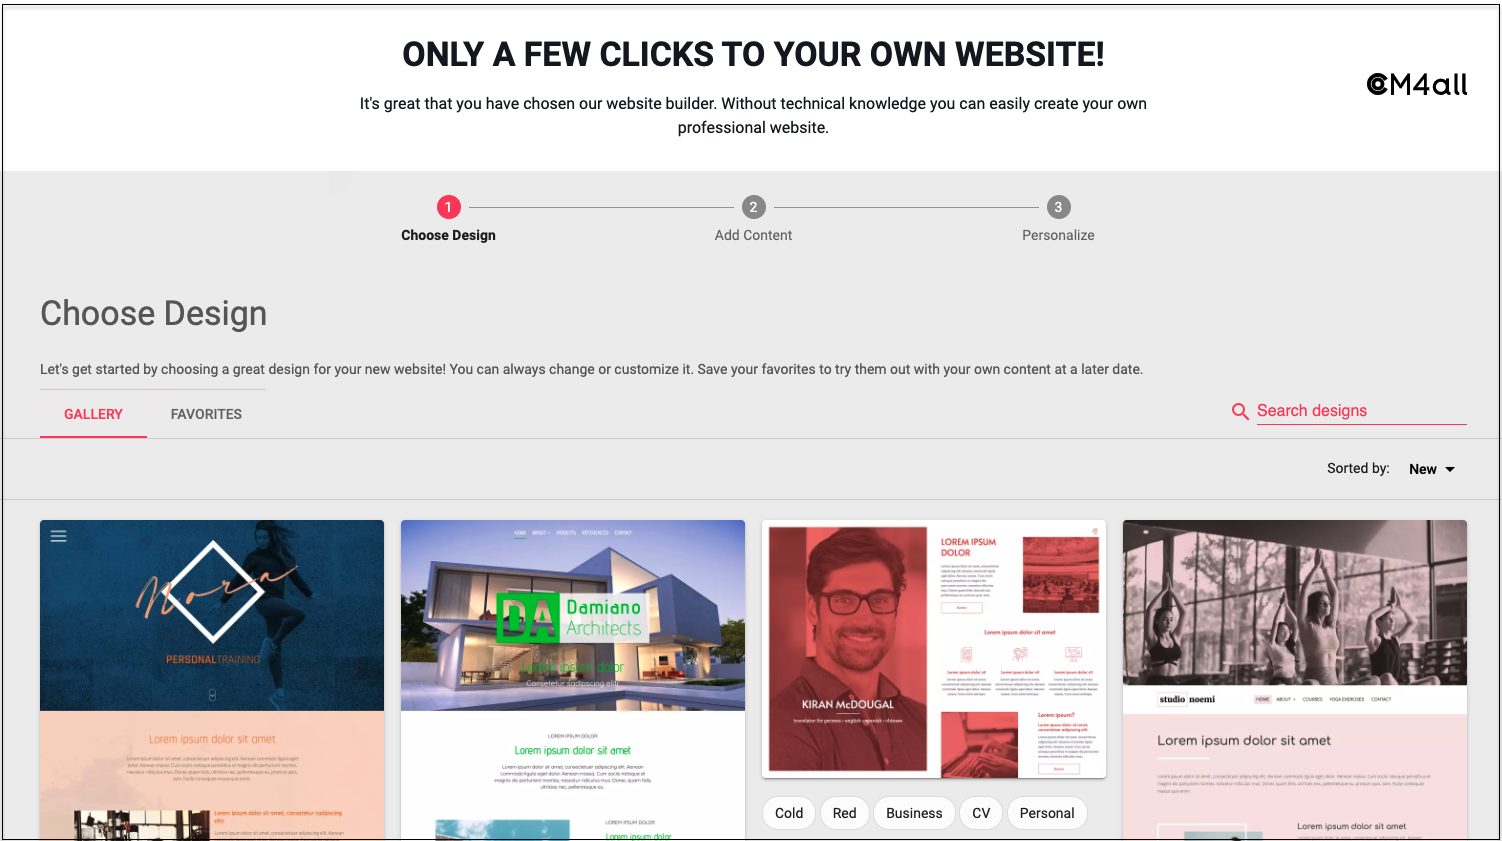
Complete this step in order to view the first draft of your website.
When you access the website editor, you will be prompted to take the SiteBuilder Quick Tour. As a first-time user, you will find this very beneficial. The tour will help you get started and explain how to find all the tools you will need to build your customised website.
SiteBuilder overview:
The application user interface includes the Website Area, the Top Menu options and the Left-hand side menu options.
Website Area
On the Website Content page, you’re able to view your website the way it will look once published. Just click in the text and start typing to edit your website.
Top Menu Options

The top of the Website Content screen allows you to:
- Save changes
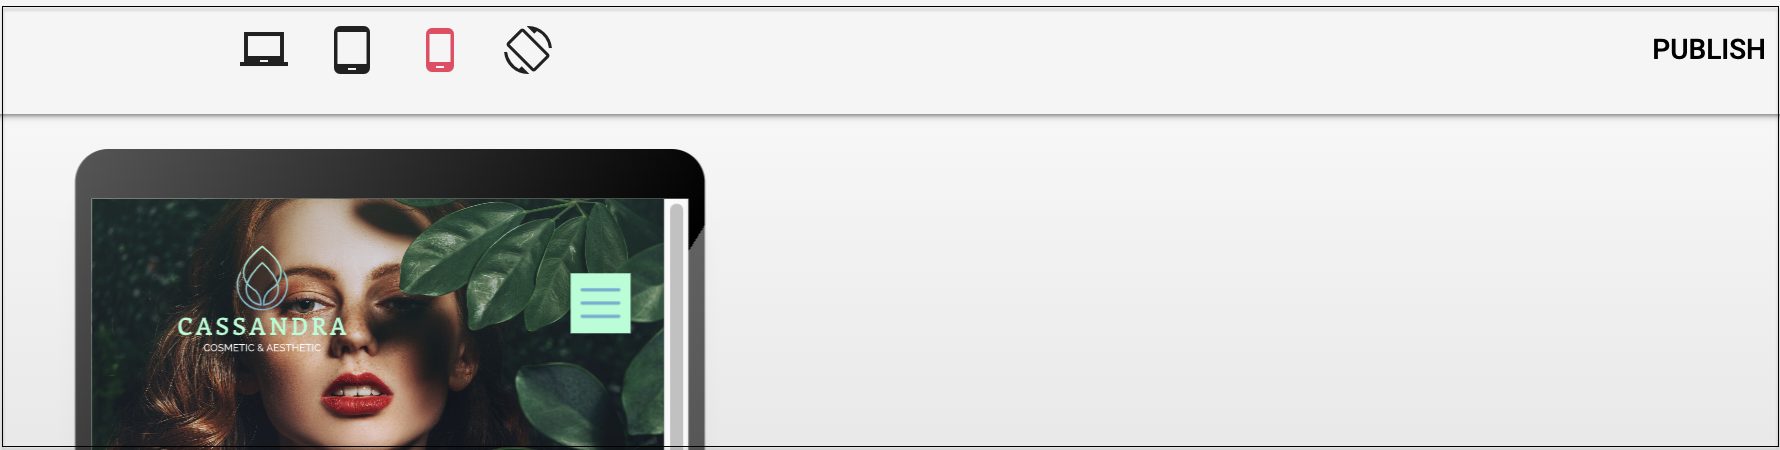
- Preview a desktop, mobile and smart device-friendly version of your website
- Publish your website
Left-hand side Menu
Select the panel on the left-hand side of the screen to make available a menu with the following options:
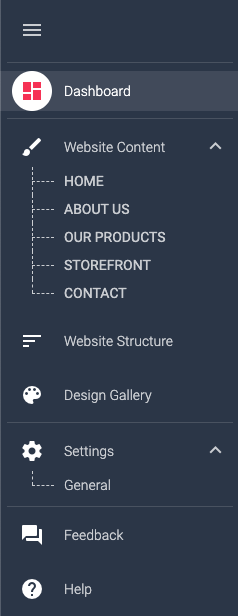
- The dashboard will give you insight into your website. You can view visitor statistics and read messages from your visitors.
- The Editor allows you to add text, images and functionalities to your website.
- Website Structure allows you to add, delete or move pages.
- The Design Gallery provides a selection of beautiful designs.
- Settings allow you to manage your website versions, SEO settings, visitors’ access and much more.
- Feedback on your experience with the SiteBuilder product can be submitted under this tab
- The Help Center provides generic help and allows you to restart the tour.
Mobile Version
The mobile version allows you to edit your website on mobile devices and obtain additional information e.g. on visitor statistics. This version includes a user feedback function and we encourage you to submit detailed feedback. This will improve future releases of the software.
Drag & drop
The website editor uses the principle of drag & drop. This means that you can add widgets and other content to your page by holding down the left mouse button while pulling an element onto your page from the menu at the top. Moving elements around works in the same intuitive way. Grab an item, move it to its new position, and let go of the left mouse button.
Drop elements in areas displayed with a green or a yellow ‘+‘. A green ‘+’ indicates that the element will appear on one specific page, a yellow ‘+’ indicates that the element will appear on all the pages within your website. Where an element can’t be dropped, a red ‘+’ will appear.
Tooltips
Certain areas on the screen offer tooltips when you pause over them with your mouse. These areas include:
► The main content area, where typically the majority of your website’s content can be found
► The title and subtitle area, where you can edit your page titles
► The footer area, where you can place links to important pages on your site, the date of the last changes, etc.
► The main graphic area, where you can place images
► The logo area, where you can optionally place your company logo/image
It is important to know that the content of some areas appears on all pages of your website (e.g., title, subtitle, footer, main graphic, logo) and some areas can have different content for every page. The sidebar next to the main content area offers the option to place content for a single page or all pages.
How to edit text
You can click in your main content area or in any of the other content areas and start typing, you can also copy and paste your text. To change the format of a text, insert a table or a list, all you have to do is to click the corresponding icon on the editor toolbar.
The editor toolbar
If you switch to Expert mode, you will have access to more text-formatting options. We recommend using these features only when necessary as overuse can easily make your website look messy.
Adding Tables
While moving your mouse over content areas a menu will appear where you can insert a table. You can define the number of columns for this specific content area and define the spacing between them. Columns can contain text paragraphs and widgets.
How to edit the header and logo area
To add/change the logo or header area of your website, move your mouse over the corresponding image area. Select the Configure icon to open the configuration dialog.
You can select one or more images to be displayed within the header area. You can define the image transition, display time and controls to be shown and re-order your images. Every image can be linked to an internal page or an external website. Depending on the design template images can be adjusted and repositioned within the header area.
You can either use the same header area settings for all of the pages of your website (default) or you can set individual preferences on each page. Simply go to the page on which you’d like to make individual changes and select the Configuration icon. Select Individual settings for this page and configure the header area for this page. If you would like the subpage(s) to have the same settings as the parent page, select Inherit from parent page within the configuration dialog. You can set these pages back to default at any time.
The Button Bar
The button bar at the top right of the application interface provides you with options for working with your website, such as previewing your website, saving the changes you’ve made, publishing your website to the Internet or resetting your work.
Preview
Selecting Preview enables you to view the current saved state of your website, this is how your website will appear to visitors once published. The website preview will open in a new browser window. When using a responsive layout you can see what your website will look like on different devices.
Save
Selecting Save will save the current state of your website. You are required to save your website before you are able to publish it.
Publish
Selecting Publish enables you to make the current saved state of your website available to everyone on the Internet.
Reset
Selecting Reset will remove all unsaved changes you have made to your website. This option can be useful when experimenting or when you would like to go back to your last saved version.
Important to Note:
- It is not possible to do a backup restore for an individual website. The SiteBuilder has ‘undo’ functions that enable you to revoke changes in each step of the process. In addition, the changes need to be confirmed before saving
- Firefox, Internet Explorer, Chrome and Safari browsers are recommended for SiteBuilder

