How to manage a domain’s DNS records via konsoleH
If you are using our new Control Panel, refer to this article.
Make the switch and discover a simpler, more secure way to manage your hosting.
The Manage DNS tool in konsoleH allows you to update your domain’s DNS records when logged into konsoleH with Admin level access.
NOTE: A new and improved Manage DNS tool has been developed and is available in the xneelo Control Panel. This user-friendly tool offers a superior experience when updating your domain’s DNS records.
Access the Manage DNS tool
- Browse to konsoleH and log in at Admin level

- Select or search for a domain name in the Hosting Services tab
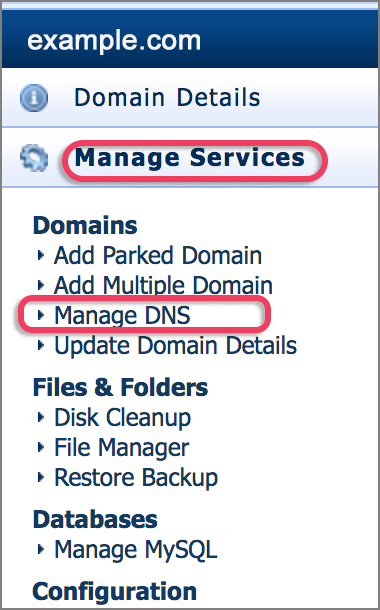
- Select Manage Services from the left-hand menu, then Domains > Manage DNS

- The DNS tool will open, displaying all the current DNS records for the domain
- The following tasks can be completed within the Manage DNS tool
- Edit an existing record
- Add a new record
- Remove a record
- Reset the DNS zone file back to the default records
- Edit your DNS records via the Advanced View
How to edit a record
Edit an existing record by changing the relevant information and clicking on the update button next to the record you are editing

How to add a record
Add a new record by selecting Add Record, enter the relevant information and then click Add


Note:
- CNAME records require a full stop at the end of the Destination.
- Ensure the Destination for TXT records is in quotation marks, e.g. “google-site-verification=rXOxyZounnZasA8Z7oaD3c14JdjS9aKSWvsR1EbUSIQ”
How to delete a record
Remove an existing record by selecting remove next to the relevant record

Reset the DNS zone file back to the default records
The Reset option allows you to reset the DNS records of your domain to the default xneelo records

Edit your DNS records via the Advanced View
The Advanced View allows records not catered for within the Normal View, such as SRV records, to be added.
The Manage DNS tool in the xneelo Control Panel allows for special characters (underscores) and SRV records to be added easily, without editing the Advanced View. This will reduce errors.
Note:
- Once you have added or changed the required DNS records, allow 2 to 24 hours for DNS propagation to complete
- Incorrect DNS changes can interfere with the operation of your website and/or email, so make changes with care.
- Self-Managed customers who wish to add reverse (PTR) DNS records for their allocated IP addresses are not able to do so via the Manage DNS tool and will need to contact us from their authorised email address.

The new xneelo Control Panel is here
Experience a simpler, more secure way to manage your hosting. Most features are now live and ready for you. Switch now


